What Is Excel AutoFit Row Height?
Autofit Row height in Excel is a method used to autofit the size of the cell in Excel. After working with the worksheet, we may need to adjust the width and height of the rows and columns according to the data structure. We can change the default height and width of the size of the rows as per our requirement.
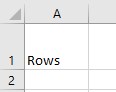
Consider the below example showing the text string, ‘Rows’ in cell A1. Now, the size of the cell is bigger and not correctly fitting the text string.
To autofit the row height, simply click on the line between row 1 and row 2. We can see the row height is automatically adjusted to based on the text string.
Likewise, there are other ways to autofit row height in Excel. In this article, we will show you how to use Excel AutoFit row height.
Key Takeaways
- Autofit row height in Excel is a method used to change the size of the row’s height in Excel worksheets.
- This is very useful when we have lengthy text strings or when we have to adjust the size of the row.
- Also, the size of the row height in Excel depends on the font size we set when opening a new workbook.
- To autofit row height in Excel, we can simply double click on the rows and we can see the height of the row is automatically adjusted.
How To Change Default Row Height?
We can change the row height in Excel from 0 to 409 points. So, a common way of changing the row height is dragging the row border upwards to decrease the row height and dragging it downwards to increase the row height.
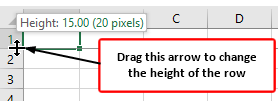
As we are dragging, we can see the changing points and pixels of row height on a real-time basis.

Once the row height is fixed, we can apply the same formatting to other rows using format painter excel.
AutoFit Row Height In Excel
Like how we have changed the row height per our preference, we can auto-adjust the row height with a click of a button.
Auto adjustment of the row height depends on the data size of each row cell. Now, let us learn how to autofit row height in Excel.
Examples
Example #1
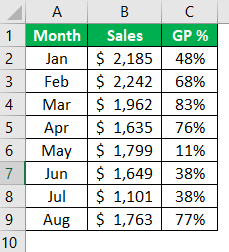
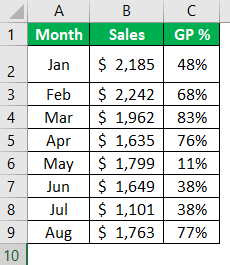
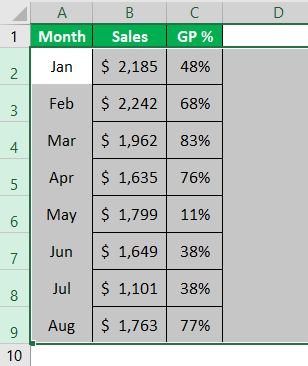
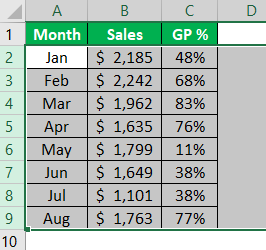
Consider the below table showing monthly sales and GP%.
Now, we will change the second-row height to 24 points.
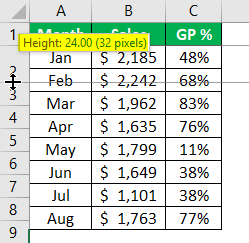
Now, our new height may look like this.
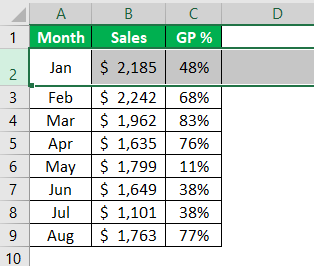
Now, we want the same row height for the remaining row. We will select the entire row by pressing the “Shift + Space” key.
Now, we will click on the “Format Painter” option under the “HOME” tab.
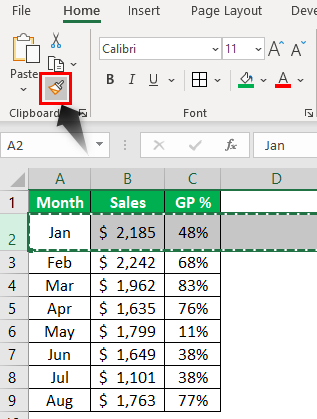
Next, we will apply the format painter brush to all the rows.

We will leave our left-click on the mouse and see the magic.
It has changed the row height of the remaining rows as per the row height of the selected row, i.e., row number 2.
Example #2
Now, let us use the same example. We will learn how to auto-adjust row number 2.

We will place our cursor at the bottom of the row.
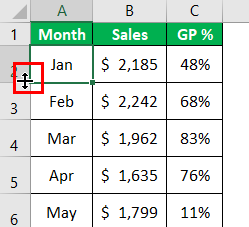
Double-click as soon as we see the above four side arrow keys. Our row gets auto-adjusted according to the contents of the row.
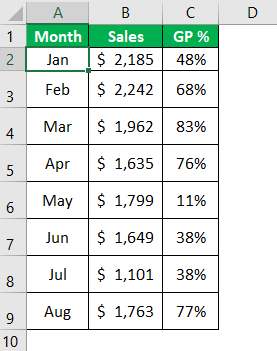
Similarly, to auto-adjust the row height for the remaining rows, we must select all the rows first.

We will double-click on the bottom of any selected rows.
Likewise, we can auto-adjust rows in Excel.

We can also auto-adjust the row height using the other two methods – “Manual Method” and “Shortcut Method.”
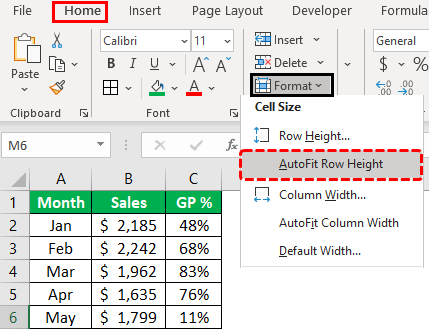
After selecting the rows under the “HOME” tab, go to the “Format” option and click on the “Format” option drop-down.
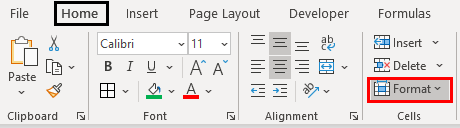
From the drop-down options, we choose the option called “AutoFit Row Height.”
Likewise, we can auto-adjust rows in Excel.
One more method is using excel shortcut key options ALT + O + R + A. After selecting the row’s height that needs to be auto-adjusted, we press the above shortcut key, and our row height will be auto-adjusted.

We do not need to hold keys but press one after the other to auto-adjust the row height.
Important Things To Note
- Autofit row height in Excel is used to change the height of the row.
- We can use the format painter option to adjust the other rows.
- Row height depends on the size of the content in the rows.
Frequently Asked Questions
1. What is autofit row in excel?
Autofit row height in Excel method helps users adjust the size of the row in the worksheet based on the length of the text string.
The default row height is based on the font size set when we open an Excel file. If no changes are made to the default settings, the default font name is “Calibri,” and the font size is “11”, so the row height is 15 points, equal to 20 pixels.
2. Explain autofit row in excel with an example.
Consider the below example showing the text string, ‘Rows’ in cell A1. Now, the size of the cell is bigger and not correctly fitting the text string.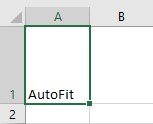
To autofit the row height, simply click on the line between row 1 and row 2.
Likewise, there are other ways to autofit row height in Excel.
3. What is the use of autofit row in excel?
Suppose you have a data set where the text spills out to the other columns as its width is smaller. Excel has certain limitations on height and column width. Hence, when we insert anything that occupies more space than the current size, we can notice that it spills out. In this situation, we can adjust the rows and columns to fit the text in the cell completely using the AutoFit function in Excel that can accommodate the text for multiple columns and rows, adjusting the column width and row height at once.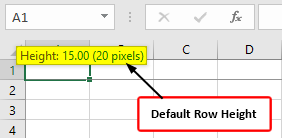
We need to click on the bottom of the row header to see the row height. It will display the row height of the selected row.
Recommended Articles
This article has been a guide to AutoFit Row Height in Excel. We discuss how to AutoFit row height in Excel with different methods and practical examples. You may learn more about Excel from the following articles: –