What Is AutoFit In Excel?
The AutoFit in Excel helps users to resize the cells in a dataset to display the cell values clearly irrespective of the characters, thereby avoiding the manual altering of the column-width and row-height as per our requirement.
The Excel AutoFit function helps us arrange the data/value in a particular order, automatic action on alignment, and fix the lengthiest string/alphanumeric values into a resized column/row automatically.
For example, if a cell’s content in our dataset is hidden due to the limited size, the AutoFit feature will align the cell size according to the cell content so that it can be seen always. Again, when the cell value is less than the cell size, and we want it to fit exactly, this feature can also decreases the cell size.
Key Takeaways
- The Autofit in Excel is a feature that helps in aligning the cell values in a clearer and user-readable way. It displays the entire data clearly, which helps avoid errors.
- We can press ‘Ctrl+A’ to select the entire worksheet and use any of the AutoFit methods we learnt to align the cell values.
- The shortcut keys to AutoFit the column-width is “Alt+H+O+I”, and to AutoFit the row-height is “Alt+H+O+A”,
- where the “Home” tab opens with the “Alt+H”, the “Format” menu opens when the “O” is pressed, and the “I” and “A” is for column-width and the row-height, respectively.
Top 5 Methods To AutoFit In Excel
The top 5 methods to AutoFit in Excel are,
- AutoFit using double click on the mouse.
- AutoFit using the select-and-drop option.
- AutoFit using a menu with a few tabs.
- AutoFit using AutoFit row height button.
- AutoFit using the Wrap Text button.
Let us now discuss the method in detail with specific examples
Method #1 – AutoFit by Double Click on the Mouse
We will go in-between the columns and double-click the line toAutoFitcell values.The image below shows the data in column A with some addresses, but the cell size limits it.
- First, take the mouse pointer to the middle line of columns A and B cell line, as shown below.

- Next, we must click twice, i.e., double-click, using a mouse pointer, in the middle of the AB cell line.
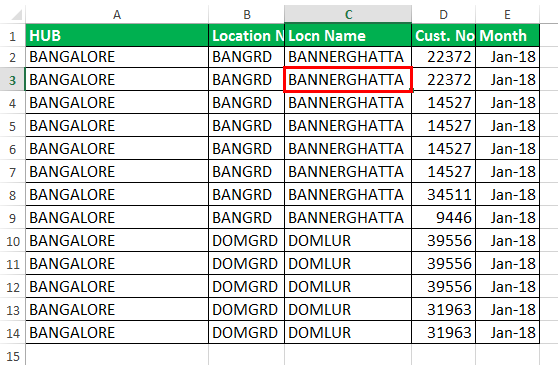
Now, we can see the entire values of the cells in column A, as it automatically fits the value of a cell.


Method #2 – AutoFit using the Select and Drag Option
It is the same as AutoFit cell size. Using a mouse pointer with the selection and dragging can make the cells automatically fit the value base size.
Select the row/column we want to AutoFit cells in all versions of Excel without going through a menu.
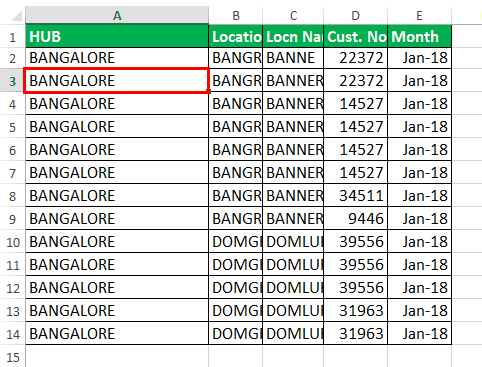
For example, in the illustration below, column A of “SOLD BY” has names but does not show the complete names. So, here we will go for AutoFit adjustments.

- Select the line of the “A” (i.e., SOLD BY) column in the worksheet, as shown below.
- After that, we will drag the mouse pointer on the worksheet with the desired length of a cell value, as shown below.
Method #3 – AutoFit Using Menu with Few Tabs
It is also the same as AutoFit, but the usage begins with a menu/button, either mouse selection or shortcut keys, as we like it. We could use it further.
Here we go with minimal steps.
- Select the rows/columns we want to AutoFit (if we need to AutoFit all rows and columns, click the top left box to select everything)
- Alternatively, select the rows/columns we want to AutoFit (we can highlight multiple rows/columns by holding the “Ctrl” key and choosing each row/column).
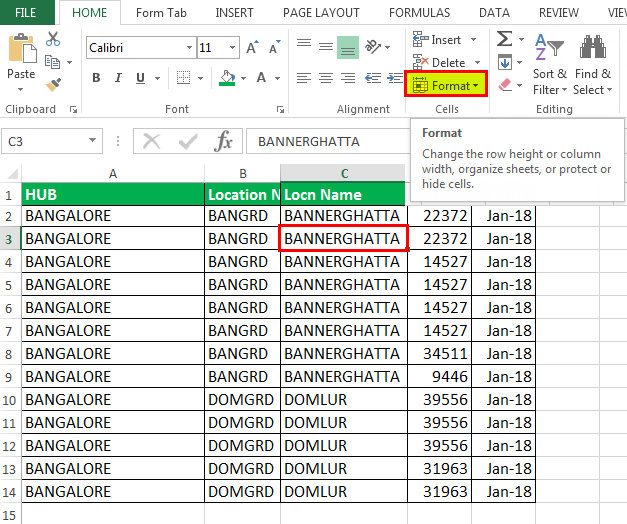
- Next, go to the “Home” tab, and select the “Excel Format” button, as shown below.

- Later, select “AutoFit Column Width” to complete the “AutoFit” action on desired cells.

- Then, we must click/select the “AutoFit Column Width” button. The chosen cell of A column, i.e., cell A3, will automatically extend the size of a cell, as shown below.
Method #4 – AutoFit Using AutoFit Row Height Button
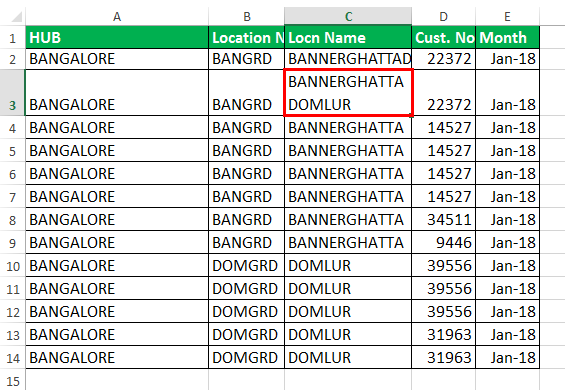
- We just selected one of the cells with two lines in the same cells in a worksheet. The cell value is “BANNERGHATTA DOMLUR”, but only displays BANNERGHATTA.
- After selecting cells, go to the “Home” tab, and select the “Format” button, as shown below.
- After that, select AutoFit Excel Row height to complete the “AutoFit” action on desired cells.

- Then, we will click/select the “AutoFit Row Height” button. The chosen cell of A column will automatically extend the size of a cell.
Method #5 – AutoFit Using the WRAP TEXT Button
Whenever we want to adjust/align the row height or text wrap in a cell, we should click “Wrap Text.” Else, the height of a cell will be the height of the font of our text. When we select multiple rows or columns to adjust the width or height manually, the rows and columns within the selected cell range will change too.
Some text is entered in column B, but the cell size is limited to the regular size. So here, we will do a wrap of text, i.e., extend the words of a cell in the same cell with the same column size and extend it through row size, for the data given below.

Using the Wrap Text Button in Excel, we can display the cell values (text /alphanumeric/numbers) by multiple lines in the same cells.
Important Things To Note
- The maximum number of characters we can enter in a column’s cell is 255, again, it depends on the font size or style.
- If the column-width or row-height is set to 0, we cannot see the cell, i.e., basically, it will be hidden.
Frequently Asked Questions (FAQs)
Is there any other alternate way to AutoFit in Excel?
Yes, there is an alternate way. For the next level of a higher range of work, the AutoFit can be done using VBA Coding, where without a selection of any cells, we can do this for the entire worksheet.
We can use the following codes in the VBA editor module window, i.e., copy-paste in the VB coding sheet, and execute it.
Sub AutoFitColumns()
Dim wrksht As Worksheet
For Each wrksht In Worksheets
wrksht.Select
Cells.EntireColumn.AutoFit
Next wrksht</strong
End Sub
Can we use the Format Painter option to AutoFit in Excel?
Yes, we can use the Format Painter option to AutoFit in Excel.
For example, if we have applied any of the AutoFit methods for a cell, then using the format painter option, select the cell formatting and paste it to the new cell to AutoFit.
Give one advantage and disadvantage of AutoFit in Excel.
• An advantage of AutoFit in Excel is that it saves time, and we can view the data in the cell clearly.
• A disadvantage of AutoFit in Excel is that since we have shortcut keys to AutoFit, most users may not remember or be comfortable to use the shortcut keys as easily as the other methods.
Recommended Articles
This article is a guide to AutoFit in Excel. Here we align cell size to display cell value, double-click, select & drag method, example, downloadable template. You may learn more about Excel from the following articles: –