What Is Create A Macro Button In Excel?
We create a Macro button In Excel to assign it some Macro code and make it interactive, easy to access, and save time. Once the coding is complete, we execute the program to get the task done.
An interactive button can perform many activities in the worksheets. Therefore, once programming is done, we can assign that particular task to one of the buttons so that the given job will be executed by click of the button.
Key Takeaways
- The Create Button Macro in Excel helps us save time while using macros or executing them.
- We write a macro, save it. To execute the code each time, we must open it from the VBA Editor and press the Run command.
- When we create a button and assign an existing macro to it, with just the click of that button, we can run the Macro code thereby avoiding the lengthy steps listed above.
- We can create a button using any shapes available in the “Insert” tab, or the Form Controls or the ActiveX Control buttons from the “Developer” tab.
3 Methods To Create Button In Macro Excel
We can create a button in three methods in Excel, namely:
- Using Shapes.
- Using Active X.
- Form Control in Excel.
Examples
We will consider specific examples for the methods to Create Button Macro in Excel.
Example #1 – Using Shapes
Using the “Shapes” feature in Excel, we can insert a wide variety of shapes, and also format them.
Before inserting shapes, below is the macro we had written to filter values in the below data.
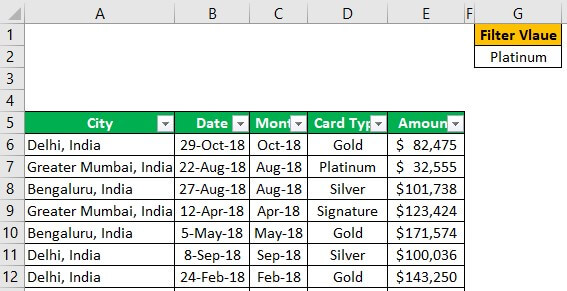
We have data in columns from A to E. In the cell G2, we have created a drop-down list of all the card types. The card type that we choose in cell G2 should be filtered out in the data. For this, below is the Excel macro code we have written.
Code:
Sub Filter_Values()
Dim LR As Long
Dim LC As Long
Dim Rng As Range
‘ Find the last row in column A
LR = Cells(Rows.Count, 1).End(xlUp).Row
‘ Find the last column in row 5
LC = Cells(5, Columns.Count).End(xlToLeft).Column
‘ Define the range starting from cell (5,1)
Set Rng = Cells(5, 1).Resize(LR, LC)
‘ Apply AutoFilter on the 4th field based on G2 value
Rng.AutoFilter Field:=4, Criteria1:=Range(“G2”).Value
End Sub
Upon running the above code, it will filter the values which are selected in the cell cell G2. Each time we must open the Visual Basic Editor, and run the code.
So, now we will insert shapes to assign the VBA macro.
Follow the below-given steps to assign macro to shape
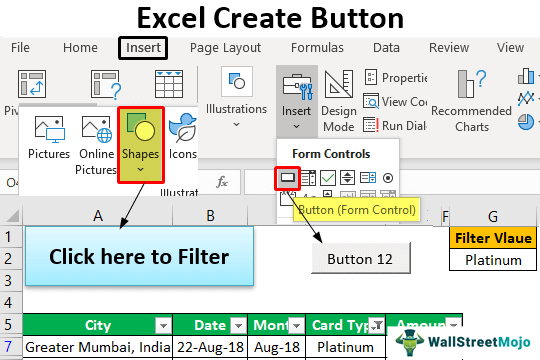
We must first go to the “Insert” tab in Excel and find the “Shapes” option.

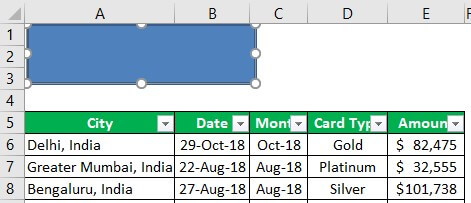
Once we click on the “Shapes” drop-down list, we see many shape options. Select any of the shapes and draw on the worksheet.

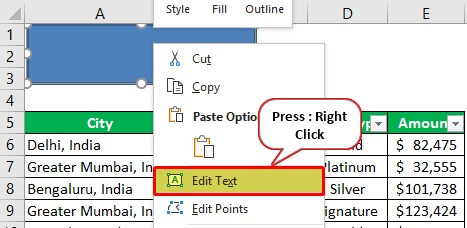
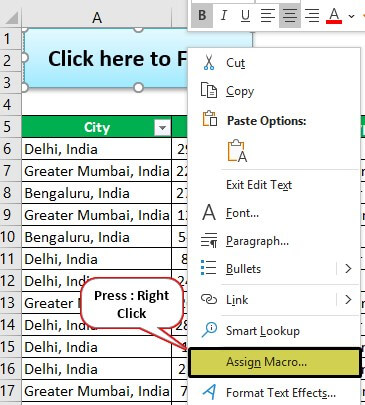
After adding the shapes, we need to enter some text values, so right-click on the shape and choose “Edit Text.”

We must enter the text as we would like to convey the message to the user.

It is the default view of the shape.We can format the shape under the “Format” tab.

Once the proper formatting is given to the shape, we need to click and choose “Assign Macro.”

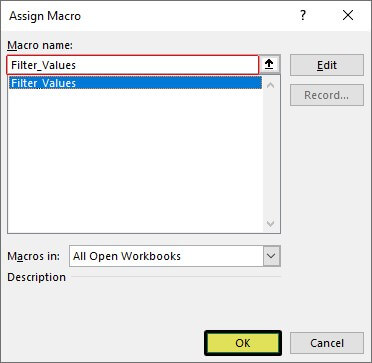
Once the proper formatting is given to the shape, right-click and choose “Assign Macro.” Next, we must select the macro we want to assign to the shape.

- Now click “OK”. Currently, the macro has been assigned to the shape.


We see the hand pointer indicating the click option when we hover on the shape. If we click, it will execute the assigned macro, and the value in cell G2 will be filtered.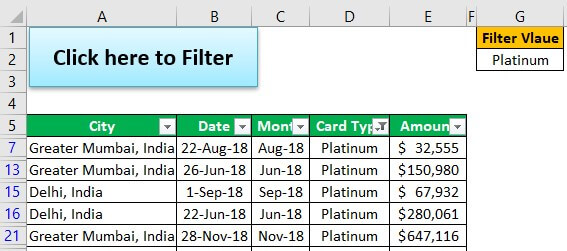
Example #2 – Using Form Control Shapes & Active X
We will consider a combined example for the other 2 methods, Form Control Shapes & ActiveX.
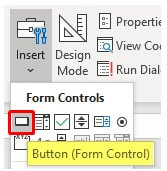
Under the Developer tab, we have an option called “Insert.” Under this, we have “Form Control” and “ActiveX Control.”
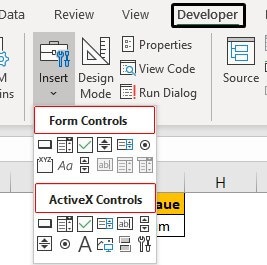
From “Form Controls”, we will select the “Button” option.
Then, draw this on the worksheet, and immediately we will get a list of macros.
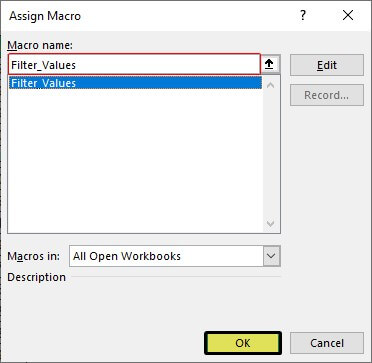
We must choose the macro we want to assign and click “OK,” to close the above window.
As a result, now, a button is created to run the macro.
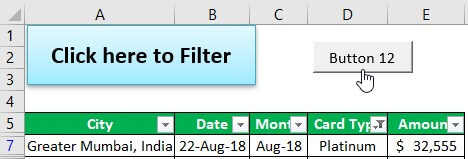
Like this, we can create a button in Excel to execute the macro.
To learn more in detail about VBA macros and use them for buttons, you can always go through our Basic and Advanced VBA Course to become an expert.
Important Things To Note
- The Active X Control button requires further coding knowledge, so not covered in this article.
- The basic difference between “Shape” and “Form Controls” is the formatting and style they look like.
Frequently Asked Questions (FAQs)
How to enable the Developer tab?
When we want to assign a button to the Macro Code, first, we must create Macros using the option available in the “Developer” Tab. Sometimes, the “Developer” Tab will not be available on the ribbon, if we haven’t used it before. Therefore, we must first enable it.
The steps to enable the “Developer” tab are as follows:
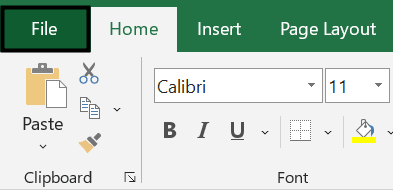
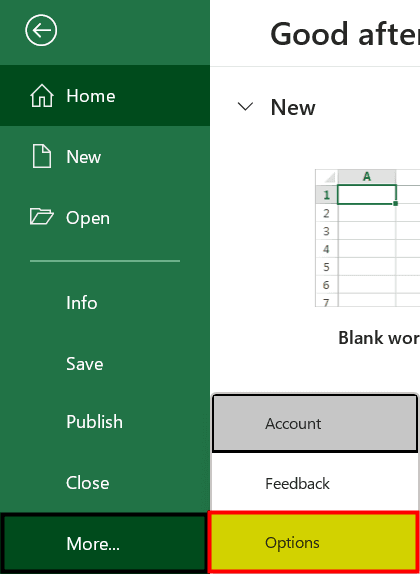
- Step 1: Go to the “File” tab.
- Step 2: Click the “More…” option from the list → select the “Options”.
- Step 3: The “Excel Options” window pops up, and then click the “Customize Ribbon” on the left side of the “Excel Options” window.
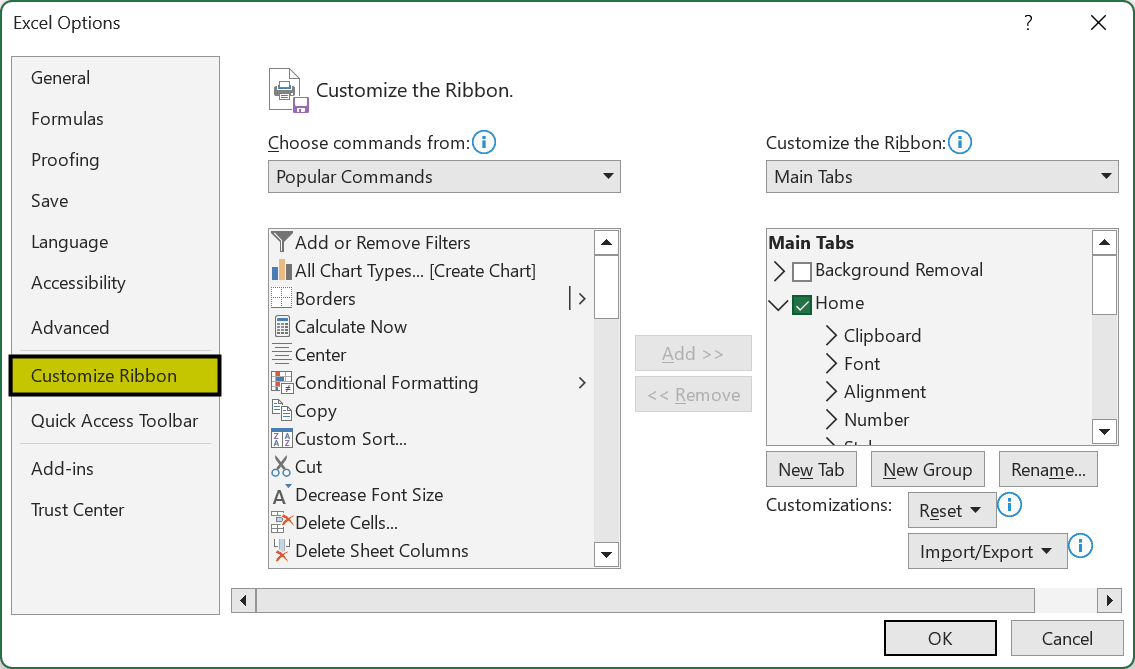
- Step 4: Check the “Developer” tab checkbox under the “Main Tabs” on the right side of the “Excel Options” window.
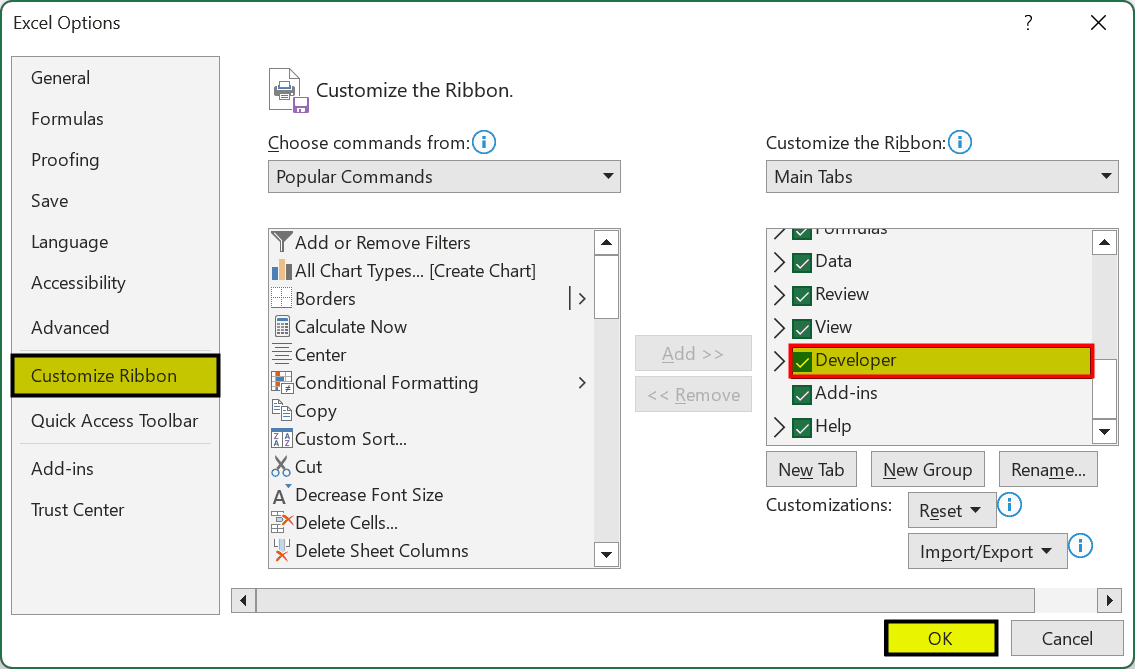
- Step 5: Click “OK”. Now, the “Developer” tab is enabled and appears on the ribbon, as shown below.

How to Add the Macro button to the Excel ribbon?
The steps to add the Macro button to the Excel Ribbon are as follows:
Step 1: Go to the “File” tab.

- Step 2: Click the “More…” option from the list → select the “Options”.

- Step 3: The “Excel Options” window pops up.
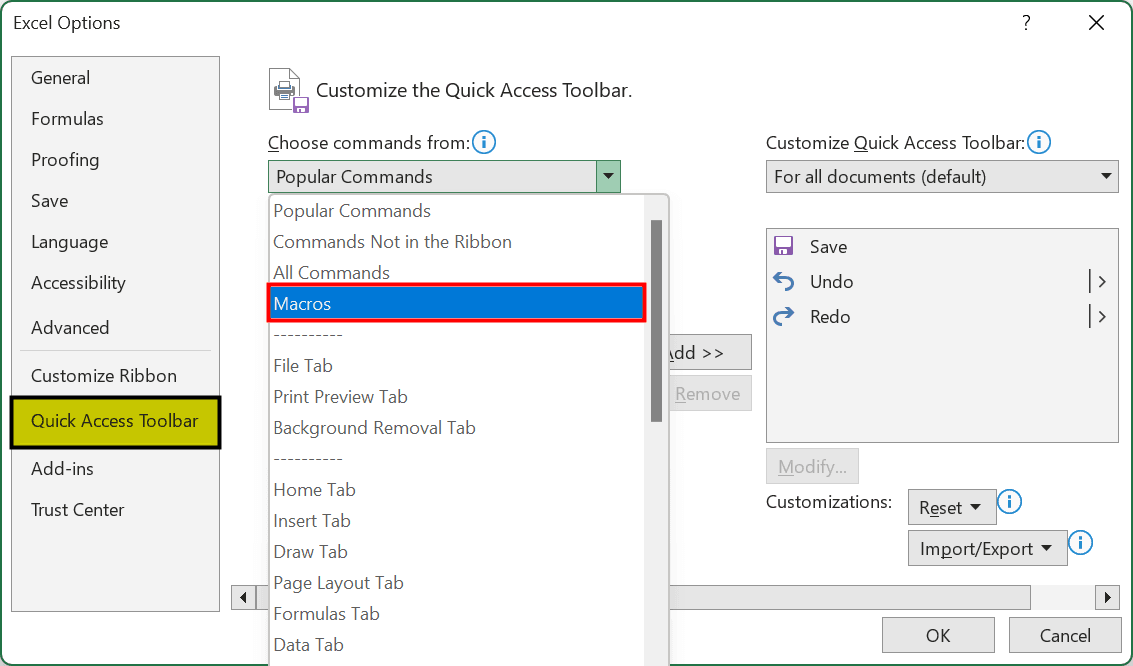
৹ First, click the “Quick Access Toolbar” on the left side of the “Excel Options” window.
৹ Next, select the “Macros” option from the “Choose commands from:” drop-down.
Immediately, the list of created and saved Macro files appears in the section below the “Choose commands from:” drop-down. We can select the required Macro Code, and click “OK”.
Finally, we can see the Macro button added to the Excel Ribbon.
The Create Button Macro in Excel is not working or is greyed out.
The Create Button Macro in Excel may not work for the following reasons, namely,
- The Macro Code file assigned is deleted and moved to another location.
- The Button is assigned to a different file or not assigned at all.
Recommended Articles
This article has been a guide to Create Button Macro in Excel. Here we assign macro to buttons from shapes, ActiveX & Form Controls, examples & downloadable template. You may learn more about Excel from the following articles: –