Excel VBA GETOBJECT Function
We can use the GetObject function in VBA in MS Excel to access an ActiveX object from the Excel file and then assign the object to an object variable. To use OLE (Object Linking and Embedding) or COM (Compound Object Module) technology to control any Microsoft application like MS Word, MS Outlook, MS PowerPoint, Internet Explorer, etc., we can use the VBA GETOBJECT function.
VBA GetObject Template
Download Excel TemplateWe use the CreateObject function to create the object, and the GETOBJECT function returns the reference to the object.
Syntax for GETOBJECT Function

The GETOBJECT function has these named arguments:
- Pathname: We need to specify the full path and the file name containing the object to retrieve. It is an optional argument. Both arguments in the GetObject function are optional, but if ‘pathname’ omits, the second argument, ‘class’, is required.
- Class: This is also an optional argument, as specified earlier also. It accepts a string representing the class of the object.
We use the syntax ‘appname.objecttype’ to specify the ‘class’ argument.
- Appname: We need to specify the application name to provide the object.
- Object type: We specify the type of class of object to create.
Example of Excel VBA GETOBJECT Function
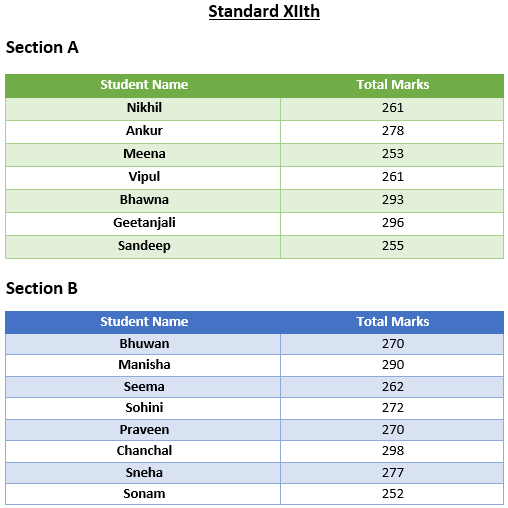
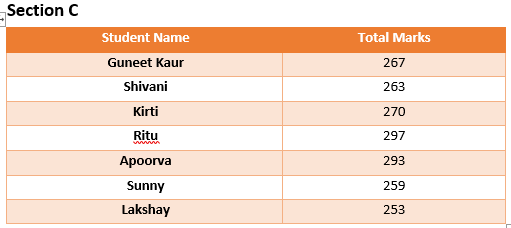
Suppose we have a word document containing 3 tables.
We want to write a VBA code that will import all the tables in the document to the Excel sheet. We will need to use the CreateObject and GetObject functions in VBA to do the same.
Steps would be:
- Create an Excel file and save the file with the .xlsm excel extension (Excel Macro-Enabled Workbook) as we will need to run the VBA code (a macro).
- Open the basic visual editor with a shortcut key (Alt+F11) or use the ‘Visual Basic’ command in the ‘Code’ group in the Developer tab in excel.
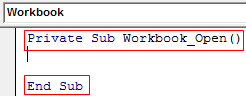
- Double click on ‘ThisWorkbook’ on the left side of the VBA editor and choose ‘Workbook’ from the list shown on the screen’s top.

- Choose ‘Open’ from the list.

- Now, we need to write the code in between these two lines.
- First, we will declare variables to hold the objects (MS Word Document and MS Word Application object) and a ‘String Variable’ to hold the document’s name from where we need to extract the tables.

- For error handling, we will add one statement. This statement tells the VBA program to ignore the error and resume the execution with the next line of code. “On Error Resume Next” statement does not fix the runtime errors, but it simply means that program execution will continue from the line following the line that caused the error.

- Now we will use the GetObject function to access the current instance of the Word Application Object.

- If there is no current MS Word application instance, or the ActiveX component cannot create an object or return reference to this object, then error 429. For this, we will add two lines in the code. After handling the error, we need to create an instance of the MS Word Application object using the CreateObject function.

- To make the MS Word Application visible, we will change the visible property of the ‘WdApp’ object to TRUE.
- We need to find the location and file name of the word document from which we want to import the tables into an excel sheet and assign the same to the “strDocName” To find the name and location, we can check out the properties of the file.
To open the ‘Properties’ dialog box, select the file and press ‘Alt+Enter.’

- If the file does not exist in the specified location, the code returns the message stating, “The file Marks Details was not found in the folder path.” The title would be “Sorry, that document name does not exist.”

- Now we need to activate the MS Word Application and assign the variable ‘wddoc’ with the word document having the file name stored in the ‘strDocName.’

- If the file is not open, we need to open the document and activate the app.

- After activating the word document, we need to access the tables in the document. To do the same, we will create some variables.

Tble is the integer variable that will store the count of tables in the document.
rowWd is the long variable that will store the number of rows in a table.
colWd is the long variable, storing the number of columns in a particular table.
- We need to count the number of tables in the document, and if they are notable in the document, then we will display a message box to the user that says “No Tables found in the Word document.”

- We will run a ‘For’ VBA loop for several tables to access tables in the document and write the content in the Excel sheet. Within this VBA loop, we will run nested ‘for’ loops for accessing every row and every column in the row.

- As we do not want to save the document and quit the application, we should also release the system’s memory. To do the same, we will write the following code.

Now, whenever we open the excel file, the file is updated with table content from the word document.

Code:
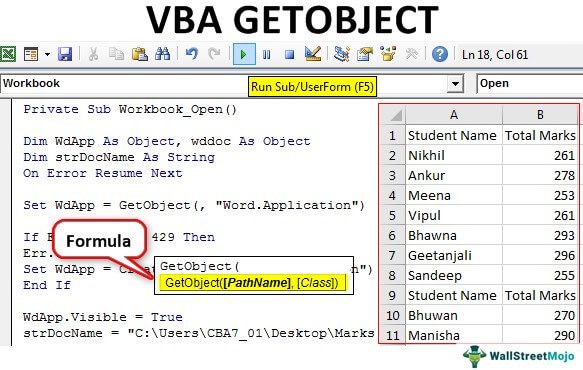
Private Sub Workbook_Open()
Rem Declaring Object variables to access object created by GETOBJECT
Dim WdApp As Object, wddoc As Object
Rem Declaring a string variable to access the Word document
Dim strDocName As String
Rem Error handling
On Error Resume Next
Rem Activating MS Word if it is already opened
Set WdApp = GetObject(, "Word.Application")
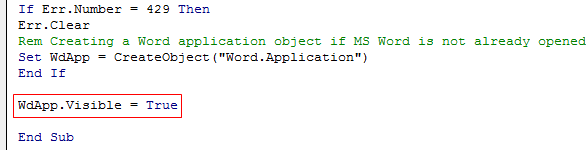
If Err.Number = 429 Then
Err.Clear
Rem Creating a Word application object if MS Word is not already opened
Set WdApp = CreateObject("Word.Application")
End If
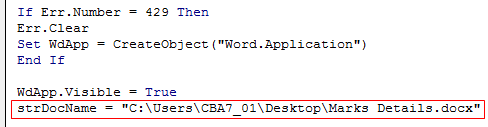
WdApp.Visible = True
strDocName = "C:UsersCBA7_01DesktopMarks Details.docx"
Rem Checking relevant directory for the relevant document
Rem If not found then informing the user and closing the program
If Dir(strDocName) = "" Then
MsgBox "The file " & strDocName & vbCrLf & "was not found in the folder path" & vbCrLf & "C:UsersCBA7_01.", _vbExclamation, "Sorry, that document name does not exist."
Exit Sub
End If
WdApp.Activate
Set wddoc = WdApp.Documents(strDocName)
If wddoc Is Nothing Then Set wddoc = WdApp.Documents.Open("C:UsersCBA7_01DesktopMarks Details.docx")
wddoc.Activate
Rem Defining variables to access the tables in the word document
Dim Tble As Integer
Dim rowWd As Long
Dim colWd As Integer
Dim x As Long, y As Long
x = 1
y = 1
With wddoc
Tble = wddoc.Tables.Count
If Tble = 0 Then
MsgBox "No Tables found in the Word document", vbExclamation, "No Tables to Import"
Exit Sub
End If
Rem Starting the looping process to access tables and their rows, columns
For i = 1 To Tble
With.Tables(i)
For rowWd = 1 To .Rows.Count
For colWd = 1 To .Columns.Count
Cells(x, y) = WorksheetFunction.Clean(.cell(rowWd, colWd).Range.Text)
Rem Accessing next column
y = y + 1
Next colWd
Rem Going to next row and start from column 1
y = 1
x = x + 1
Next rowWd
End With
Next
End With
Rem we do not need to save the word document
wddoc.Close Savechanges:=False
Rem we quit MS Word application
WdApp.Quit
Rem We finally release system memory allocated for the 2 object variables
Set wddoc = Nothing
Set WdApp = Nothing
End SubThings to Remember
- A single-instance object is available for which only one instance of the object generates, regardless of the number for which CreateObject is run. For example, the GetObject function always returns the same instance when called with a string of zero length, and an error comes if it does not mention the ‘pathname’ argument.
- We cannot use GetObject to access a reference to a class created with VBA.
- Suppose there is no active instance of the MS Word Application, or we do not want the object initiated with a file already loaded. In that case, we first use the CreateObject function to create the object and then use the GetObject function to access the object.
Recommended Articles
This article has been a guide to VBA GetObject. Here, we discuss how the GetObject function returns an object’s reference in Excel VBA, practical examples, and a downloadable template. Below you can find some useful Excel VBA articles: –