
Table Of Contents
How to Sort Your Column Data in Excel? (Step-by-Step)
Follow the below steps to sort the column in Excel:
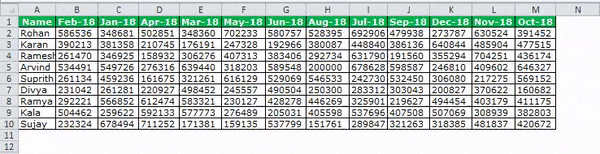
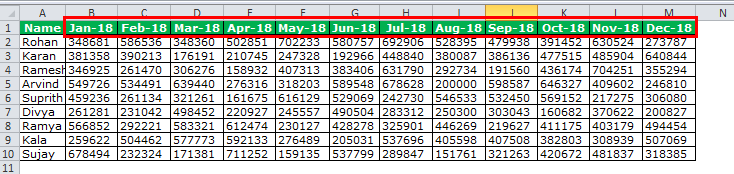
- For example, we must select the data. Select means we do not have to select all the data but choose as per the below image. We will select only the columns from B to M.
- We must go to the "Data" tab and select the "Sort" option. (We can also press ALT + D + S).

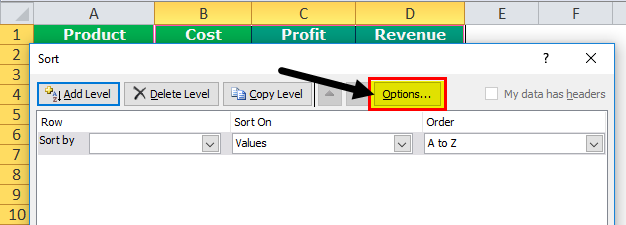
- Now, we will click on "Options."
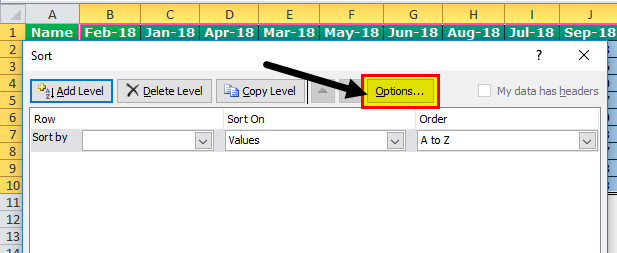
- Clicking on the "Options" button will open up the below dialogue box. First, we must select "Sort Left to Right."
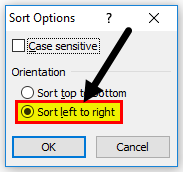
Once we select this option in Excel, it understands the data from right to left instead of top to bottom. - We need to click on Excel's "Sort by" drop-down list. As a result, we will not see any header. Instead, it shows only Row1, Row2, and Row3, as shown below.
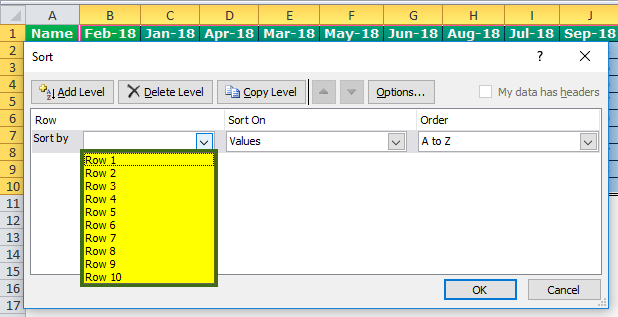
- It will understand our requirements here. Now, we need to sort the data month-wise. Our month is in the first row. So, we must select "Row 1" as the option. Since we are sorting the data month-wise from Jan to Dec, it becomes oldest to newest. So select "Oldest to Newest" under the "Order" section.
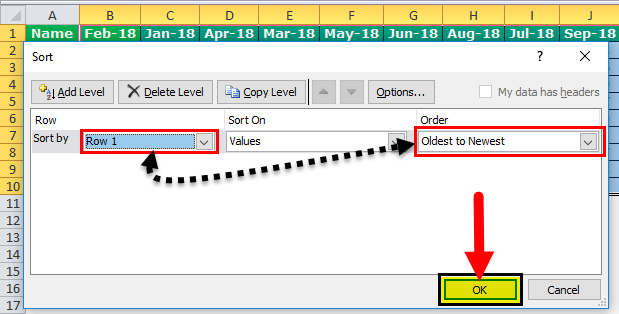
- Click the “OK” button to sort the data from Jan to Dec.
Example to Sort Column in Excel
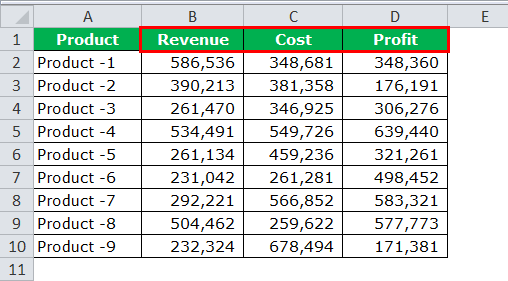
I was in an interview, and I have given data from the hiring manager to sort out the data based on the heading. He has given me the below data and asked me to sort the data. The first column should be "Revenue," the second one should have "Cost," and the final column should be "Profit."
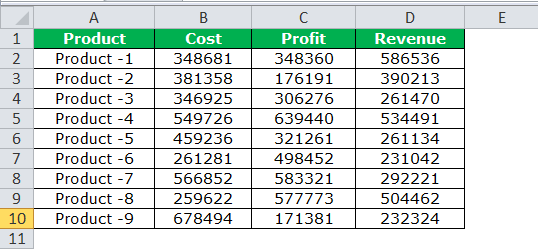
I thought for a minute that he did not ask me to sort the data alphabetically. If that were the case, it would have been a walk in the park for me. Instead, he asked me to sort differently.
After thinking for a minute, I remembered the "Custom Sort" option. In "Custom Sort," we can mention headings, and decide which one to come first, second, etc.
- Step 1: We must select the data.
- Step 2: Press ”ALT + D + S” and go to ”Options.”
- Step 3: We must select “Sort left to right.”

- Step 4: Click on “OK,” and under the “Sort by” option, select “Row1.”

- Step 5: Since we need to do a custom sort, we cannot select A to Z, but we must choose the "Custom List" option.
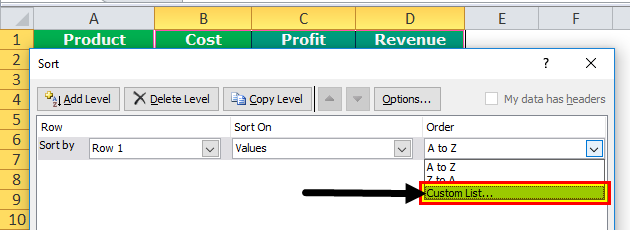
- Step 6: Under the custom list, we can mention our order of the sort. Under "List entries," we have said our order.

- Step 7: Click on "OK." The "Order" list will be shown in the "Sort" dialog box.
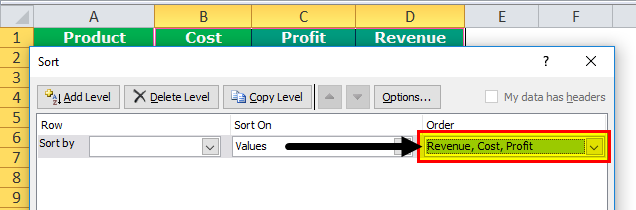
- Step 8: Click on "OK." It will sort the data according to the values we have given.
Things to Remember
- It is important to select the options and set our sorting method as "Sort right to the left." Otherwise, it will sort it as row type.
- It is beneficial to sort in case of arranging headings alphabetically.
- Unlike row sorting, there is no "My Data Has Header" option in column sorting.
- We can sort the dates from oldest to newest.
Recommended Articles
This article is a guide to Column Sort in Excel. Here, we discuss how to sort a column in Excel using Excel examples and downloadable Excel templates. You may also look at these useful Excel tools: -
