What is Sort in Excel?
SORT in Excel means arranging the data in a determined order. For example, sometimes we need to place the names alphabetically, sort the numbers from smallest to largest, largest to smallest, dates from oldest to latest, latest to oldest, etc. In Excel, we have a built-in tool called the “SORT” option. This “Sort” option can help us sort the data based on the condition we provide.
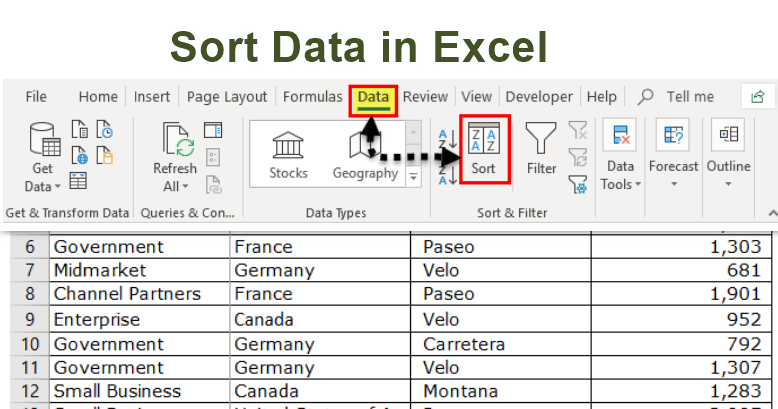
The “SORT” option in Excel is under the “Data” tab.

- The “SORT” option plays a key role in organizing the data. For example, if the monthly sales data is not in order from Jan to Dec, it may not be a proper organizing way of the data structure.
- Excel “SORT” option will help us solve all kinds of data to make life easy. In this article, we will demonstrate the usages of the “SORT” option in Excel and save a lot of time.
How to Sort Data in Excel?
Example #1 – Single Level Data Sorting
It will sort the data based on only one column, nothing else.
Now, look at the below data. Again, we have sales of different products by segment and country.
We have the data until the 700th row. Download the Excel file to follow along here.
We want to sort them based on the “Country” column from A to Z.
Below are the steps used for single-level data sorting:
- First, select the data that we want to sort. Next, you can use the shortcut key to select the entire data, select the first row, and then click “Ctrl + Shift + Down Arrow.”

- Go to the “Data” tab > “Sort.” The shortcut key to open the “Sort” option is “ALT + D + S.”

- Make sure the “My data has headers” checkbox has been ticked. If this box has ticked means, the selected data has headers. Otherwise, your header will be treated as the data only.
- Click on the “Sort by” dropdown list and select the word “Country.”
- Click on “Sort On.” Here, we can sort based on values, cell color, font color, and conditional formatting icon.
- Finally, select the “Order.” You can sort A to Z, Z to A, and a custom list here.
- The final “SORT” dialog box should look like this.
- Click on “OK.” It will sort the data country-wise alphabetically from A to Z.


Example #2 – Multi-Level Data Sorting
In the previous example, we have learned single-level sorting. In this example, we will explain the multi-level sorting process.
Previously, we sorted the data country-wise. Assume we want to sort the data segment-wise, product-wise, and units sold from largest to smallest. It requires multi-level sorting.
- Step 1: Select the data. (We are using the same data from the previous example)

- Step 2: Press “ALT + D + S.” (shortcut key to open the SORT box)

- Step 3: First, select the “Segment” heading.

- Step 4: Click “Add Level” to insert one more layer.

- Step 5: From the second layer, select the “Product.”

- Step 6: Click “Add Level” to add the third layer.

- Step 7: Select the “Units Sold” header from the third layer.

- Step 8: The “Order” will default to “Smallest to Largest.” Under “Order,” click on the dropdown list and select “Largest to Smallest.”

- Step 9: It will sort the layers alphabetically. It will sort the “Units Sold” column from the largest to the lowest value.

Firstly, it will sort the data based on the “Segment” column. Next, they will sort by “Product” and finally by “Units Sold” (largest to smallest).
Example #3 – Sorting Dates Data
We have a sales table country-wise on different dates. So, we want to sort the data country-wise first and then date-wise (oldest to newest).
- Step 1: Select the data first.

- Step 2: Open the “Sort” option. (ALT + D + S)

- Step 3: Select a “Country” header in the first drop-down list.

- Step 4: Click “Add Level” to insert one more layer.

- Step 5: Select the “Date” header from the second layer.

- Step 6: By default, orders selected “Oldest to Newest.” Our objective is to sort from oldest to newest.
Click on “OK” to sort.

Things to Remember
- We need to select the entire to sort. Otherwise, left-out columns will be as it is.
- Ensure the “My data has headers” check has been selected to sort the data.
- We can sort the colored cells, colored font, etc.
- We also sort the data by applying the filter in excel.
- We can sort from A to Z and Z to A in the case of the alphabet.
- We can sort from “Largest to Smallest” and “Smallest to Largest” in the case of numbers.
- In the case of dates, we can sort from “Oldest to Newest” and “Newest to Oldest.”
Recommended Articles
This article is a guide to Sort in Excel. Here, we will demonstrate the SORT option in Excel (single-level and multi-level sorting) along with an Excel example and a downloadable template. You may also look at these useful functions in Excel: –