Excel Preview Print Option
Print preview in Excel is a tool used to represent the print output of the current page in Excel. This tool is used to see if any adjustments need to be made to print the final result. The print preview only displays the document on the screen, and it does not print. In other terms, it only shows us the format in which it will print the copy.
How to use Print Preview in Excel? (with an Example)
When the report or data is ready, we usually send the data online to the user. However, there is a situation where we need to share offline with the users by printing them. In such cases, you need to know how to print a large amount of data.
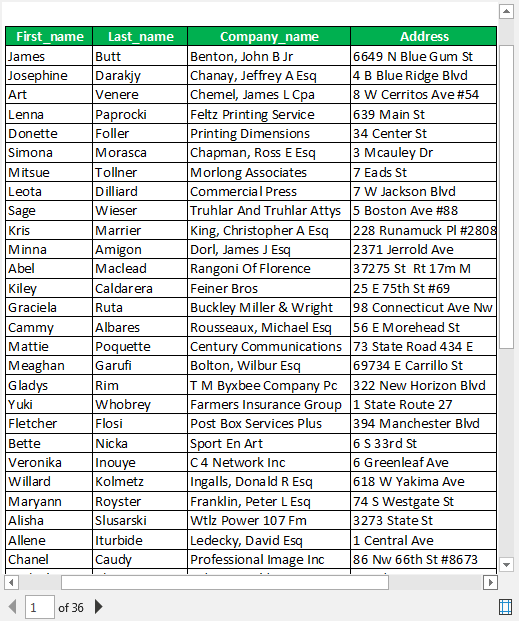
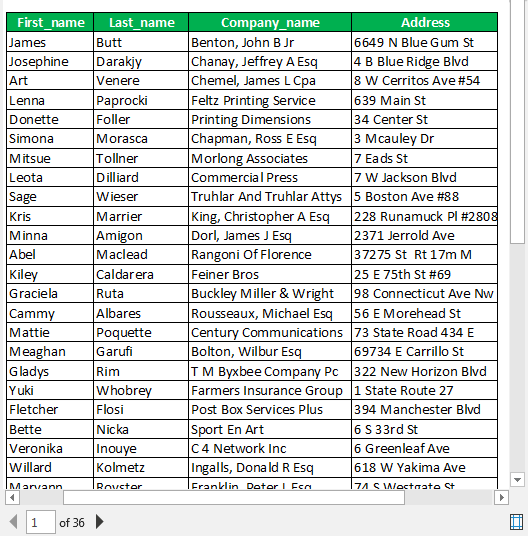
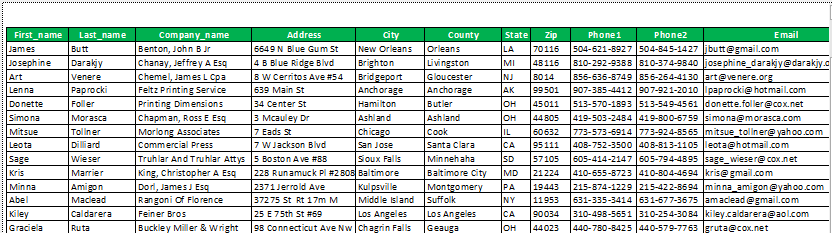
- Assume you have a large amount of data like the below.

- To print this, first select the entire data.

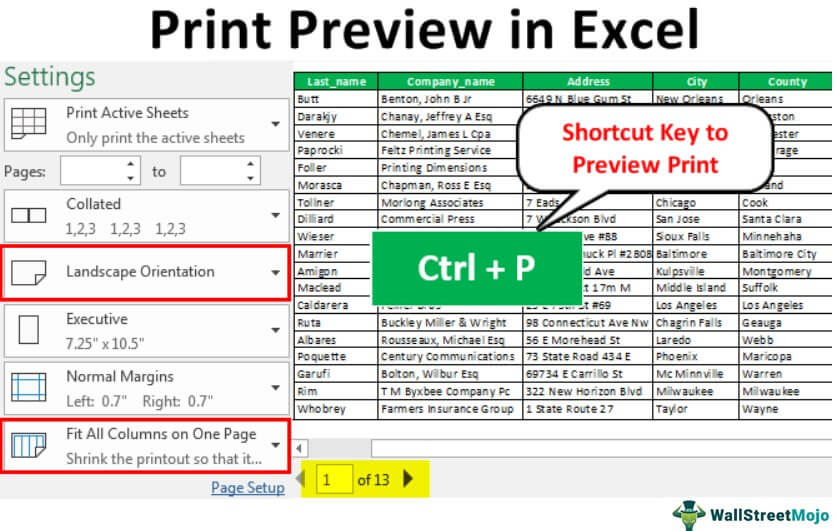
- Then, press the excel shortcut key “Ctrl + P.”

- It will take us to the window below.

- We can see two slabs in the above image. The left side is “Print Setting Options,” and the right is the “Print Preview” window.
We can see one more slab at the bottom, showing how many sheets it will print. The above says 1 of 36, i.e., out of 36 sheets, a print preview is visible for the 1st sheet.Now, look at the data headers and compare them with “Print Preview.”

- We have a 11 headers in our data. Below are the headers in order.
“First_name,” “Last_name,” “Company_name,” “Address,” “City,” “County,” “State,” “Zip,” “Phone1,” “Phone2,” and “Email.”When we print this data, we usually expect the data to come in a single sheet only. But look at the “Print Preview” now.


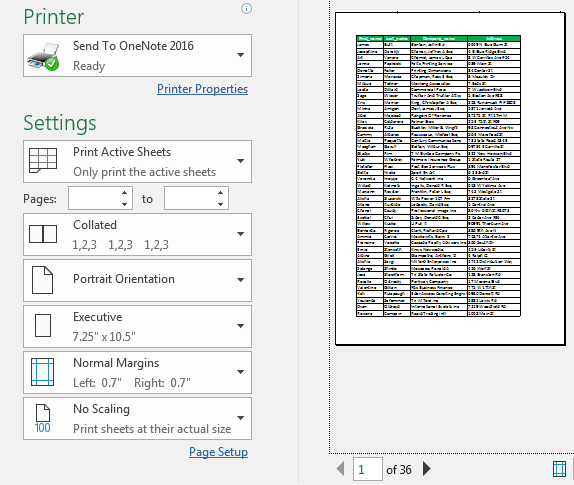

Out of 11 headers, we could see only 4 headers. After printing these columns first, then it will print the remaining columns. After we get all the print copies, we need to arrange them in order.
Isn’t it a frustrating job to arrange the prints in order? So for this, we need to set up the page before print in excel.
Setup the Page to Preview Print
To set the page first, select the data first, then go to Page Layout >> Print Area >> Set Print Area.
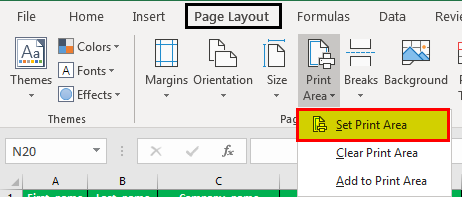
It will set what the area we are going to print is. Now, press “Ctrl + P” once again to see the “Print Preview.”
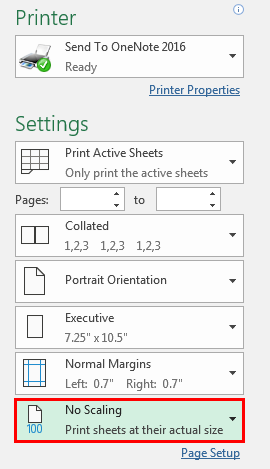
We can still see the same view. The problem here is we could be able to see only 4 columns out of 11 columns. So, we need to set the setting as “Fit All Column on One Page” under page scaling.
Click on the “No Scaling” dropdown list to view all the options.
Select “Fit All Columns on One Page” to fit all the columns on one page.
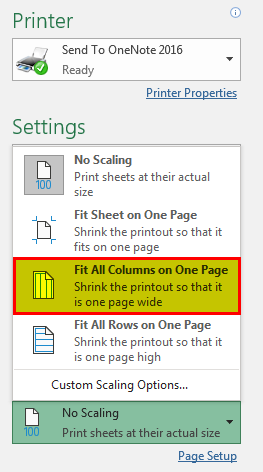
Now, it has fitted all the columns under one page. Since the data is large, it has trimmed the size of the fonts to very small.
Even though we printed this, we could not be able to read the contents, so how do we overcome this issue now?
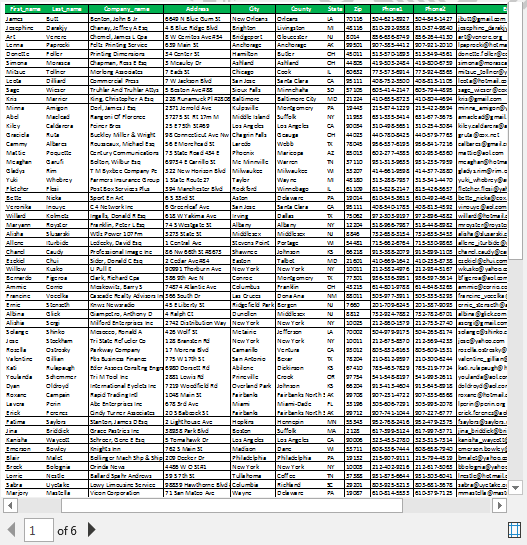
To adjust the scaling, we need to change the page’s orientation from “Portrait” to “Landscape.”
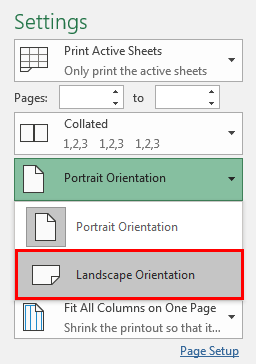
Now, we can read the contents a little better than the previous one.
Now, the total pages have been reduced from 36 to 13.
Like this option, we can set up the print area, adjust columns, decide on the page’s orientation, and do many other settings with the help of the Excel “Print Preview” option.
Recommended Articles
This article is a guide to Print Preview in Excel. Here, we will show you how to use the print preview feature to the full extent, along with some examples. You can learn more about Excel from the following articles: –