What Is Print Titles In Excel?
When we print the Excel worksheet, the title is present on the first worksheet page but not on others. So, to publish titles on every printed page, we can select the print options from the headings in the “Page Layout” tab, which will print the titles for us.
Consider the below example where we have the marklist of class A in 5 subjects. Assume that we have to print the data. As shown in the below image, the data will be printed in 2 sheets.

Now, let us understand how to publish print titles in Excel.
The steps are:
- Step 1: Press the shortcut keys, Ctrl + P.
- Step 2: The page setup window opens.
Fill the Rows to repeat at top: option and click on Print Preview option to preview.
As we can see, the heading is shown in both the sheets.

Likewise, we can insert print titles in Excel.
- Print Titles in Excel is used to print headings in each printed sheet.
- We need to set the print sheet to fit all columns in one sheet to have all the columns on one page.
- We select the entire row to be repeated in all the sheets. We need to select only the data range. The same thing applies to columns too.
- By default, we can view Excel row and column headers. However, if you want to print, we need to set them as a print by checking the box.
How To Print Titles In Excel? (Step By Step)
Using Print titles option in excel, we can retain the heading in rows or columns or both in printed sheets. Let us learn how to use this option with interesting and detailed examples.
Examples
Example #1 – Print Excel Titles Row Numbers And Column Alphabets
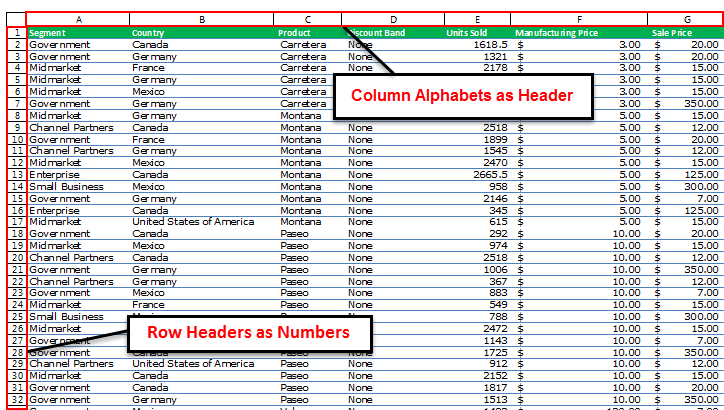
Excel does not stop repeating rows or columns across all the printing sheets. It can also print Excel row numbers and column headers. Follow the below steps to do this task.
- Step 1: Go to the “Page Layout” tab and “Headings” under “Sheet Options.”
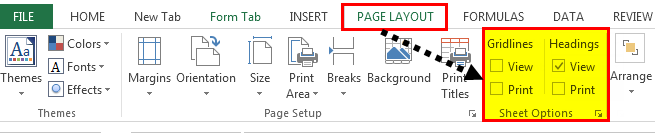
We can only “View” the headings as of now. To print, we need to tick the checkbox of “Print.”
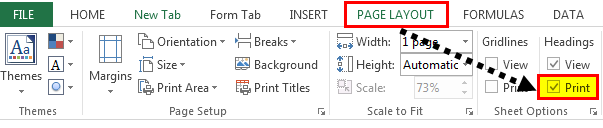
- Step 2: Under “Sheet Options,” click the checkbox “Print.”
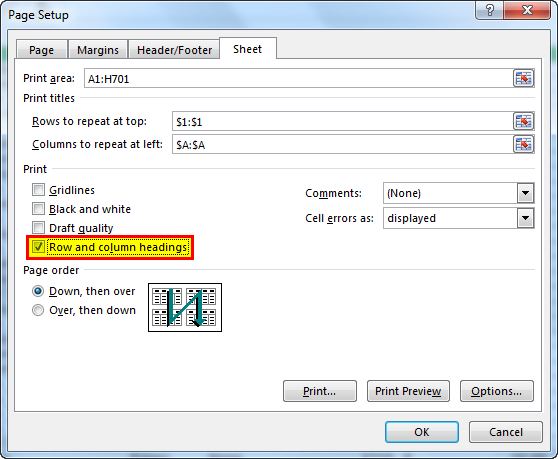
We can also do this setting under an Excel “Print titles” window. We need to click the checkbox “Row & Column headings.“
Now, press the “Ctrl + P” and select the print preview to see the row numbers and column alphabets.
Example #2
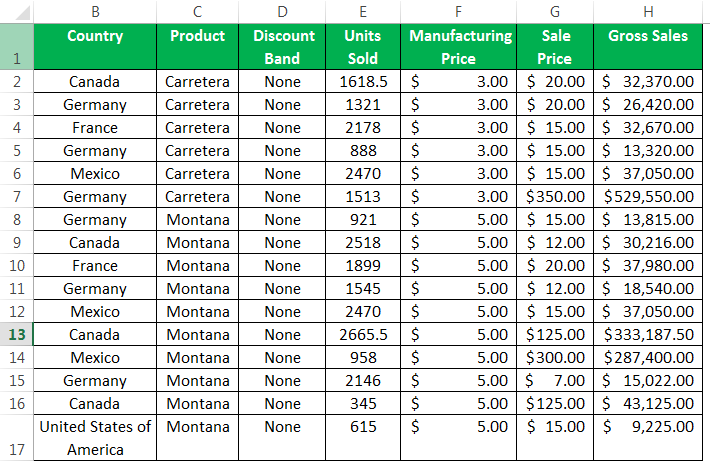
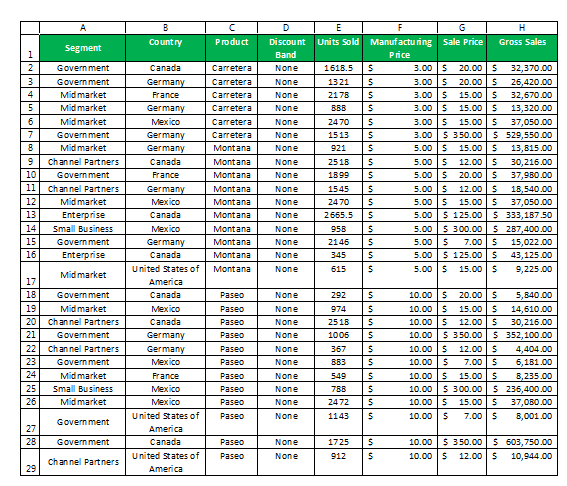
Now, we have a huge sheet. We need to print this with the headers on all the printed sheets.
- First, press “Ctrl + P,” the shortcut key to print in Excel.

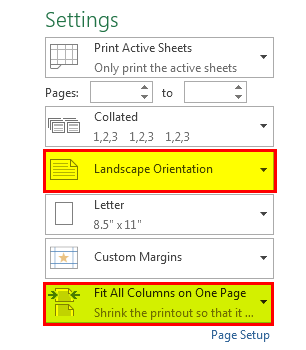
- In print “Settings,” select “Landscape Orientation.” Next, select “Fit All Columns on One Page.”

- Now, all the columns are fitted on a single sheet.

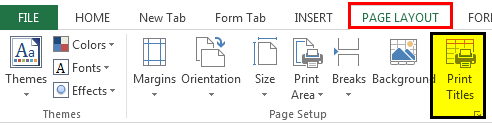
- Now, we need to repeat the heading on all the sheets. Go to “Page Layout” and select “Print Titles” in Excel.

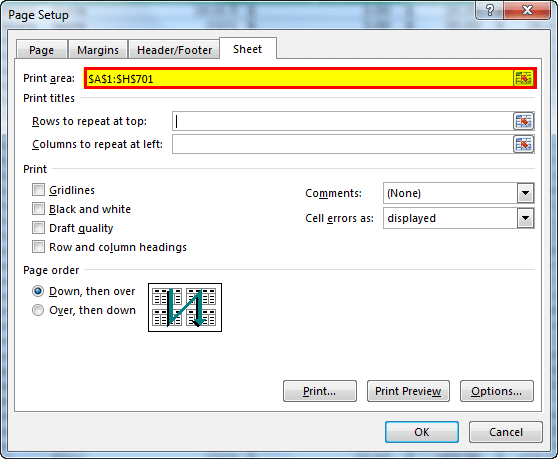
- Now, we need to do some settings under this window. First, the tab selects theprint area in excel.
So, we need to print from A1 to H701.

- Under “Print titles” in Excel, we have an option called “Rows to repeat at top.” Here, we must select our headings, i.e., the first row.
- Click on the ‘OK.” We have settings to repeat the top row in all the sheets. Now, click on “Print” and see the print preview. The below preview is the first sheet. From a total of 26 sheets, it has been reduced to 15 sheets now.
Now, look at the second sheet preview. It also includes headings.This way, we can have a header across all printing pages.Having column headers on all the printing pages is similar to having row headers across pages. We need to select the column to repeat.


Important Things To Note
- Print Titles in excel is an option used to print titles in the data which is printed.
- This option will save a lot of time when we print many sheets together.
- Enter the correct row and column cell reference in the page layout window.
Frequently Asked Questions (FAQs)
1. What is the use of print titles in Excel?
Print Titles in Excel is an option used to help users print titles in every sheet. Though we can freeze headings to help us view the data in Excel, while printing, the heading will appear only on the first sheet. To make sure the heading appears in each printed sheet, print titles in Excel option is used.
2. Explain how to retain heading in printed sheets using print titles with an example.
Consider the below example where we have the sales list of various products in 3 quarters. Assume that we have to print the data. As shown in the below image, the data will be printed in 2 sheets.
Now, let us understand how to publish print titles in Excel.
The steps are:
• Step 1: Press the shortcut keys, Ctrl + P.
• Step 2: The page setup window opens.
Fill the Rows to repeat at top: option and click on Print Preview option to preview.
As we can see, the heading is shown in both the sheets.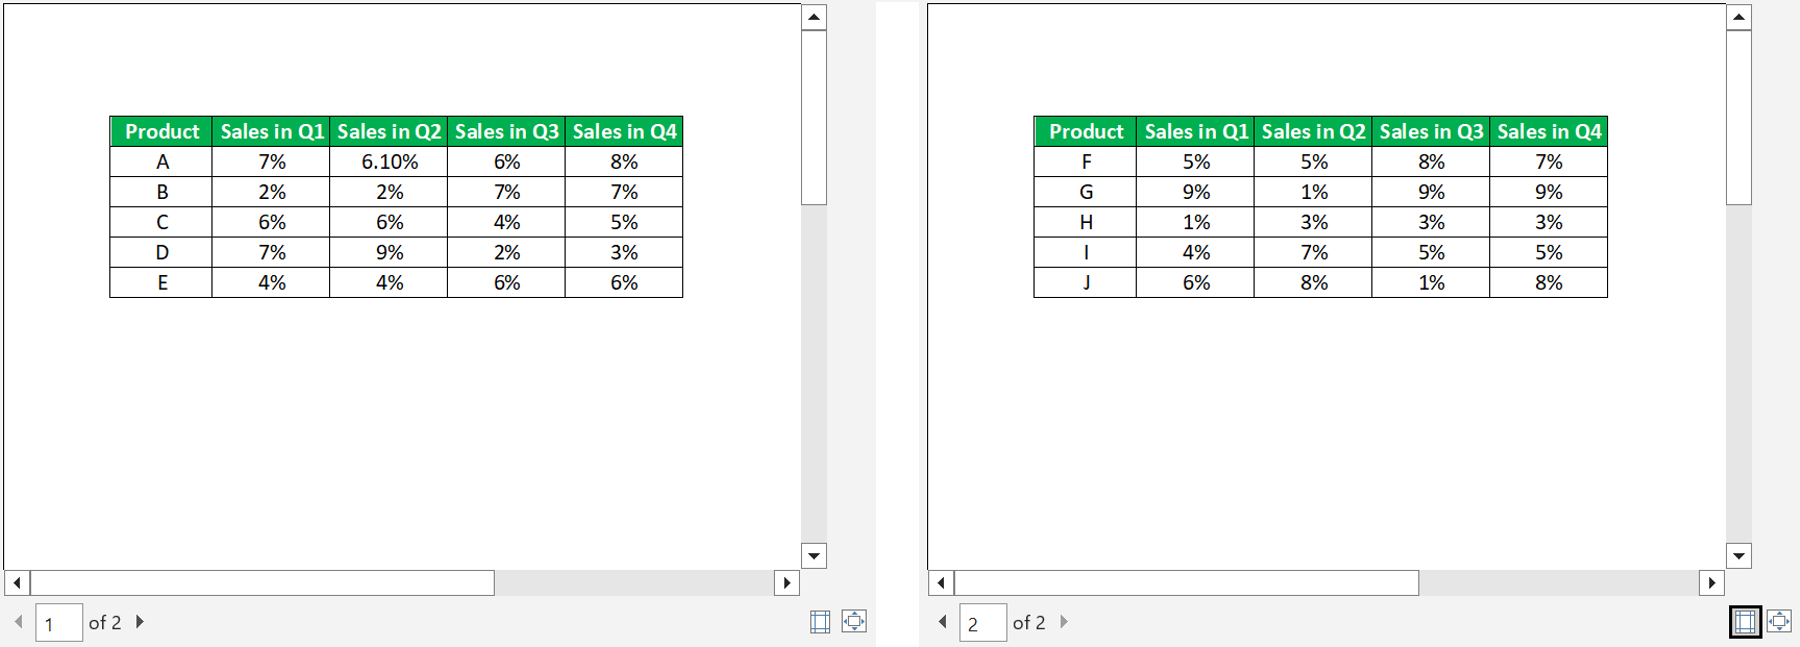
Likewise, we can insert print titles in Excel.
3. Why Print Titles option is disabled?
Print titles option might be disabled because we might be editing a cell in the page area. Make sure, no cell is selected to enable Print Titles option.
Recommended Articles
This article is a guide to Print Titles in Excel. Here, we discuss examples of repeat Excel header rows, print Excel row numbers and column alphabets, practical examples, and a downloadable template. You may learn more about Excel from the following articles: –