Table Of Contents
Excel VBA OFFSET Function
The VBA Offset function returns a reference to a cell or range that is a specified number of rows and columns away from a starting cell. The Offset function lets you move relative to a cell's position without activating it, making your VBA code work faster and more efficiently.
For example, assume you have a data set like the one below.

Now from cell A1, you want to move down four cells and select that 5th cell, the A5 cell.
Similarly, if you want to move two rows down from the A1 cell and two columns to the right, select that cell, i.e., the C2 cell.
In these cases, the OFFSET function is very helpful. Especially in VBA OFFSET, the function is just phenomenal.
Key Takeaways
- The VBA Offset function returns a cell or range relative to a particular reference — based on rows and columns moved.
- VBA Offset helps you navigate the worksheet without selecting any cells, making the code more efficient.
- Positive values move down/right while negative values move up/left.
OFFSET Is Used With Range Object In Excel VBA
In VBA, we cannot directly enter the word OFFSET. Instead, we need to use the VBA RANGE object first. Then, from that range object, we can use the OFFSET property.
In Excel, the range is nothing but a cell or range of the cell. Since OFFSET refers to cells, we need to use the object RANGE first, and then we can use the OFFSET method.
Syntax Of OFFSET In VBA Excel

- Row Offset: Number of rows to move from the selected cell Here the selected cell is A1, i.e., Range (“A1”).
- Column Offset: Number of columns to move from the selected cell.
Examples
Example #1
Consider the below data for demonstration.

Step 1: Now, we want to select cell A6 from cell A1. But, first, start the macro and reference cell using the Range object.
Code:
Sub Offset_Example1()
Range("A1").offset(
End Sub

Step 2: Now, we want to select cell A6. Then, we want to go down 5 cells. So, enter 5 as the parameter for Row Offset.
Code:
Sub Offset_Example1()
Range("A1").offset(5
End Sub

Step 3: Since we are selecting the same column, we leave out the column part. Close the bracket, insert a dot (.), and type the method “Select.”
Code:
Sub Offset_Example1()
Range("A1").Offset(5).Select
End Sub

Step 4: Now, run this code using the F5 key, or you can run it manually to select cell A6, as shown below.

Output:

Example #2
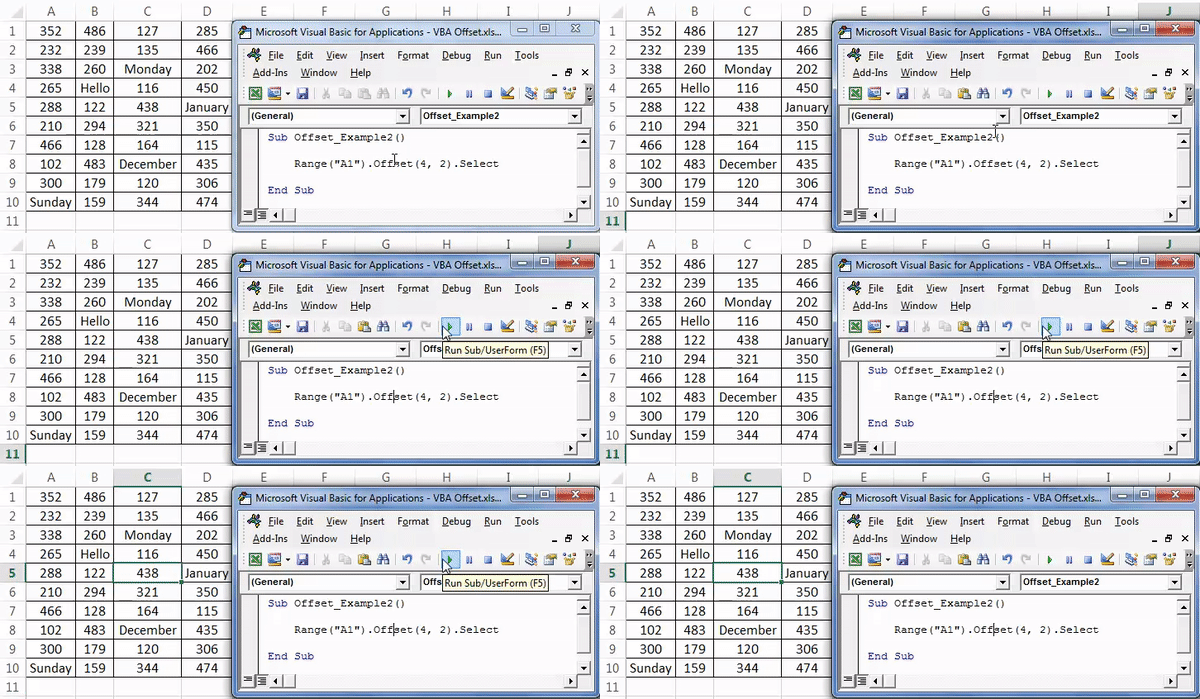
Now, take the same data as in the above example, Here, we will see how to use the column offset argument. Now, we wish to select cell C5.
Step 1: Since we want to select cell C5 first, we want to move down four cells and take the right two columns to reach cell C5. The below code would do the job for us.
Code:
Sub Offset_Example2()
Range("A1").Offset(4, 2).Select
End Sub

Step 2: We run this code manually or using the F5 key. Then, it will select cell C5, as shown in the below screenshot.

Output:

Example #3
We have seen how to offset rows and columns. We can also select the above cells from the specified cells. For example, if you are in cell A10 and want to select the A1 cell, how do you select it?
In the case of moving down the cell, we can enter a positive number, so here in the case of moving up, we need to enter negative numbers.
Step 1: From the A9 cell, we need to move up by 8 rows, i.e., -8.
Code:
Sub Offset_Example1()
Range("A9").Offset(-8).Select
End Sub

Step 2: If you run this code using the F5 key or manually run it, it will select cell A1 from the A9 cell.

Output:

Example #4
Assume you are in cell C8. From this cell, you want to select cell A10.
From the active cell, i.e., the C8 cell, we need to first move down 2 rows and move to the left by 2 columns to select cell A10.
Step 1: In case of moving left to select the column, we need to specify the number is negative. So, here we need to come back by -2 columns.
Code:
Sub Offset_Example2()
Range("C8").Offset(2, -2).Select
End Sub

Step 2: Now, run this code using the F5 key or run it manually. It will select the A10 cell as shown below:

Output:

OFFSET with ActiveCell
We can offset from an active cell instead of using a pre-defined range. Thus, you'll get a dynamic offset to select a cell navigating from the active cell.
ActiveCell.Offset(4, 2).Select
OFFSET with ActiveCell to Select a Range
We can use the code shown below to select a range from the active cell.
Range(ActiveCell.Offset(2, 2), ActiveCell.Offset(6, 3)).Select
Things To Remember
- In moving up rows, we need to specify the number in negatives.
- In case of moving left to select the column, the number should be negative.
- A1 cell is the first row and first column.
- The "Active Cell" means presently selected cells.
- To select the cell using OFFSET, you need to mention “.Select.”
- To copy the cell using OFFSET, you need to mention “.Copy.”

