Excel VBA Counter
There are various functions in MS Excel to count values, whether a string or numbers. Counting can be done based on some criteria. Functions in Excel include COUNT, COUNTA, COUNTBLANK, COUNTIF, and COUNTIFS in excel. However, these functions cannot do some tasks like counting the cells based on their color, counting only bold values, etc. That is why we will create a counter in VBA to count these tasks in Excel.
Let us create some counters in Excel VBA.
Examples of Excel VBA Counter
Below are examples of the counter in VBA.
Example #1
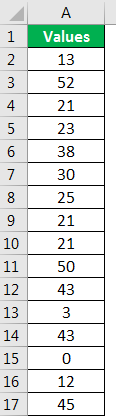
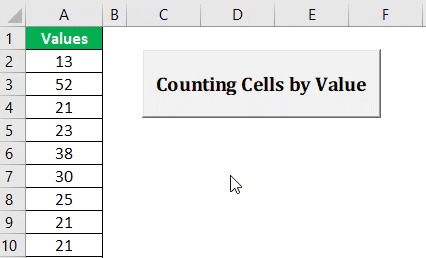
Suppose we have data like the above for 32 rows. First, we will create a VBA counter, which will count the values greater than 50 and one more counter to count the values less than 50. Then, we will create the VBA code so the user can have data for unlimited rows in Excel.
To do the same, the steps would be:
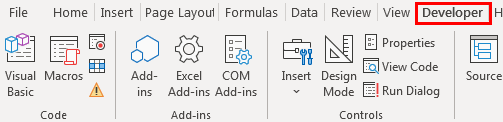
Make sure the Developer tab Excel is visible. To make the tab visible (if not), the steps are:
First, click on the ‘File’ tab in the ribbon and choose ‘Option’ from the list.
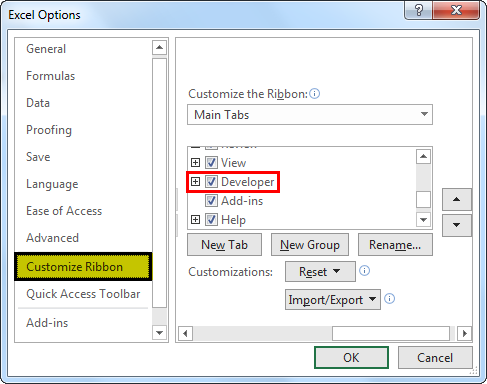
Choose ‘Customize Ribbon’ from the list, check the box for ‘Developer,’ and click on OK.
Now the ‘Developer’ tab is visible.
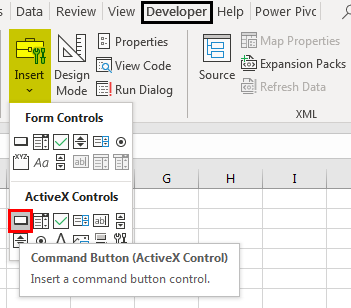
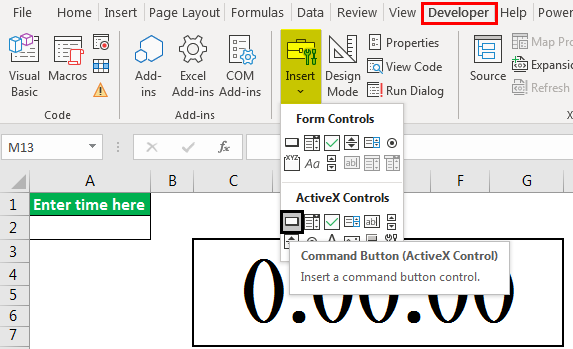
Insert the command button using the ‘Insert’ command available in the ‘Controls’ group in the ‘Developer’ tab.
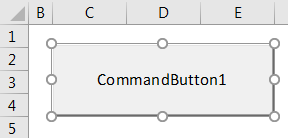
While pressing the ALT key, create the command button with the mouse. Then, if we keep pressing the ALT key, the edges of the command button go automatically with the border of the cells.
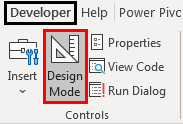
Right-click on the command button to open the contextual menu (make sure ‘Design Mode’ is activated; otherwise, we will not be able to open the contextual menu).
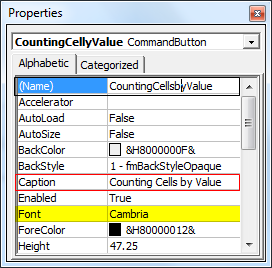
Choose ‘Properties’ from the menu.

Change the properties of the command button, i.e., Name, Caption, Font, etc.
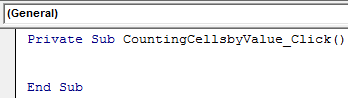
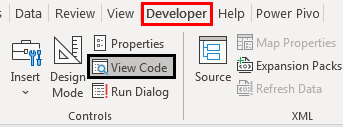
Right-click again and choose the ‘View Code’ from the contextual menu.

Visual Basic Editor opens now. By default, it creates a subroutine for the command button.
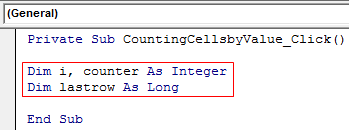
We will write code now. But, first, we will declare 3 variables. One for loop purposes, one to count, and one to store the value for the last row.
We will use the code to select cell A1 and then the current region of cell A1 and then get down to the last filled row to get the last filled row number.

We will run a ‘for’ loop in VBA to check the values written in the A2 cell to the last filled cell in the A column. We will increase the value of the ‘counter’ variable by 1 if the value is greater than 50 and will change the font color of the cell to ‘Blue,’ and if the value is less than 50, then the font color of the cell would be ‘Red.’

After checking and counting, we need to display the values. To do the same, we will use ‘VBA MsgBox.’

Code:
Private Sub CountingCellsbyValue_Click() Dim i, counter As Integer Dim lastrow As Long lastrow = Range(“A1”).CurrentRegion.End(xlDown).Row For i = 2 To lastrow If Cells(i, 1).Value > 50 Then counter = counter + 1 Cells(i, 1).Font.ColorIndex = 5 Else Cells(i, 1).Font.ColorIndex = 3 End If Next i MsgBox “There are ” & counter & ” values which are greater than 50″ & _ vbCrLf & “There are ” & lastrow – counter & ” values which are less than 50″ End Sub
Deactivate the ‘Design Mode’ and click on the ‘Command button.’ The result would be as follows.
Example #2
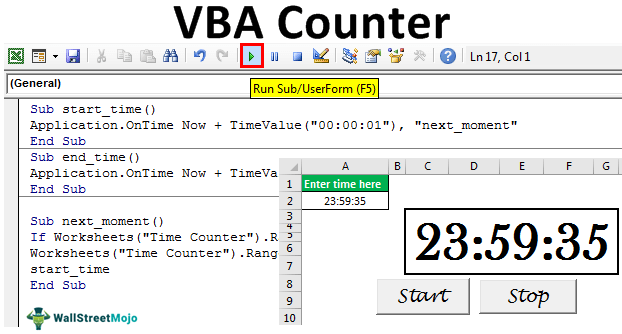
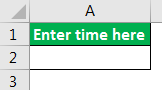
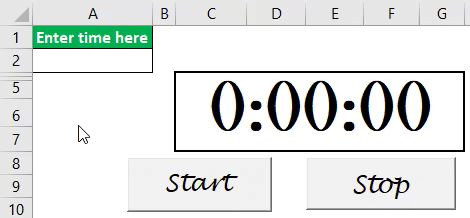
Suppose we want to create the time counter using Excel VBA as follows:
Then, if we click on the ‘Start’ button, the timer starts, and if we click on the ‘Stop’ button, the timer stops.
To do the same, the steps would be:
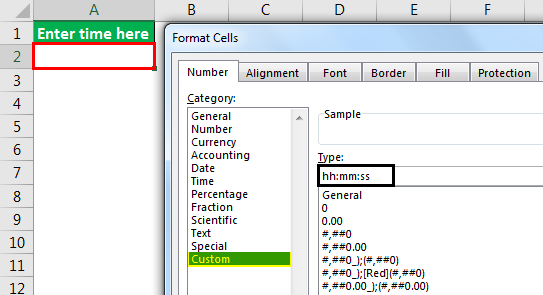
First, create a format like this in an Excel sheet.
Change the format of cell A2 to ‘hh:mm: ss.’
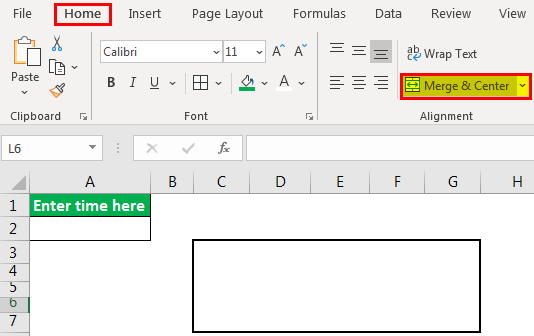
Merge the cells C3 to G7 by using the Merge and Center Excel command in the ‘Alignment’ group in the ‘Home’ tab.
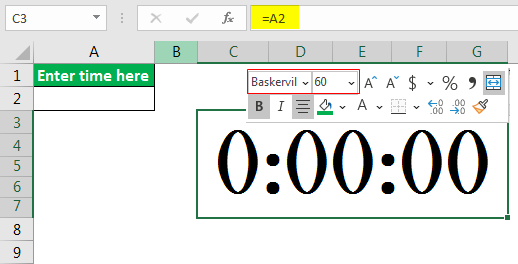
Give the reference of cell A2 for just merged cell and then do the formatting like make the font style to ‘Baskerville,’ font size to 60, etc.
Create two command buttons, ‘Start’ and ‘Stop,’ using the ‘Insert’ command in the ‘Controls’ group in the ‘Developer’ tab.
Change the properties using the ‘Properties’ command in the ‘Controls’ group in the ‘Developer’ tab.

Select the commands buttons one by one and choose the ‘View Code’ command from the ‘Controls’ group in the ‘Developer’ tab to write the code as follows.
Choose from the dropdown the appropriate command button.
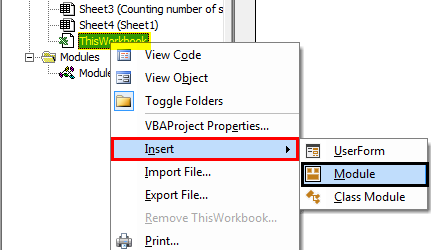
Insert a module into ‘ThisWorkbook‘ by right-clicking on the ‘Thisworkbook,’ then choose ‘Insert’ and then ‘Module.’
Write the following code in the module.
Code:
Sub start_time() Application.OnTime Now + TimeValue(“00:00:01”), “next_moment” End Sub Sub end_time() Application.OnTime Now + TimeValue(“00:00:01”), “next_moment”, , False End Sub Sub next_moment() If Worksheets(“Time Counter”).Range(“A2”).Value = 0 Then Exit Sub Worksheets(“Time Counter”).Range(“A2”).Value = Worksheets(“Time Counter”).Range(“A2”).Value – TimeValue(“00:00:01”) start_time End Sub
We have used the ‘onTime‘ method of the Application object to run a procedure at a scheduled time. The procedure we have scheduled to run is “next_moment.”
Save the code. Write the time in the A2 cell and click on the ‘Start’ button to start the time counter.
Example #3
Suppose we have a list of students along with marks scored by them. We want to count the number of students who passed and who failed.

To do the same, we will write the VBA code.
Steps would be:
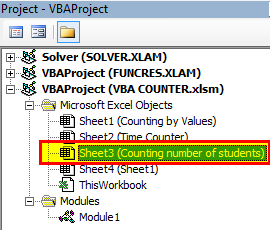
Open Visual Basic Editor by pressing the shortcut in excel Alt+F11 and double click on ‘Sheet3 (Counting Number of students)’ to insert a subroutine based on an event in Sheet3.
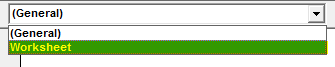
Choose ‘Worksheet’ from the dropdown.
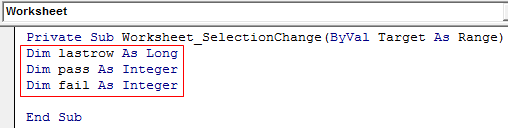
As we pick ‘Worksheet’ from the list, we can see various events in the adjacent dropdown. But, first, we need to choose ‘SelectionChange’ from the list.
We will declare the VBA variable ‘lastrow’ for storing the last row number as a list for students can increase, ‘pass’ to store several students who passed, and ‘fail’ to store several students who failed.
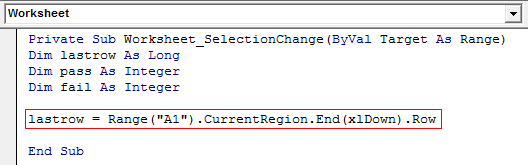
We will store the value of the last row number in ‘lastrow.’
We will create the ‘for’ loop for counting based on condition.
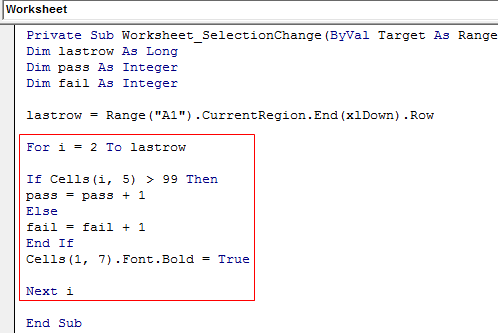
We have set the condition if the total marks are greater than 99, then add the value 1 to the ‘pass’ variable and add one value to the ‘fail’ variable if the condition fails.
The last statement makes the heading ‘Summary’ bold.
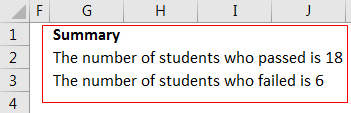
To print the values in the sheet, the code would be:

Code:
Private Sub Worksheet_SelectionChange(ByVal Target As Range) Dim lastrow As Long Dim pass As Integer Dim fail As Integer lastrow = Range(“A1”).CurrentRegion.End(xlDown).Row For i = 2 To lastrow If Cells(i, 5) > 99 Then pass = pass + 1 Else fail = fail + 1 End If Cells(1, 7).Font.Bold = True Next i Range(“G1”).Value = “Summary” Range(“G2”).Value = “The number of students who passed is ” & pass Range(“G3”).Value = “The number of students who failed is ” & fail End Sub
Now, whenever there is a selection change, values will be calculated again as below:
Things to Remember
- Save the file after writing code in VBA with the .xlsm excel extension. Otherwise, the macro will not work.
- We must use the ‘For’ loop when we have already decided how many times the code in the VBA loop will run.
Recommended Articles
This article has been a guide to VBA Counter. Here, we discuss how we will create a counter in excel VBA to count cells based on color, counting only bold values, etc. Below you can find some useful Excel VBA articles: –