Table Of Contents
What Is AutoSave In Excel?
AutoSave in Excel is a function/facility used to save the changes or progress of work automatically. So, it will help us reduce the impact of risk in data loss in case of any crash situation in the system. We can find this feature in the "Options" tab under the "Save" section. So, for example, if we input the time as 5 minutes, Excel will automatically save our workbooks every five minutes.
Table of contents
- AutoSave in Excel automatically saves changes made to a workbook, reducing the risk of data loss in case of a system crash. To access this feature, go to the "Options" tab and select the "Save" section. Input a time interval, such as 5 minutes, to enable automatic saving at that interval.
- AutoSave in Excel saves time and data by automatically saving your work at regular intervals. Once enabled, you can't close the document without saving it.
- It allows multiple users to edit the document simultaneously and automatically updates changes to SharePoint or OneDrive.
How To Turn On/Enable AutoSave In Excel?
Usually, "Autosave" is enabled in Excel by default. So let us see how to turn on "Autosave" options in Excel.
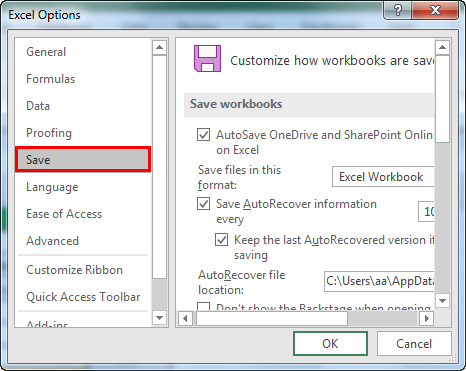
- We must go to the “File” menu. Then, click on “Options.”
- Excel options will pop out with many options to manage as per our necessity. Next, we must click on the “Save” option – This will take us to "Customize how workbooks are saved."
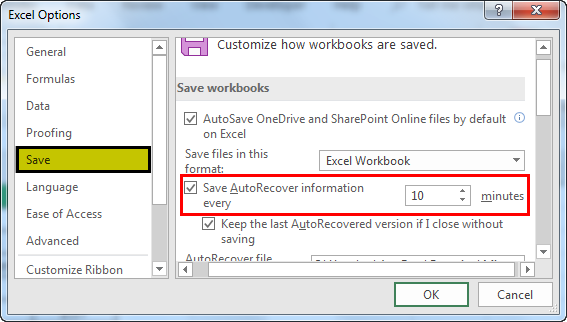
- We can see that “Save AutoRecover information every __ minutes” is enabled from this window. It is where we are notifying Excel to save the workbook for every "n" minute (n could be any number representing no-of minutes in time). By default, Excel will take 10 minutes to perform "AutoRecover," but we can change this time as per our requirement, such as 1,2,3 minute.
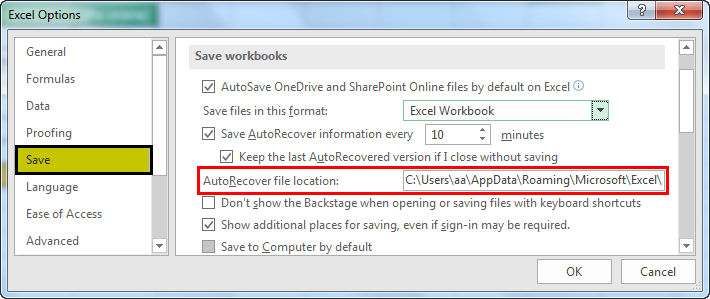
- Suppose you enable it and cannot save it. In that case, it will store it in this path: “C: Users AppData Roaming Microsoft Excel” (this path varies for everyone as their recovered Excel autosave location will be different. Therefore, request all to check for this AutoSave location in Excel options – Save.
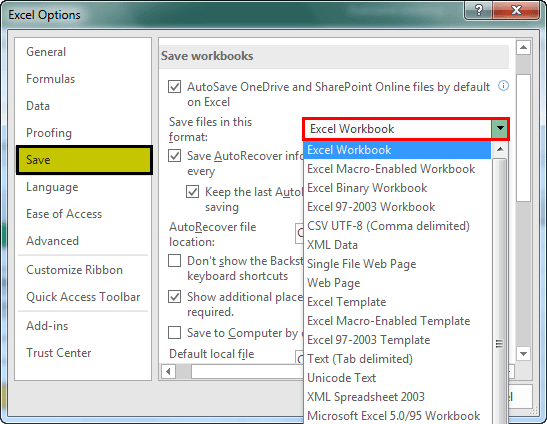
We can also change the folder to save the backups by entering a different path into the “AutoRecover file location.” - We can automatically select a specific format when saving our workbooks by selecting the format from the list of available Excel formats.
The format would be “Excel Workbook (*xlsx).” Most users used this. And also, make sure we turn on the “Keep the last autosaved excel version if I close without saving. - We also can avoid saving the workbooks in one drive-by by enabling “Save to Computer by default” as follows:
We had learned how to turn on AutoSave in Excel, time to be given to performing the task periodically, and many other features that we got.


How To Turn OFF/Disable AutoSave In Excel?
Similar to turning on or enabling AutoSave in Excel, we can also disable AutoSave in Excel. The steps are:
- First, click on File - Options - Excel Options.
- Next, select Save tab available in the right side of the window.
- Now, click on Save Workbooks, unselect AutoSave files stored in the Cloud by default in Excel.
- Finally, click on OK.
Likewise, we can turn off or disable AutoSave in Excel.
How To Recover The AutoSaved File?
Now, let us see how to recover the file which got AutoSaved. As you can observe, the file path we had given in the “AutoRecover file location” copied the path.
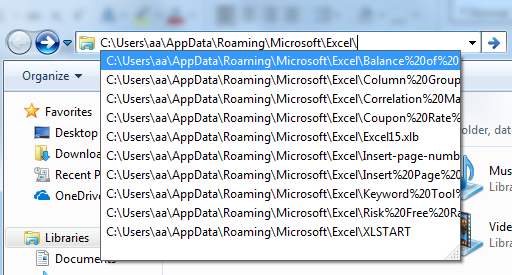
Step 1 – Now, open Microsoft Explorer. At the top of the bar, we should paste the path that we had copied from the “AutoRecover file location” and then press "ENTER."
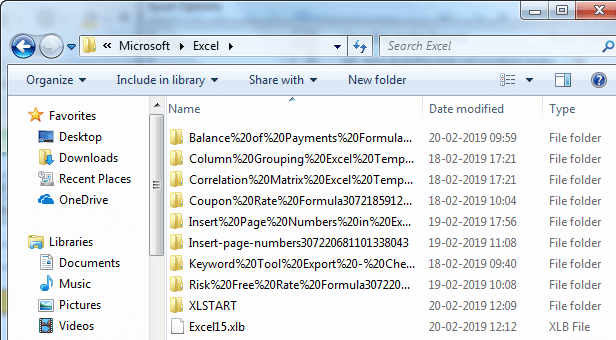
- Step 2 – A window with files and folders that are AutoRecover will be displayed. From this window, we can click on the file that we want to be recovered. Then, we can keep the changes and save the workbook with a new name. Once we enter the path, the below window will pop out.
From here, we can recover the files which are not saved, and our work and time do not go in vain by enabling the autosave in Excel.
How To Turn On Autosave By Visual Basic Application (VBA)
Let us see how to code using Excel Macro will help us perform autosave in the Excel workbook.
- Step 1 - Open “Visual Basic Editor” from the Developer tab in your Excel as below.
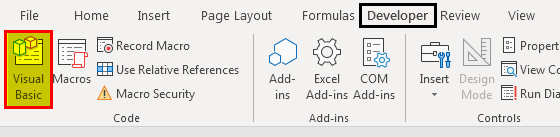
- Step 2- When we click on the “Visual Basic,” we can visualize a VBA editor. That is where we have to write code to perform the autosave operation.

- Step 3 – Here, we will not create any module for our operation to perform as this is an “Event” where we will write a macro. For example, if we open a workbook, an event is anything like it will be considered an event. Similarly, if we made changes in the workbook, it is also an event, closing the workbook is also an event, etc.
- Step 4 – We assume “closing the workbook” as an event for the autosave operation. So, open “ThisWorkbook,” which is on the left side of the page, and start writing a macro.
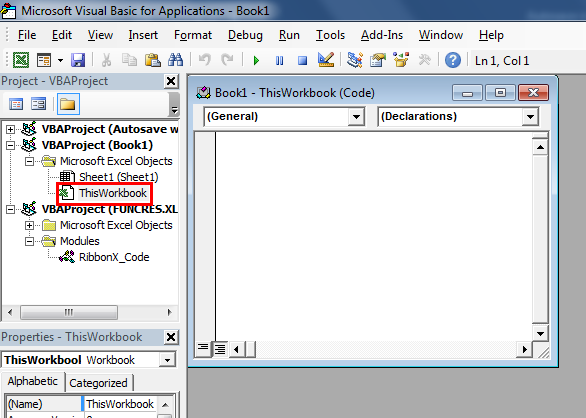
- Step 5 – As we open the “Thisworkbook,” we can see the “General” and change it to “Workbook” as follows.

- Step 6 – When we change to a workbook, It gives an option to write a macro in an event “Workbook_Open().” There is a list of declarations that we can use to create an event on our right side. Here, we will perform a task for autosave in Excel, so we have to change the event to “BeforeClose.”
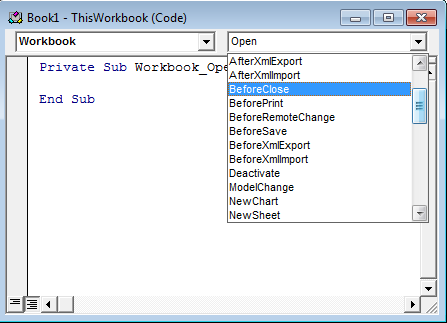
- Step 7 – Select “BeforeClose” and start writing the code for AutoSave in Excel.
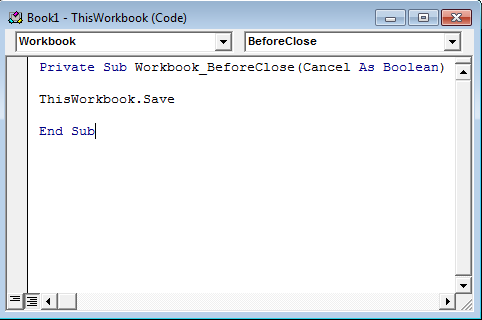
- Step 8 – “ThisWorkbook.Save” will automatically save the workbook and save it as a macro-enabled workbook to run the code as below:
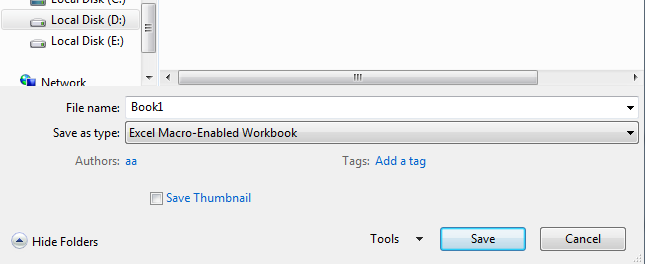
- Step 9 – Save this workbook as a macro-enabled and close the workbook. Then, we can observe that the display alert asking for save or do not save would not get pop out, but some other warning alert will pop out, which is as below:

Step 10 – Once you click on "OK," the workbook with changes will get AutoSaved. We can also disable this alert by using some code in VBA, which saves a workbook automatically in a simple way.
Let us see how it works:
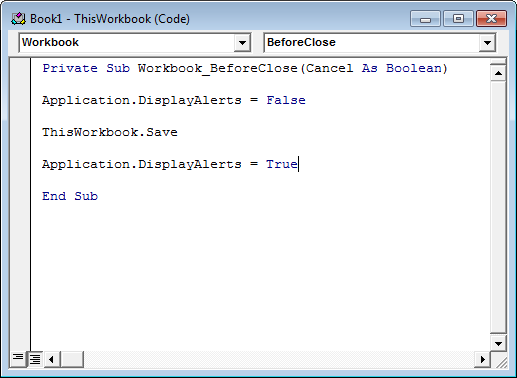
These warning messages will come through an application, so we take “Application.DisplayAlerts = False.” Any display alert will not pop out once this line is included in the code. But it is also important to include a line of “Application.DisplayAlerts = True” as this helps when something important displays an alert pop out.
Now, try to make changes and close the workbook. We can observe that none of the display alerts will pop out, but changes will get saved. This operation will help us protect our work though we unexpectedly close the workbook without saving it.
AutoSave Not Working In Excel
We all know AutoSave helps users save their data in Excel, automatically. Now, sometimes, AutoSave might not work properly.
We can fix this by selecting File > Options > Save and then, select AutoSave box.
We have to make sure the AutoSave box is checked to ensure our data is saved automatically.
Important Things To Note
- AutoSave in Excel is a splendid feature that saves time and data periodically.
- Once we enable the autosave in Excel, we cannot close without saving, which may mislead us though we do not want to save the data.
- It always monitors the user’s work and updates the changes in content to share points or one drive.
- It also allows multiple people to edit the document simultaneously.
Frequently Asked Questions
To launch Excel 2007, click on the Office button located on the left side of the ribbon. From there, select "Excel Options" and click on "Save" in the left panel. Check the "Save AutoRecover Information" option and enter the desired autosave interval in the "minutes" box. Finally, click on the "OK" button to save the changes.
AutoSave is a feature that automatically saves your work as you go when you're working online. Even if you lose your internet connection or turn it off, any changes you make will be synced as soon as you're back online. However, please note that AutoSave is not available when you're editing a file simultaneously with others.
There are several Excel shortcuts available for the "Save As" option. These include adding it to the Quick Access Toolbar, using the F12 key, or pressing the keyboard shortcut CTRL+S (to save the file for the first time). When using these shortcuts, the "Save As" dialog box will open, allowing you to save the file in the desired format and location.
Recommended Articles
This article has been a guide to AutoSave in an Excel file. Here, we discuss how to turn on AutoSave in Excel using Excel options and VBA (Visual Basic Application) and examples. You may also look at these useful functions in Excel: -
