How to Insert Date in Excel?
In Excel, every valid date is stored as a form of the number. One important thing to be aware of in Excel is that we have a cut-off date of “31-Dec-1899”. Therefore, every date we insert in Excel will be counted from “01-Jan-1900 (including this date)” and stored as a number.
Examples
Here, we will learn how to insert a date in Excel with the help of the examples below.
Example #1 – Date Stored as a Number
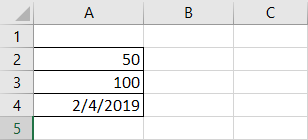
In the Excel sheet, let us take 50, 100, and today’s date, 30/01/2019.
Now, we can observe how data is stored in Excel when we change the formatting of the above data to date and accounting format.
50 – Change format to short date
100 – Change format to short date
30/01/2019 – Change format to accounting as it already in date format

If we observe the number 50 has been changed to date. It displayed exactly 50 days from 01/01/1900 (including this date in the count). Similarly, for the number 100, the date indicated in the exact count from 01/01/1900. And the third observation, which is already in date format and we changed to number format, displays “43,495.” So, today, 30/01/2019 is 43,495 days away from the cut-off date.
Example #2 – Inserting Specific Date in Excel
To insert a specific valid date in Excel, we must use DATE().
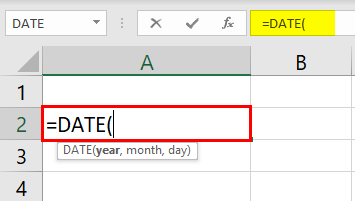
In the above function, we can observe that DATE asks to provide “year,” “month,” and “day” values. As we give the details of it, then this displays the date in default format as below:

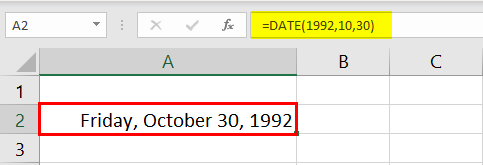
In the above example, we had given the “year” as 1992, “month” as 10, and “day” as 30. But, the output is displayed as per the default format.
Example #3 – Changing the Inserted Date Format in Excel
As seen in our earlier examples, we have displayed the date in a pre-defined format. To change the date format, we should go to “Format Cells.” Let us see how we can do it:
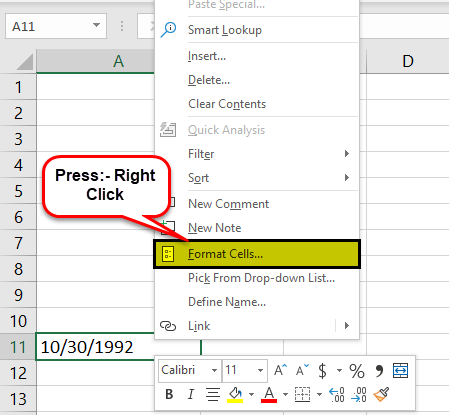
To access the “Format Cells,” we should right-click on the “Date” cell. Then, the above list of operations will pop out. Here, we must select the “Format Cells,” which may take us to the “Format Cells” window.

We got the list in a different format for the date as above. So, let us select one of the formats and see how the format got changed as below.
It is an important formatting feature that helps select dates as per their required format for different organizations.
Example #4 – Insert List of Sequential Dates in Excel?
If we want to list out of the sequential dates, we can select the start date, dragging it down until we reach the end date as per your requirement.
We must insert the date manually (do not use DATE()).

And drag it down as below.

Here we got the list of dates in a sequence from the starting date.
Example #5 – Insert Dates with NOW() and TODAY() Excel Function
To get the present-day date, we can use TODAY() and get the present day and the current time. Then, we should go with the NOW() Function. Let us see the example below:

We also got a keyboard shortcut instead of the formulas.
We should use the “Alt +” shortcut instead of the TODAY() Excel function to get the present date.
We should use the “Alt + Shift + ” shortcut instead of the NOW() Excel function to get the present date along with the time.
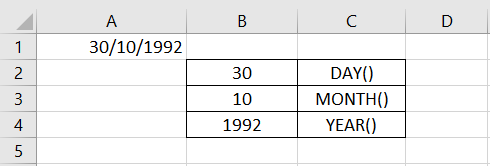
Example #6 – How to Extract Selective Information from the Inserted Excel Date Values.
There are three important functions in Excel that help us extract the specific information from the date. They are:
Example #7 – Using TEXT() for Inserting Dates in Excel
TEXT() is one of the very important formulas for the presentation of data into a certain desired custom format.
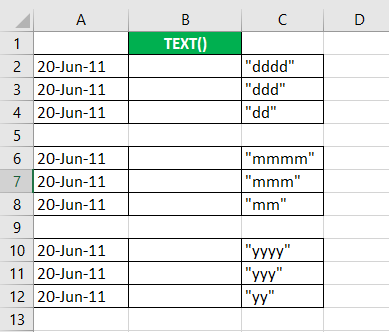
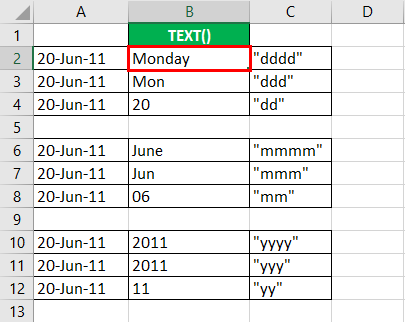
Let us assume the dates as per the above example. We can get the day, month, year, and per the formats mentioned in the third column.
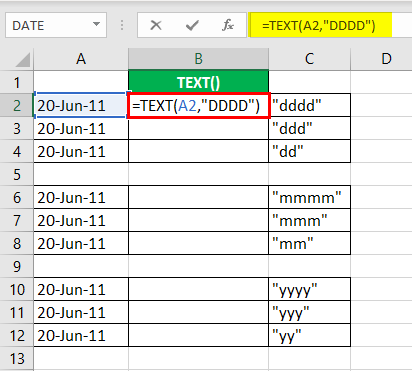
Using the TEXT() as above, we can derive as per the format required.
We can also use the TEXT() in changing the date format as per our requirement. We can avoid going to “Format Cells” and changing the format. It will also reduce the time consumption when changing the format.
Let us see how we can change the format using the TEXT().

TEXT() will also help us in concatenating with a date.
However, when we try to concatenate without using the TEXT() then, it may display the number instead of the date as below:
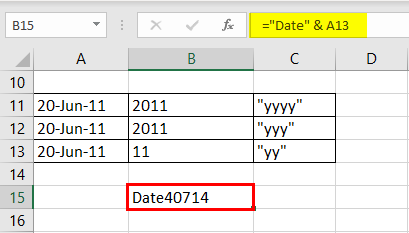
By using the TEXT(), we can concatenate with an actual date as below:

How to Change the Format of the Inserted Date in Excel?
If we observe from the above example, the date is in the form of MM/DD/YYYY. Suppose we want to change the format, then we can do it as per below:
We should go to the “Control Panel” and select ” Ease of Access.” Then, we can visualize the option of the clock, language, and region.
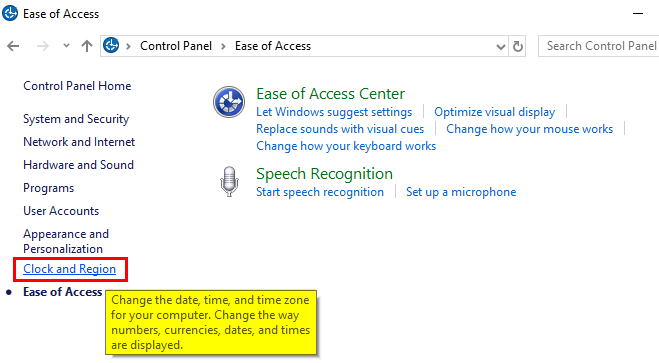
Click on the above option. It will pop out to other windows where we can get a choice of the region and go on that.

Here, we can select the date format as per our requirement, short date or long date. It will be the default setting of the date once we apply it. If we want to go to the previous format, we can reset it on the window.
Things to Remember
Inserting a valid date in excel should always be stored as a number. We can verify this condition by using ISNUMBER().
Let us take the date in two different formats, as shown above. Inserting a valid date in Excel should always be stored in the number format, so we need to verify the same.
As we check for the number using the ISNUMBER(), function, the date which is stored in the form of the number and a valid date will be “TRUE” or else “FALSE.”
In our example above :
- 30/01/2019 – This is TRUE as it is stored in the form of a number, and this date is valid
- 30.01.2019 – This is FALSE, as it is not stored in the form of the number, and it is not valid.
Recommended Articles
This article is a guide to Insert Date in Excel. Here, we discuss how to insert dates in excel along with the top 7 examples using a combination of the DATE(), NOW(), TODAY(), and TEXT() functions. You may also look at these useful functions in Excel: –