Table Of Contents
Create and Insert Calendar in Excel
Inserting a calendar is a useful feature provided by Excel. It will become more useful when working on a shared worksheet where you will often have to enter dates. It will help you reduce your time doing manual entries, remember the format, etc.
Inserting a calendar in Excel will help you to resolve these problems. First, you need to insert a dropdown calendar and select the date from them.
Table of contents
Steps to Insert & Create Calendar in Excel
Following are the ways to insert and create a calendar in Excel:
#1 - Inserting Calendar based on Templates available in Excel
There are several Excel Calendar templates available in Excel. You can choose any of them according to the requirement by following the below steps.
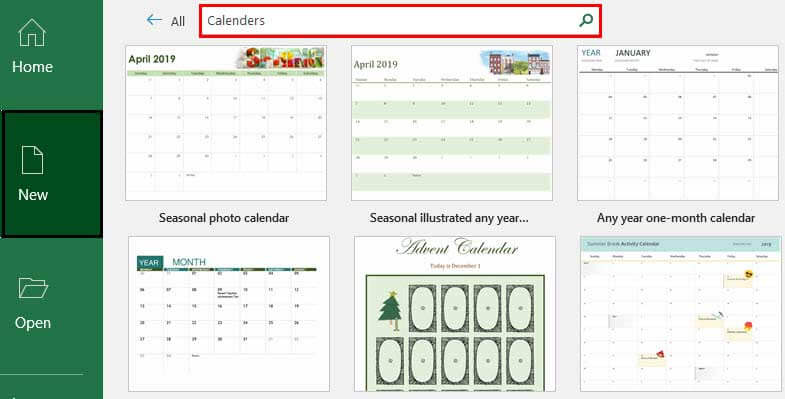
Click on "Files" and select "New Search" for the calendar in the search box. It will show you several Excel calendar templates by categories, "Seasonal photo calendar," "Academic Calendar," "Any Year Calendar," etc. In addition, you may see the screenshot below to learn how to insert free Excel calendar templates.
#2 - Inserting Seasonal Photo Calendar in Excel
Click on the "File" and select "New Search" and “Seasonal photo calendar” from the search box.
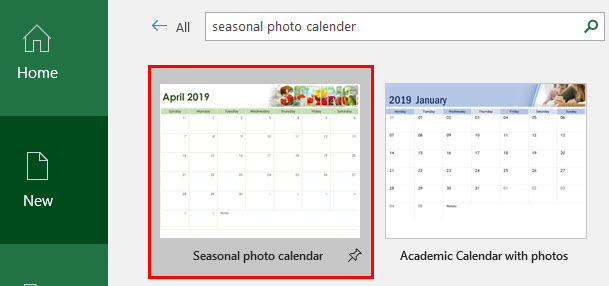
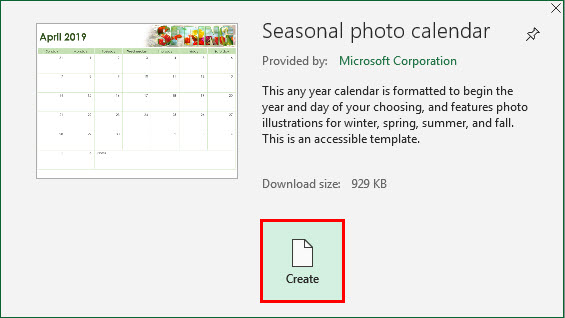
Select the calendar and click on "Create."
It will look like this.
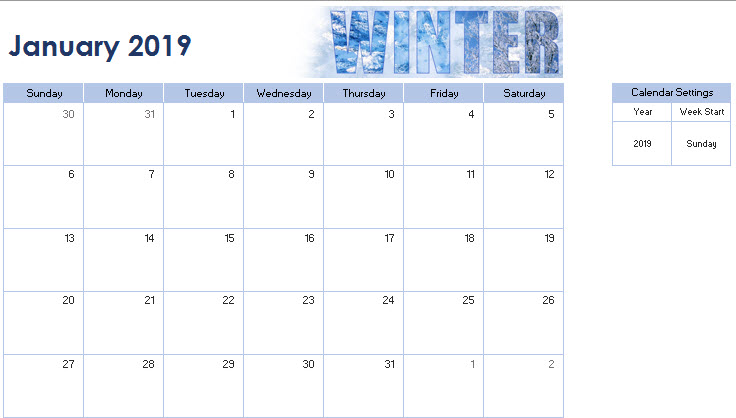
Now, we must insert a year below the "Year" cell. Then, it will automatically update the calendar for that year.
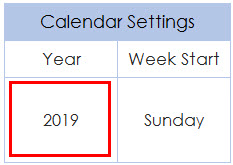
All the 12 sheets with the month names will be updated according to the year entered in the January sheet. In addition, the "Week Start" date can be selected as "Sunday" or "Monday" (This will update the first cell of the calendar as "Sunday" or "Monday").
Note: Enter formula =YEAR(TODAY()) in a cell below the "Year" cell. It will show you the current year's calendar whenever you open it.
We can follow the above steps, search the calendar from the Excel online template, and start working on it according to the requirements.
Want to know more about these functions -
- Year Function in Excel
- Today Function in excel
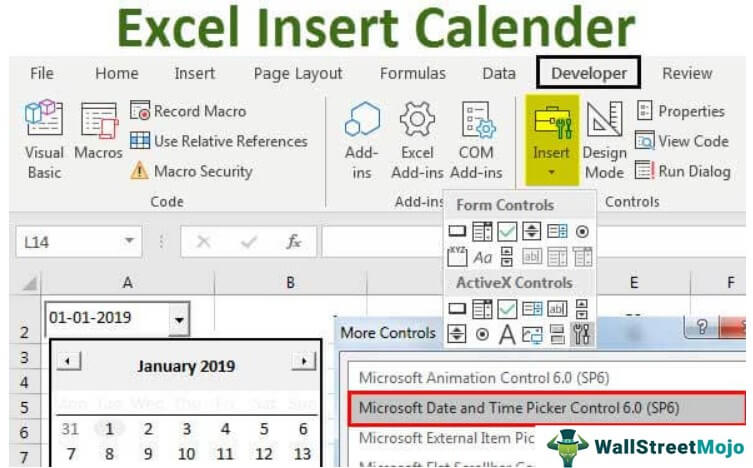
#3 - Using Date Picker Control
The "Date Picker" control is "ActiveX Controls," found under the Excel Developer Tab. However, it is normally hidden and cannot be seen directly under "ActiveX Controls." Therefore, you need to explore the "ActiveX Controls."
Below are the steps to enter Date Picker control:
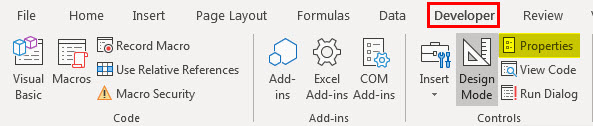
First, check if the "Developer" tab is in the "Menu" bar. If you cannot see the "Developer" tab, then follow the below-given steps.
- First, we must go to the "File" menu and click "Options."
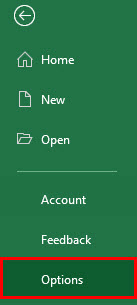
- Then, select "Customize Ribbon" in Excel and check the "Developer (Custom)" option.

We may see the "Developer" tab in the "Menu" bar. - Now, click on "Insert" under the "Developer" tab (It will look like the setting button).

- A dialog box (More Controls) will open as below. Search for "Microsoft Date and Time Picker Control 6.0 (SP6)" and select it. Click "OK."

- Select "Microsoft Date and Time Picker Control 6.0 (SP6)." It will enter a "Drop-down" calendar.

- We can select the desired date, whatever we would like to choose. But, first, we must turn off the "Design Mode."


We can move the calendar to the desired cell. But, first, we must right-click on the date picker and move it to the selected cell.
Example of Date and Time Picker
Below is an example of using a date and time picker.
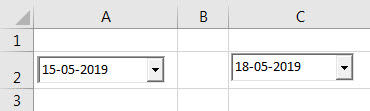
Suppose we need to get the difference between two dates. We must insert one date picker in cell A2 and another in cell C2.
Excel cannot recognize the value of a date picker control. Link the date picker controls to certain cells in the following way to fix this:
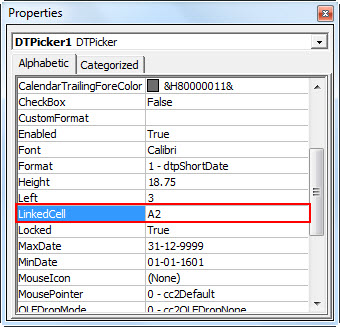
We must first select the date picker. Then, under the "Developer" tab, click on "Properties."
In "Properties," at "LinkedCell," type A2. It will link the date picker control to the A2 cell.
Similarly, link the second date picker to cell C2.
Now, we must insert the formula =C2-A2 in Cell E2. Then, finally, select the date from both date pickers.

We have selected 01/01/2019 in "Date picker 1" and 23/02/2019 in "Date picker 2." Now, we must put the formula =C2-A2 in cell E2.
It will calculate the difference between the selected dates.
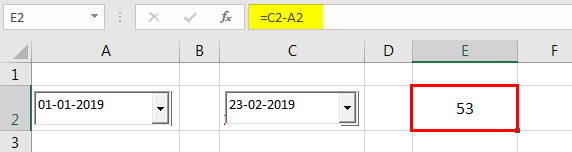
Calculate the days between both dates. The result is 53.
We do not need to worry about the format and do not care about manual date writing. We need to click on the dropdown list in excel. It will show the calendar. We need to select a date from them.
How to Install Third-Party Add-ins for Excel Calendar?
We must go to Google, search for the given third-party Add-ins, then download and install them.
After installation, we can see the third-party Add-ins in the Excel "Menu" bar.
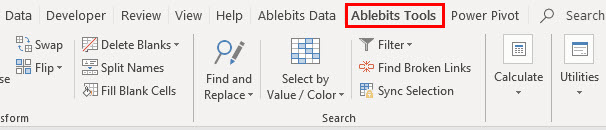
The above image is a screenshot of "Ablebits Tools."
Under "Ablebits Tools," click on "Date Picker." It will activate "Date Picker."

Now, enter any date in desired cells. A date picker pop-up may show at the top right corner of that cell.
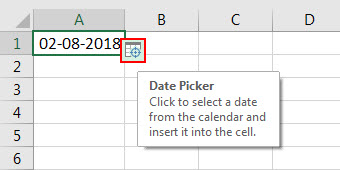
Click on the pop-up, select the desired date, and start working.
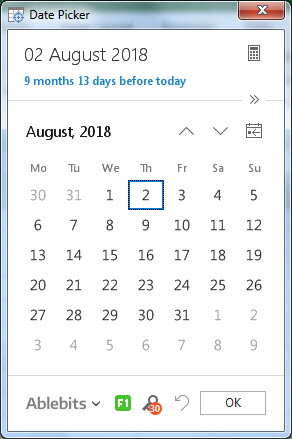
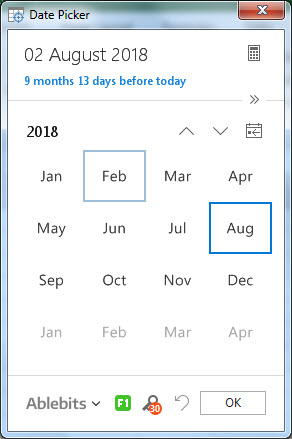
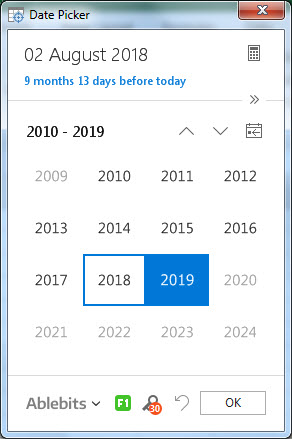
Ablebits Date Picker Tools Additional Options
Use ^ to go to the previous month and another button to go to next month. For example, click “August 2018” to select another month or year instead of moving months.
Things to Remember
- Microsoft "DatePicker" and "TimePicker" are only available on 32-bit Windows.
- Suppose we are using a 64-bit version. We cannot use the "DatePicker" and "TimePicker."
- For a 64-bit version, we must use third-party external Add-ins Tools for your Excel.
- Some third-party Add-ins available are Excel Date Picker, "Ablebits Date Picker," "Popup Calendar Add-ins," etc.
- Installing third-party Add-ins is very easy and user-friendly. Just download and install it, and we are all set to use the tool.
Recommended Articles
This article is a guide to Excel Insert Calendar. We discuss inserting and creating a calendar in Excel using various date picker controllers and third-party Add-ins. You can learn more about Excel functions from the following articles: -
