Table Of Contents
How to Insert Multiple Rows in Excel?
To insert multiple rows in Excel, we must first select the number of rows. Then, based on that, we can insert those rows. Once the rows are inserted, we can use the F4 key to repeat the last action and insert as many rows as needed.
Top 4 Useful Methods to Insert Rows in Excel (Discussed with an Example)
- Insert Row using INSERT Option
- Insert Multiple Rows in Excel using Short Cut Key (Shift+Space Bar)
- Insert Multiple Rows Using the Name Box
- Insert Multiple Rows Using the Copy & Paste Method
Let us Discuss each method in detail along with an example -
Method #1 - Using INSERT option
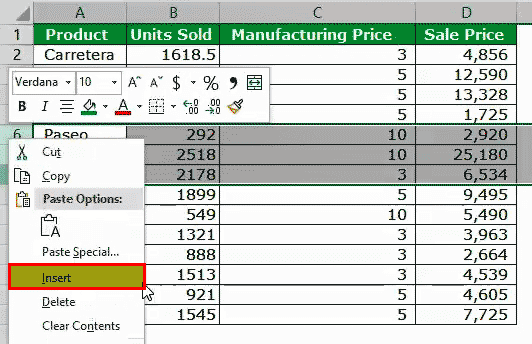
We need to select the row first, but it depends on how many rows we insert. For example, if we want to insert two rows, we need to select two rows. If we need to insert three multiple rows, we need to choose three rows, and so on.
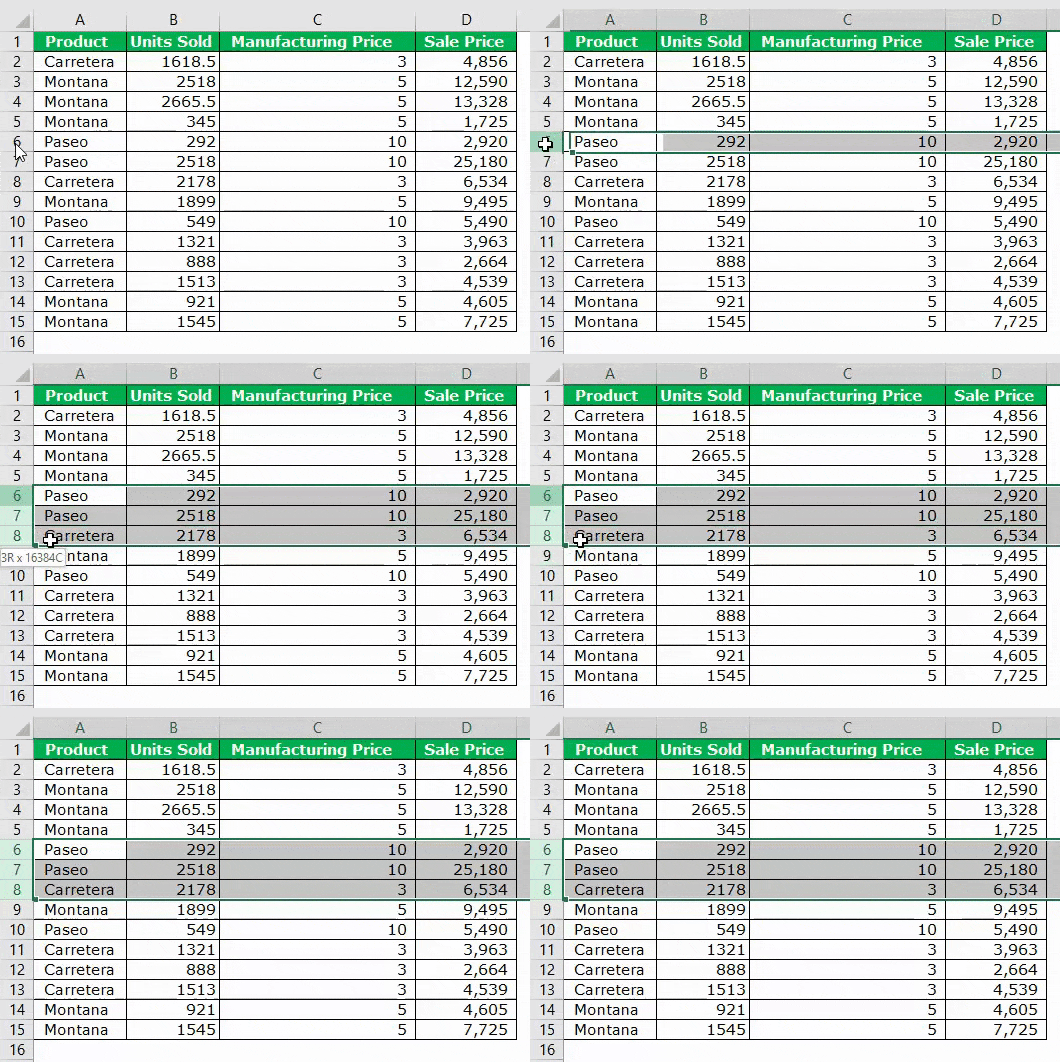
In the above image, we have selected three rows, and now we will right-click on the column header and click on "Insert." It would insert three multiple rows in a single shot.
Method #2 - Using Excel Short Cut (Shift+Space Bar)
Below are the steps to insert rows in Excel using the Excel shortcut (Shift + Spacebar).
- We must first select the cell above which we want to insert the row.

- We must use the shortcut key to select the entire row instantly. The shortcut keyboard key is "Shift + Spacebar."

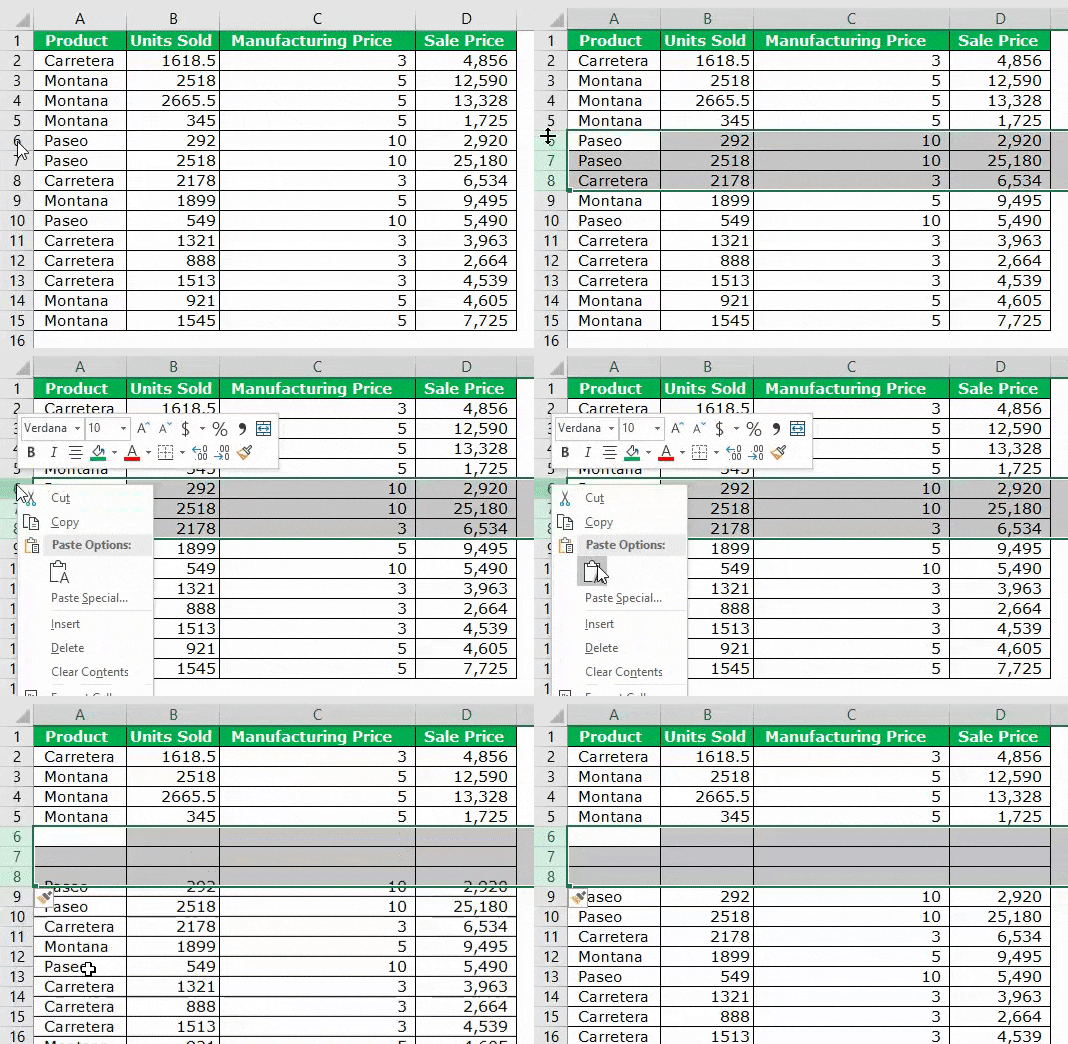
- If we want to insert two to three rows, select those many rows by using the "Shift + Down Arrow" key. In the below image, we have chosen four rows.

- Now, we must click on another keyboard "Ctrl + "(plus key) shortcut key to insert a row in Excel.

Now we have inserted four multiple rows. Suppose we need to insert another Four rows; Click on Ctrl + if the rows are selected, or instead, we can use the key F4, which repeats the previous action in excel.
Method 3: Using the Name Box.
Suppose we need to insert 150 rows above the cell we have selected. It will take some time because we need to choose those many rows first and then insert them using the Excel shortcut.
Selecting 150 rows instantly is not possible in the above two methods. We can select those name box in excel.
- Step 1: Select the cell above we need to insert rows.
- Step 2: We must mention the row range on the name box. We have mentioned 5:155 because we have to insert 150 rows in this case.
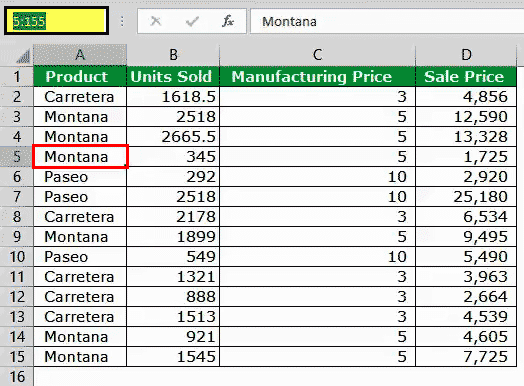
- Step 3: After typing the range, hit the enter key; this will select the cells from 5:155 instantly.
- Step 4: Once the range is selected, we must use the "Ctrl +" shortcut key to insert a row in Excel. It will insert 150 rows in just a click.
Alternative Shortcut Key to Insert Row in Excel: ALT + H + I + R is another shortcut key to insert a row in Excel.

Method 4: Using the Copy & Paste Method
Microsoft Excel is so flexible. For example, can you believe we can insert rows by copy-paste?
Yes! You heard it right. We can insert rows just by copying and pasting another blank row.
- Step 1: Select the blank row and copy.
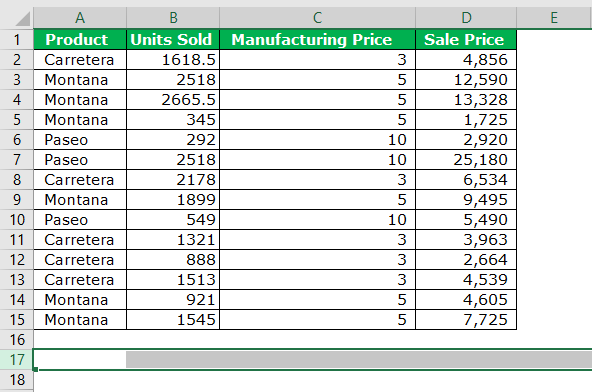
- Step 2: Now select the cell above you want to insert rows.
- Step 3: Once the desired cell is selected, select the number of rows you wish to insert and right-click and choose Insert Copied Cells.
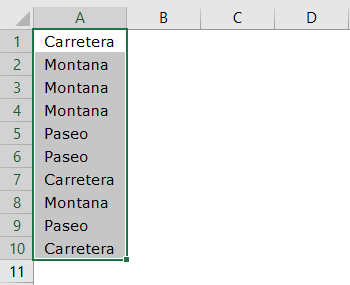
Case Study: I have data from A1: A10, as shown in the below image.
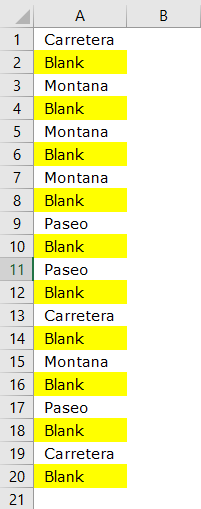
We want to insert one blank row after every row, as shown in the below image.
Alternative Coolest Technique
In the above example, we have only ten rows. What if we have to do it for 100 cells? It will take a lot of time. However, we have the coolest technique you have ever seen.
Follow the below steps to learn.
- Step 1: First, Insert serial numbers next to the data.
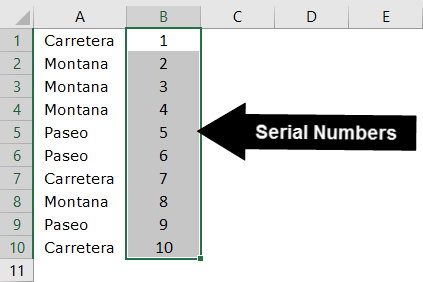
- Step 2: Copy those serial numbers and paste them after the last serial number.
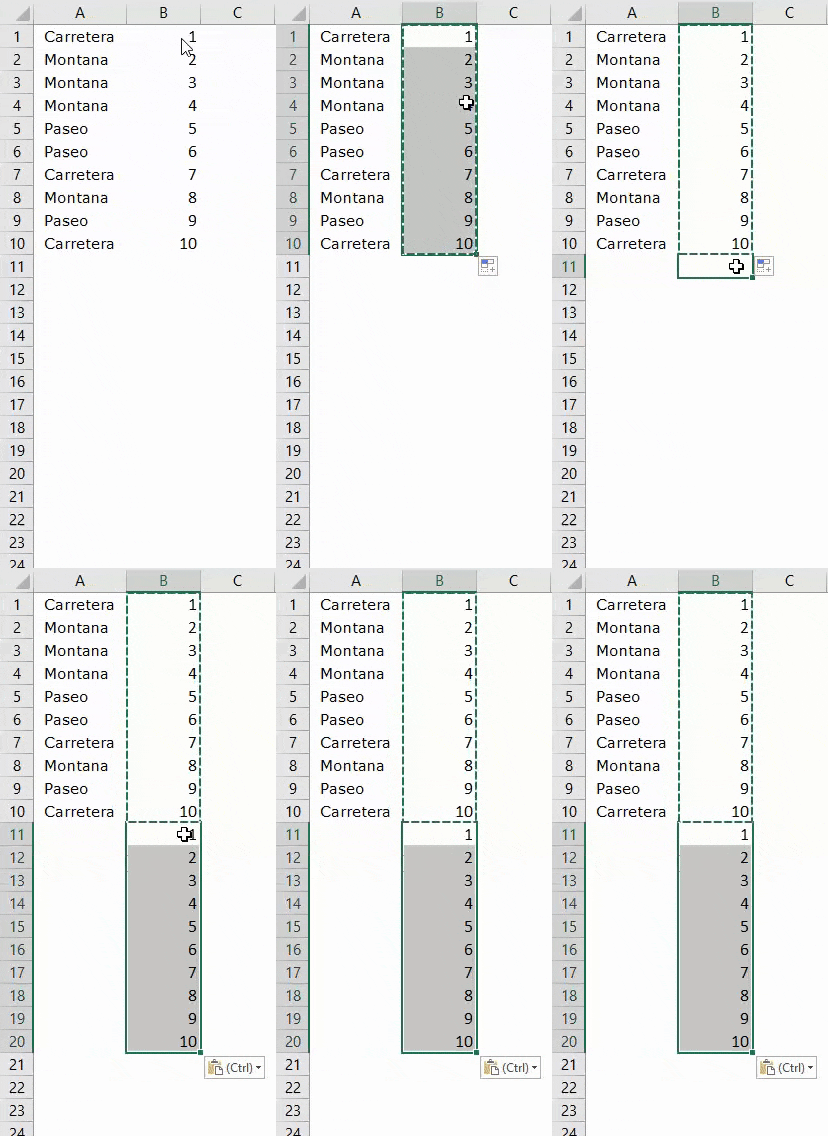
- Step 3: Now, select the entire data, including serial numbers, and press Alt + D + S.
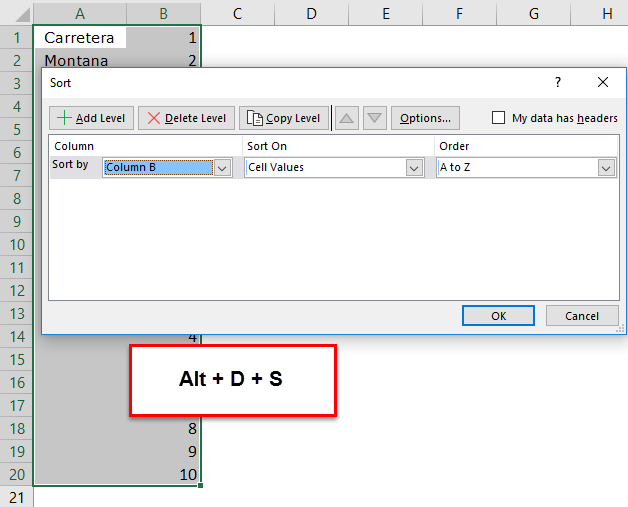
- Step 4: Select the second column from the dropdown list and ensure the smallest to highest is selected.
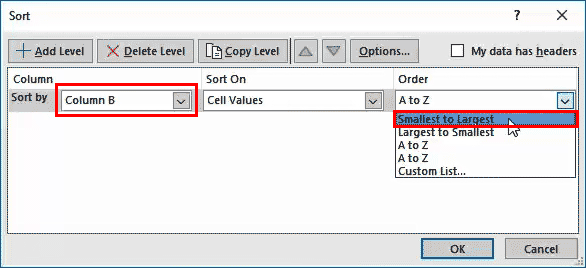
- Step 5: Now, click on the Ok. This would instantly insert the blank row after every row.
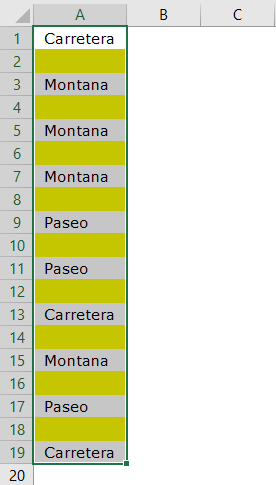
Amazing. Probably the coolest and the most intelligent technique you have learned to date.
Things to Remember
- The shortcut key to insert a row in excel is "Alt + H + I + R, Ctrl +."
- We must always insert new rows after selecting the entire row (s) first. Otherwise, there are chances that the data may shuffle.


