Part of our Excel Basics guide
What Is Insert And Embed An Object In Excel?
In Microsoft Excel, the “Object Insert” option allows a user to insert an external object into a worksheet. Embedding generally means inserting an object from another software (Word, PDF, etc.) into an Excel worksheet. This option is useful for direct access to files related to your worksheet data from within your worksheet space. In addition, the inserted object works as a ready information source or reference for a dataset in an Excel worksheet.
For example, consider the below table showing the project and its respective team lead. Now, let us learn how to embed the details of the project in Excel.

We can insert an object in Excel using the following steps.
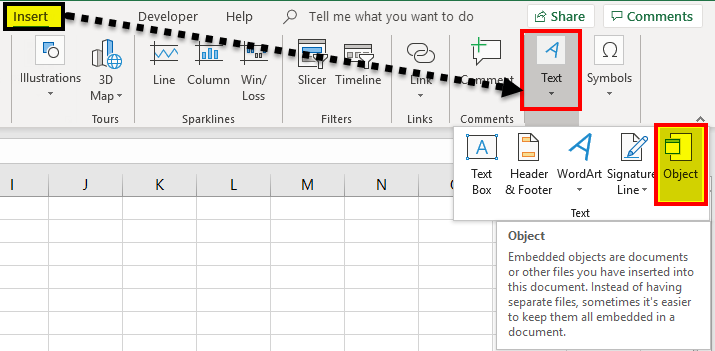
Step 1: First, select Insert > Text > Object.
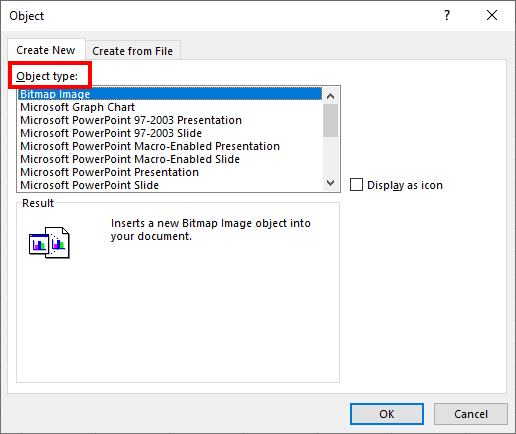
The Object window appears.
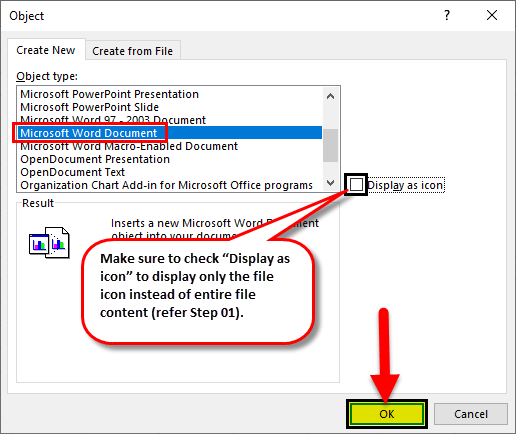
Step 2: Here, select the Object Type:. In this example, let us select Microsoft Word Document. Next, select Display as icon.
Step 3: Press OK.
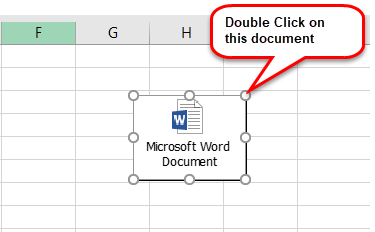
We can see the Microsoft Word Document’s icon embedded in the Excel sheet.
Whenever we click on the icon, the Word document opens up.

Likewise, we can insert object in Excel.
Key Takeaways
- Insert (embed) object in Excel helps users insert an object or file in a worksheet.
- As soon as we insert an object in Excel, its connection to the source file will be lost, so make sure to make all required changes to the original file before embedding it.
- However, we can also update the embedded file’s content by double-clicking the file icon or embedded content.
- When sending an embedded file to someone else, ensure that the recipient’s computer/ laptop has the required software installed, supporting the embedded file type to view or change its content.
How To Insert (Embed) An Object In Excel?
#1 – Insert (Embed) A New Object In Excel
Here, we will discuss how to embed a new object in Excel.
- We must first select “Text” from the “Insert” tab and then click “Object.”

- Then, select “Create New” to embed a new blank file. Remember, only file types are shown in “Object type” that can be embedded in the Excel worksheet.

- Now, choose a file type to embed. For example, we have selected a “Microsoft Word Document,” now click “OK.”
#2 – Embedding (Inserting) An Existing Object In Excel
Step 1: Select “Text” from the “Insert” tab and click “Object.”
Step 2: Select “Create from File” and click “Browse” to embed an existing file into the worksheet. Remember, only file types are shown in “Object Type” that can be embedded in the Excel worksheet.
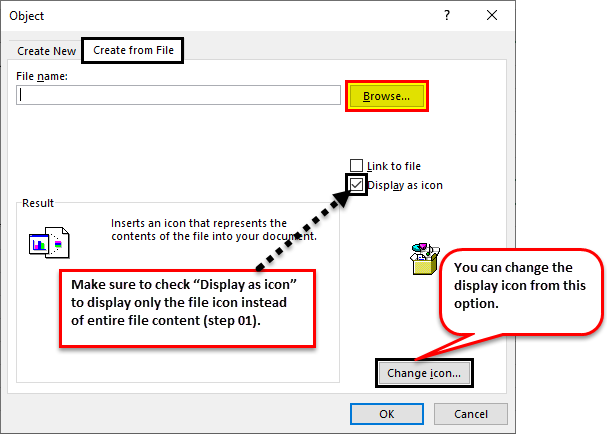
Step 3: Now click “OK.” The file icon will be displayed on the worksheet.
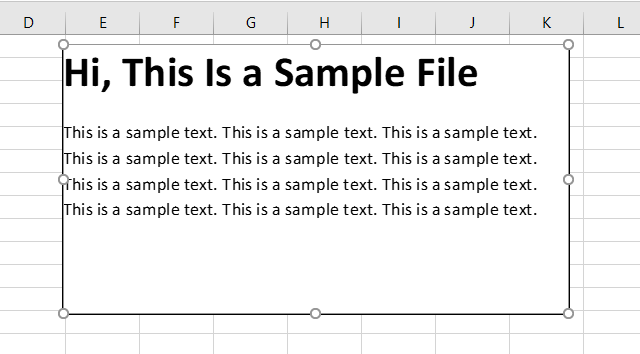
NOTE: If we do not check the “Display as icon” option, it will show the embedded file’s content instead of the icon. We can double-click on the embedded file icon or content to edit the content of the embedded file.
#3 – Link To Object Vs. Embedded Object
When you insert an object into an Excel worksheet, the object becomes part of the Excel file. Therefore, any changes made to the source file do not impact the embedded file. However, we may want to keep the file separate from the Excel file. In that case, we need to check the “Link to file” option.
A linked file is just a link to the source file, which we can edit only by editing the source file. When we double-click the link, the source file will open.
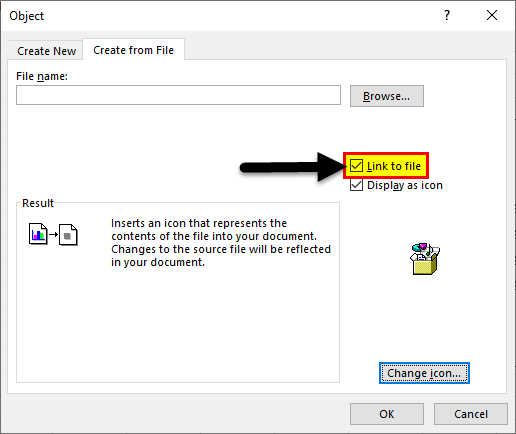
NOTE: If we change the location/ path of the source file, the link to the file in the worksheet will not work.
Why We Need Embedded Object In Excel?
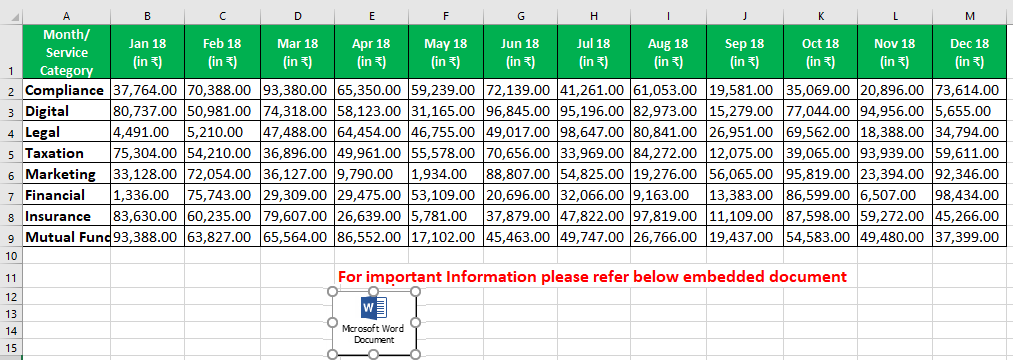
- When we want to add large comments or notes to a dataset in Excel Worksheet, we can embed a Word or text file instead of writing text in worksheet cells.
- Excel is used to create data tables/ charts. Suppose we want to use big text bodies to explain the data tables in a worksheet. In that case, we can create a separate embedded file within the worksheet instead of creating a particular file or writing a large amount of text in an Excel worksheet.
- Embedded files keep the worksheet presentation limited to required data only. We can keep any additional comments, notes, or information within the embedded file, allowing users to focus on the key information. We can view the other data only by accessing the embedded file.
4. Embedded files are the preferred option compared to the link to file option when we need to send the worksheet to someone working on a different computer/ laptop since the link to file will only work if the source file is saved on the same device as the worksheet itself since embedded files are saved within the Excel file.
Important Things To Note
- We can only embed certain file types into an Excel worksheet. We can see the list of file types accepted by going to “Insert” > “Text” > “Object” > “Create New” > “Object type.”
- Select the “Display as icon” checkbox to display only the embedded file’s icon. Otherwise, it will show the file content in the worksheet, which takes more space and is not recommended for presentation purposes.
- If we intend to print the worksheet, then it is recommended to display the content of the embedded file as it will not publish the embedded file’s content if the only icon is displayed.
Frequently Asked Questions (FAQs)
What is embedding an object in Excel?
Embedding or inserting an object in Excel helps users insert an object in an worksheet. We can insert Microsoft Word, PDF and other external files using this option in Excel worksheet.
What all objects can be embedded in Excel?
We can embed various objects in Excel. From Wordpad document to paintbrush picture, we can add objects including adobe document, Microsoft document, slide, powerpoint and adobe documents.
How to embed a word document in Excel?
For example, consider the below table showing product and sales. Now, we have to insert the details of each product’s sales in Excel.

We can insert an object in Excel using the following steps.
Step 1: First, select Insert > Text > Object.
The Object window appears.
Step 2: Here, select the Object Type:. In this example, let us select Microsoft Word Document. Next, select Display as icon.
Step 3: Press OK.
We can see the Microsoft Word Document’s icon embedded in the Excel sheet.
Whenever we click on the icon, the Word document opens up.
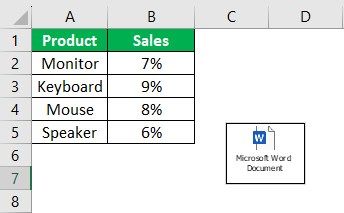
Likewise, we can insert object in Excel.
Recommended Articles
Continue with these closely related articles from the same guide.