Insert Columns in Excel using VBA
As part of the VBA code, we may need to insert a few columns to fit our needs in our datasheet. Inserting a column is the easy shortcut key in the worksheet by pressing Ctrl +,but how about inserting a new column through VBA code? In this article on “VBA Insert Column,” we will show you the process of adding columns in excel and different scenarios examples.
VBA%20Insert%20Columns%20Excel%20Template
Download Excel Template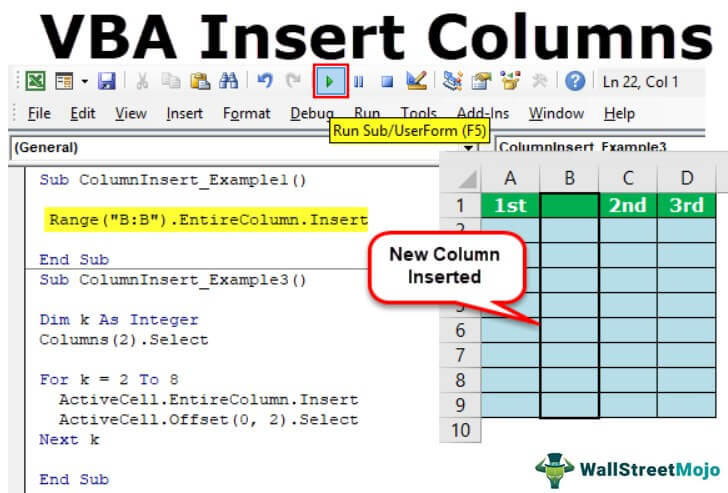
How to Insert Columns in Excel Worksheet using VBA?
We can insert columns in VBA using the COLUMNS property and RANGE object. But, first, you must know why we need columns and range objects to insert a new column.
To insert a new column, we need to identify after which column we need to insert, without telling, after which column we need to insert how VBA can understand the logic.
For example, if you want to insert the column after column B, you can construct the code like this.
Columns(“C”)
Note: We have used C to insert a column after because it will shift the selected cell to the right side.
After the columns are specified, we need to access the “Entire Column” property.
Columns(“C”).EntireColumn
Then we need to choose the “Insert” method.
Columns(“C”).EntireColumn.Insert
It will insert the column after column C and move the existing column C to D.
Example #1 – Insert Columns Using Range Object in VBA
Now, we want to insert the column after the A column. Follow the below steps to construct the code.
Now I want to VBA insert the column after the A column. Follow the below steps to construct the code.
Step 1: Start the Sub Procedure.
Step 2: Open Range object.
Code:
Sub ColumnInsert_Example1()

  Range(

End Sub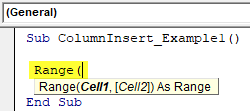
Step 3: Now, mention the column in double quotes.
Code:
Sub ColumnInsert_Example1()

  Range ("B:B")

End Sub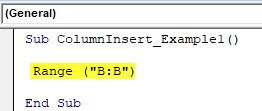
Step 4: Now, choose the Entire Column property.
Code:
Sub ColumnInsert_Example1()

  Range("B:B").ent

End Sub
Step 5: After selecting the Entire Column property, choose the “Insert” method.
Code:
Sub ColumnInsert_Example1()

  Range("B:B").EntireColumn.ins

End Sub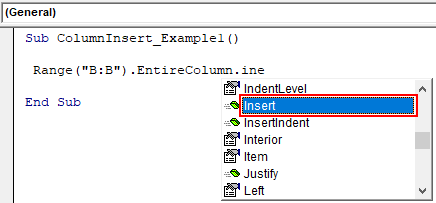
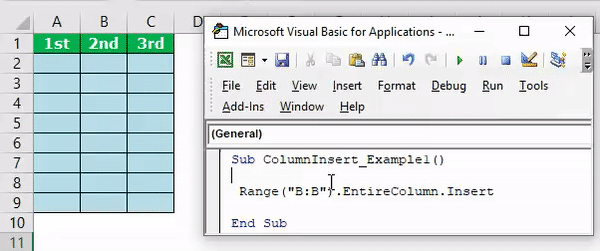
Now, your code looks like this.
Code:
Sub ColumnInsert_Example1()

  Range("B:B").EntireColumn.Insert

End Sub
Run the code. It will insert the new B column.
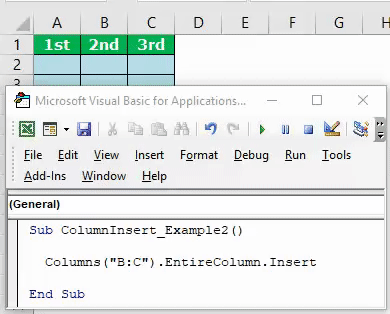
Example #2 – Insert Multiple Columns
For example, if you want to insert two new columns after column A, then we need to mention two column addresses.
Code:
Sub ColumnInsert_Example1()

  Range("B:C").EntireColumn.Insert

End Sub
The above code will insert two columns after column A.
Example #3 – With “Insert” Only Method
We can insert a new column using “Insert,” the only method without accessing the Entire Column property. For this, let us understand the “Insert” method syntax.
Expression.Insert([Shift],[Copy Origin])[Shift]: When we insert the new column, whether we need the columns to shift to the right side or to shift to the downside in case of rows. Here we can use two options, “xlToRight” and “xlDownTo.”
[Copy Origin]: This will specify the format for the newly inserted column. Do you need the format from the left side of the column or the above cells? Here we can use two options “xlFormatFromLeftOrAbove” and “xlFormatFromRightOrBelow.”
Below is the example code for you.
Sub ColumnInsert_Example1()

  Range("B:B").Insert Shift:=xlToRight, Copyorigin:=xlFormatFromLeftOrAbove

End Sub
Example #4 – Insert Columns Using COLUMNS Property in VBA
We have seen how to insert columns VBA using the RANGE object. Next, we will show we can insert columns using the “COLUMNS” property.
Open the COLUMNS property.
Code:
Sub ColumnInsert_Example2()

  Columns(

End Sub
We can specify the column in two ways here. One is using as usual alphabetic references, and another one uses column numbers.
If you want to insert the column after column A, the code will be COLUMNS(“B”). Likewise, the code will be COLUMNS(2) if you use numerical references.
Code:
Sub ColumnInsert_Example2()

  Columns("B").

End Sub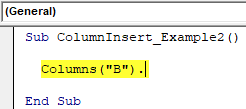
Now, the problem for you arises because when we use the COLUMNS property, we do not get access to the IntelliSense list.
Code:
Sub ColumnInsert_Example2()

  Columns("B").Entir

End Sub
Here, we need to be sure of what we are doing. So, this is the reason we have shown you the RANGE object first.
Code:
Sub ColumnInsert_Example2()

  Columns("B:B").EntireColumn.Insert

End Sub
Example #5 – Insert Alternative Columns
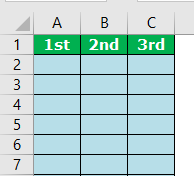
Assume you have the data like the below image.
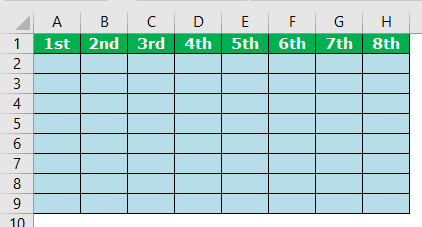
Assume you have the data like the below image.
We need to use VBA loops if you want to insert new columns after every alternate row. The below code is tailor-made for you.
Code:
Sub ColumnInsert_Example3()

  Dim k As Integer
  Columns(2).Select

  For k = 2 To 8
    ActiveCell.EntireColumn.Insert
    ActiveCell.Offset(0, 2).Select
  Next k

End Sub
It will insert the column like this.

Example #6 – Insert Column Based on Cell Value
We can also insert a column based on cell value as well. For example, look at the below data.
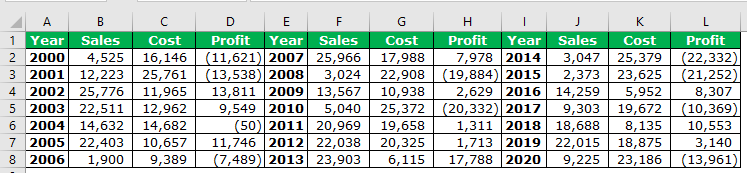
Here, we want to insert the column if the first-row cell value is “Year.” Our data should be like this after inserting new columns.
Use the below code to perform this task.
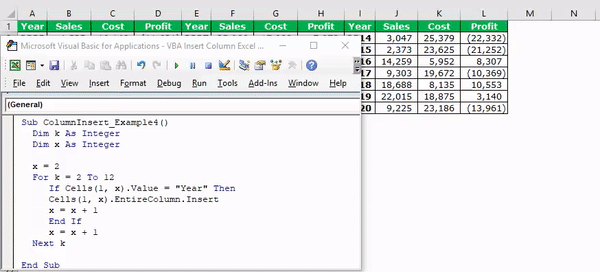
Code:
Sub ColumnInsert_Example4()

  Dim k As Integer
  Dim x As Integer

  x = 2
  For k = 2 To 12
    If Cells(1, x).Value = "Year" Then
    Cells(1, x).EntireColumn.Insert
    x = x + 1
    End If
    x = x + 1
  Next k

End Sub
You can download this VBA Insert Columns Excel here. VBA Insert Columns Excel Template
Recommended Articles
This article has been a guide to VBA Insert Columns. Here, we will show you how to insert single/multiple columns under different scenarios, examples, and a downloadable Excel template. Below are some useful Excel articles related to VBA: –