What Is Add Columns In Excel?
To Add Column in Excel means inserting a new column to the existing dataset. Besides inserting, one may need to delete, hide, unhide, and move rows or columns. Such modifications help in structuring and organizing the dataset.
For example, while preparing a consolidated balance sheet, Mr. X realizes that the data related to the previous year is missing. To include this data, inserting a new column is necessary, as shown below.
Key Takeaways
- Add Column in Excel is a feature to insert an extra column or multiple columns in an existing dataset to enter missed or new data.
- Under the “Insert” drop-down, the “R” of “insert sheet rows”, and the “C” of “insert sheet columns” are underlined. Hence, these keys work as shortcuts for inserting rows and columns.
- Multiple adjacent rows or columns can be selected by dragging across the row and column headings. Alternatively, hold the “Shift” key while selecting the rows or columns.
- We can select non-adjacent rows or columns by holding the “Ctrl” key while making the selections.
How To Add/Insert Columns In Excel?
A few ways to Add/Insert Column in Excel are,
- Right-Click on Column Labels – When we right-click on the column names, i.e., Columns A, B, C, and so on…, where we want to insert a column, we get a list, choose the “Insert” option, as shown below.
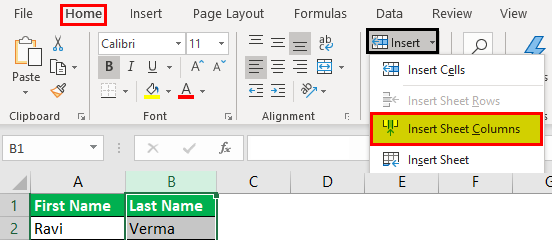
- Using the “Home” tab – Select a cell where we want to insert a column, and use the path
Select the “Home” tab – go to the “Cells” group – click the “Insert” option drop-down – select the “Insert Sheet Columns” option, as shown below.

Examples
We will consider specific examples to Add Column in Excel for the following aspects,
- Insert Excel columns (alternate methods and shortcuts).
- Delete columns and rows.
- Hide and unhide rows or columns.
- Move rows or columns.
Example #1–Add Columns in Excel
The following table shows the first and the last names in columns A and B, respectively. We want to insert a new column (column B) between these names, which will display the middle name.

The steps to insert a new column (column B) between two existing columns (columns A and B) are listed as follows:
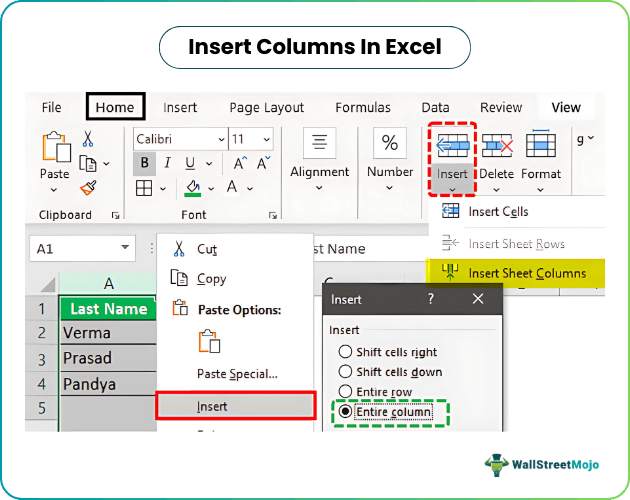
Step 1: Select any cell of column B. Alternatively, one can also select column B, as shown in the following image. Further, click the “Insert” drop-down from the “Home” tab of the Excel ribbon. Finally, select “Insert Sheet Columns”.
[Note: To select a column, click its label or header on top.]
Step 2: A new column (column B) is inserted between the columns containing the first and last names. As a result, the data (last name) of the previous column B (shown in step 1) shifts to column C, as shown in the image below.

Example #2 – Alternate Method to Insert Rows and Columns in Excel
Working on the result of Example 1, we will insert a middle name column using the following methods:
- Select and right-click a cell.
- Select and right-click a column.
#Select and right-click a cell
The steps for inserting a column after selecting, and right-clicking a cell are listed as follows:
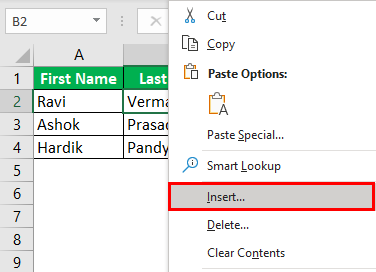
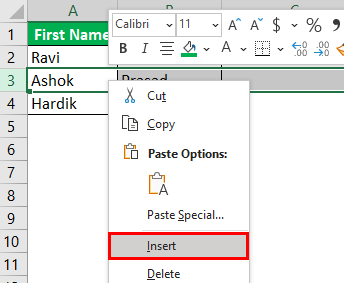
Step 1: Select any cell of column B to insert a column before column B. Right-click the selection, and choose “Insert”, as shown in the following image.
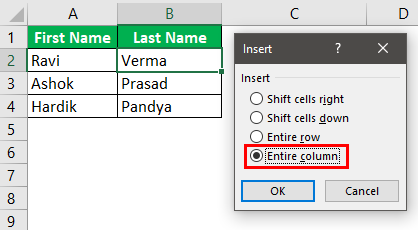
Step 2: The “Insert” dialog box appears. Select “Entire column” to insert a new column.
[Note: For inserting a new row, select “Entire row”.]
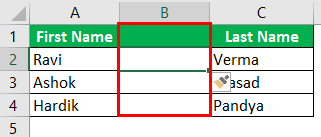
Step 3: A new column (column B) for typing middle names has been inserted.
#Select and right-click a column
The steps for inserting a column after selecting and right-clicking a column are listed as follows:
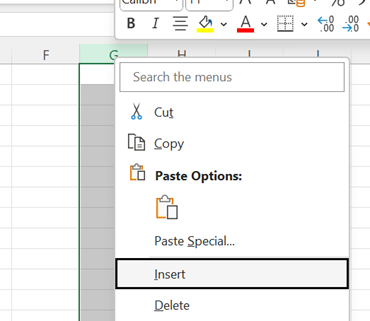
Step 1: Select the entire column B to insert a column before column B. Right-click the selection, and choose “Insert”, as shown in the following image.
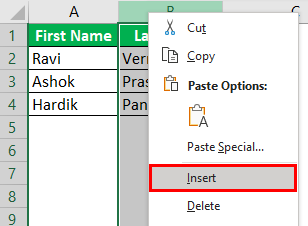
Step 2: A new column B is inserted.
Example #3 – Hide and Unhide Columns & Rows in Excel
Working on the data of Example 1, we will perform the following tasks:
- Hide columns A and B or rows 3 and 4 by right-clicking.
- Hide column A by using the “format” drop-down.
- Unhide columns B and C by right-clicking.
#Hide columns A and B or rows 3 and 4 by right-clicking
The steps to hide the columns A and B or rows 3 and 4 by right-clicking are listed as follows:
Step 1: Select columns A & B. Right-click the selection, and choose “Hide”, as shown in the next image.
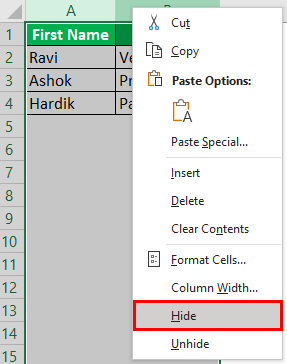
Step 2: Columns A and B will be hidden. Likewise, select rows 3 and 4. Right-click the selection and choose the “Hide” option from the context menu. The same is shown in the following image.
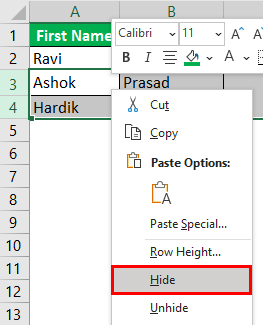
It will hide rows 3 and 4.
#Hide column A by using the “format” drop-down
The steps to hide column A by using the “format” drop-down are listed as follows:
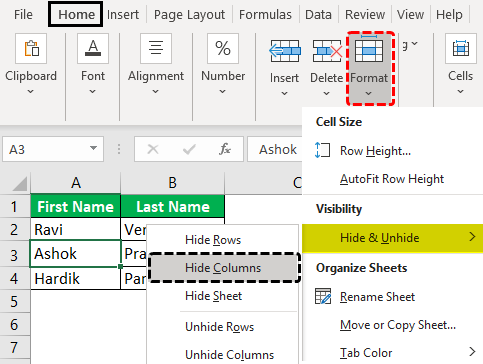
Step 1: Select any cell of column A. Click the “Format” drop-down under the “Home” tab of the Excel ribbon. Next, select “Hide Columns” under the “Hide & Unhide” option.
The same is shown in the following image.
[Note: Alternatively, select the relevant column to be hidden. Click “Hide columns” under the “Hide & Unhide” option.]
Step 2: We will hide the column of the selected cell, column A. Likewise, to hide rows, select the relevant row. Then, choose “Hide Rows” from the “Hide & Unhide” option of the “Format” drop-down.
#Unhide columns B and C by right-clicking
The steps to unhide columns B and C by right-clicking are listed as follows:
Step 1: Select the unhidden columns (A and D) immediately before and after the hidden columns (B and C). Right-click the selection and choose “Unhide.”
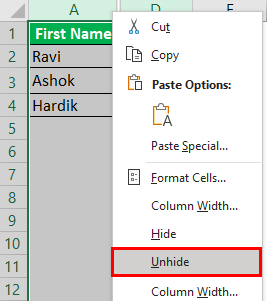
Step 2: The columns B and C will be unhidden. The dataset appears as shown in step 1 of task b.
Likewise, unhide rows by selecting the “Unhide rows” (immediately before and after the hidden rows), and clicking “Unhide” from the context menu.
Example #4 – Move Rows or Columns in Excel
With the data of Example 1, we will move column B (last name) to precede column A (first name).
The steps to move column B are listed as follows:
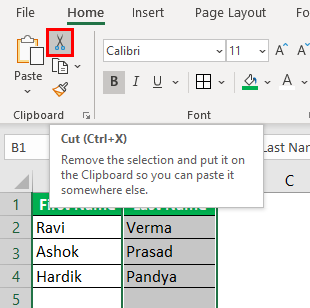
Step 1: Select column B to be moved. Cut it in either of the following ways:
- Press “Ctrl+X”.
- Click the scissors icon from the “Clipboard” group of the “Home” tab.
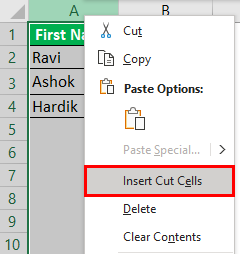
Step 2: Select column A, where the data of column B is to be pasted. Right-click the selection and choose “Insert Cut Cells.”
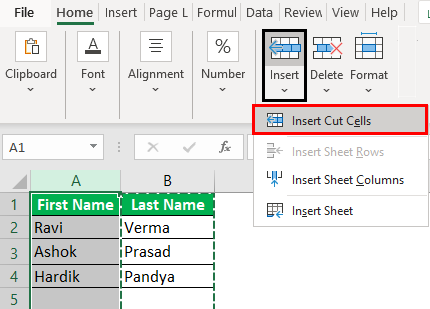
Alternatively, select “Insert Cut Cells” from the “Insert” drop-down of the “Home” tab. The same is shown in the following image.
Step 3: The data of column B is pasted into column A. Hence, the first column (column A) now contains the last names. The data of the initial column A (first name) automatically shifts to column B.
The same is shown in the following image.
[Note: A row can be selected, cut, and pasted to the desired location. Select the “Insert Cut Cells” option from the “Insert” drop-down of the “Home” tab for pasting.]

Shortcuts to Insert Columns in Excel
The two shortcuts for inserting columns and rows are
- Shortcut for inserting with the “Insert” drop-down of the “Home” tab.
- Shortcut for inserting with right-click.
#Shortcut for inserting with the “Insert” drop-down of the “Home” tab
The excel shortcut for inserting a row or column with the “Insert” drop-down works as follows:
- Select a cell preceding which a row or column is inserted.
- Click the “Insert” drop-down from the “Cells” group of the “Home” tab.
- Press “R” to insert a row or “C” to insert a column
A new row or column is inserted depending on the third pointer’s key.
Note: Under the “Insert” drop-down, the “R” of “insert sheet rows” and the “C” of “insert sheet columns” are underlined. Hence, these keys work as shortcuts for inserting rows and columns.
#Shortcut for inserting with right-click
- The shortcut for inserting a row or column with right-click works as follows:
- Select a cell preceding which a row or column is inserted.
- Right-click the selection, and press “I”. The “Insert” dialog box opens.
- Press “R” to insert a row or “C” to insert a column.
- Press the “Enter” key.
A new row or column is inserted depending on the third pointer’s key.
[Note: If the “Insert” dialog box does not open in step 2, press the “Enter” key after pressing “I”. It opens the “Insert” dialog box.]
Important Things To Note
- Excel inserts a column immediately preceding the column of the selected cell. Hence, one must always choose a cell accordingly.
- The “Insert Cut Cells” option will be visible once the selected cells have been cut.
Frequently Asked Questions
1. Name the different ways available to Add Column in Excel.
Inserting a column refers to adding a new column to an existing dataset. We can add a new column to enter additional data that can be important for the end user.
Additionally, there is a possibility that a column has been omitted by mistake. In such cases, inserting a column will be helpful.
The steps to insert a column in Excel are listed as follows:
a. Select the column preceding which a new column is to be inserted.
b. Right-click the selection and choose “Insert” from the context menu.
It will insert the new column immediately before the selected column.
2. Can we Add Column in Excel using any alternate methods?We can Add Column in Excel using shortcut keys as well.
Let us insert a new column E, in Excel. The steps to insert a column (column E) by using a shortcut are listed as follows:
a. Select the existing column E.
b. Press the keys “Ctrl+Shift+plus sign(+)” together to insert a column.
It will insert the new column E. The data of the initial column E now shifts to column F.
3. How to insert multiple adjacent columns in Excel?
Let us insert columns D, E, and F, in Excel. The steps to insert multiple columns (D, E, and F) are listed as follows:
a. Select as many columns in the existing dataset as the number of the new columns to be inserted. So, select the current columns D, E, and F.
b. Press the keys “Ctrl+Shift+plus sign(+)” together.
It will insert the blank columns D, E, and F. The initial columns D, E, and F data shift to columns G, H, and I.
Recommended Articles
This article is a guide to Add Column in Excel. Here we add/insert, hide/unhide, move columns, shortcut, right-click columns, examples & downloadable template. You may learn more about Excel from the following articles: –