
Table Of Contents
Excel VBA Tutorial for Beginners
If you are new to VBA and do not know anything about it, this is the best tutorial for beginners to start their journey in Excel VBA macros. So, let us start the journey of your VBA tutorials today.
VBA is Visual Basic for Applications is the Microsoft programming language for Microsoft products like Excel, Word, and PowerPoint. It will do all the programming we wish to do in the VBE (Visual Basic Editor). For example, VBE is the platform to write our code of tasks to execute in Excel.

What are the Macros in Excel?
A Macro is nothing but a line of code to instruct Excel to do a specific task. Once we write the code in VBA, we can execute the same task at any time in the workbook.
The Macro code can eliminate repetitive, boring tasks and automate the process. Let us record the Macro to start with the VBA Macro coding technique.
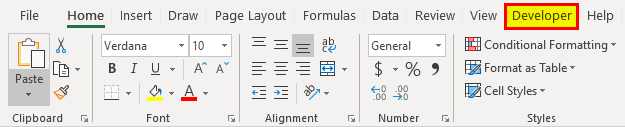
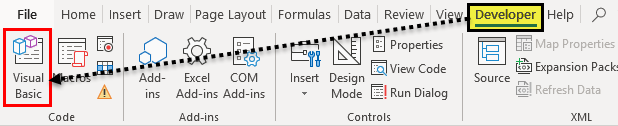
VBA coding is available under the DEVELOPER tab in excel.

If you do not see this Developer tab in your Excel, follow the below steps to enable the Developer tab in Excel.
Step 1: Go to FILE -> Under FILE, go to OPTIONS.

Step 2: Select Customize Ribbon
You will see the "Excel Options" window. Select "Customize Ribbon in Excel.

Step 3:Check the box DEVELOPER to enable it.
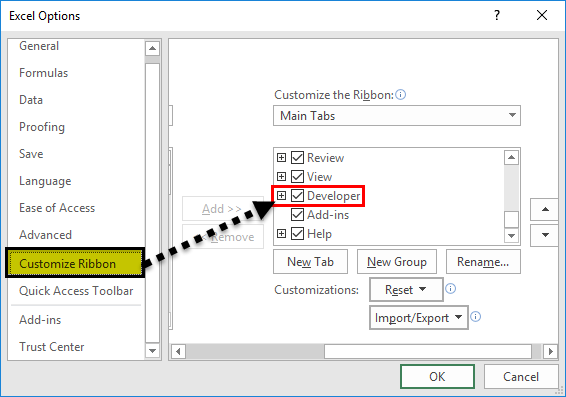
Step 4: Click on OK to enable it.
Now, you should see the "Developer" tab.
Tutorial to Record Macros in VBA Excel
In this tutorial about VBA, we will learn how to record macros in Excel with practical examples.
Example #1
We will start straight away by recording Macro.
Step 1: Click on Record Macro
Under the Developer tab, click on Record Macro.

Step 2: Give Name to Macro
As soon as you click on the "Record Macro," you will see Excel asks you to give a name to your Macro.

Give a proper name to Macro. The Macro should not contain any space characters and special characters. You can give underscore (_) as the word separator.
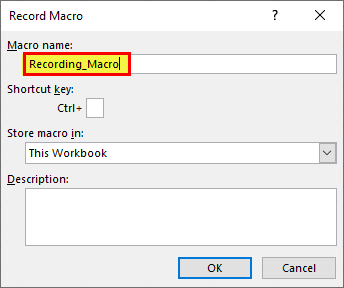
Step 3: Click on OK to Start the Recording.
From now onwards, the Macro recorder keeps recording all your activities in the Excel sheet.
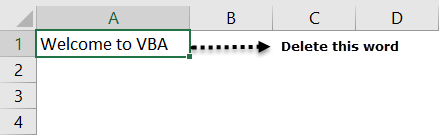
So, firstly, we will select cell A1.
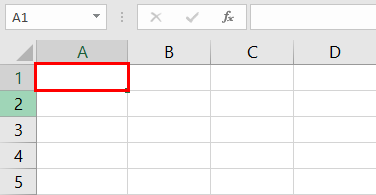
Now, we will type "Welcome to VBA" in the A1 cell.

Step 4: Stop Recording
Now, we will click on the "Stop Recording" option under the "Developer" tab to stop the recording.

So, Excel stops recording the activities we do in Excel. Now, let us see how Excel recorded the activities.
Step 5: Open VBA Editor
Under the Developer tab, click on "Visual Basic."
As soon as you click on "Visual Basic," we will see below the window.
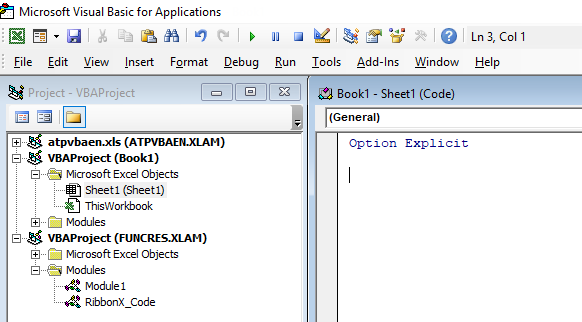
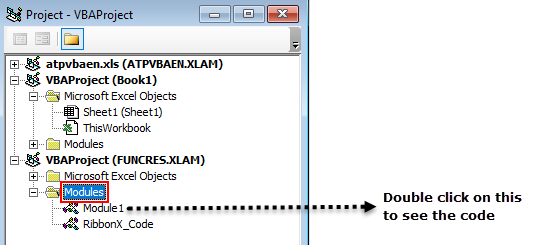
Double-click on "Modules."
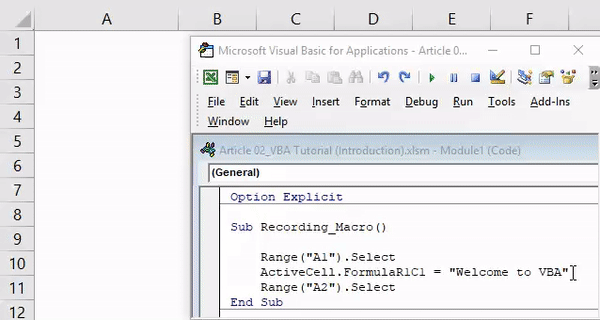
Now, we will see the code on the right-hand side. Macro code started with the word SUB.
All the Macro has two parts: Head and Tail. In addition, every Macro has a name.

Excel recorded all the activities between the head and tail of the Macro.
The first thing we did after recording the Macro was select cell A1 and Excel recorded it as Range ("A1"). Select.
The second activity was when we entered the value "Welcome to VBA." When we selected it, it became an active cell, so Excel recorded the activity as ActiveCell.FormulaR1C1 = "Welcome to VBA."
Note: R1C1 is row 1, column 1.
The third activity is after typing the word "Welcome to VBA," we press the "Enter" key, and Excel selects the A2 cell. So, Excel recorded the activity as Range ("A2"). Select
Like this, "Macro Recorder" recorded all our activities in the Excel sheet. Now, delete the word in cell A1.
After deleting the word, go to VBE, where our code is once again.
Step 6: Run the Code
Click on the RUN button to enter the same text value to cell A1.
Note: Shortcut key to run the code is F5.So, Macro executed, and we got the same value again. Like this, we can automate our daily routine work to save time and eliminate boring daily tasks.
Example #2
Now, let us record one more Macro to understand better. In this recording, we will insert serial numbers from A1 to A10.
Go to the DEVELOPER tab and click on the "Record Macro" option.

Click on "OK" to start the recording. First, we will enter 1, 2, and 3. Then, we will drag the fill handle to insert serial numbers.

Now, click on "Stop Recording."

Go to Visual Basic Editor and see what the code is.

Let us look at the code now.
Firstly, we have selected cell A1.
Code:
Range (“A1”).Select
Secondly, we have inserted 1 into the active cell.
Code:
ActiveCell.FormulaR1C1 = "1"
The third activity was when we selected cell A2.
Code:
Range (“A2”).Select
The fourth activity was we inserted 2 into the active cell.
Code:
ActiveCell.FormulaR1C1 = "2"
The fifth activity was when we selected cell A3.
Code:
Range (“A3”).Select
In the sixth activity we inserted 3 into the active cell.
Code:
ActiveCell.FormulaR1C1 = "3"
Then, we selected the range of cells from A1 to A3.
Code:
Range ("A1:A3").SelectAfter selecting the cells, we filled the serial numbers using the fill handle.
Code:
Selection.AutoFill Destination:=Range("A1:A10"), Type:=xlFillDefaultSo finally, we have selected the range A1 to A10.
Code:
Range ("A1:A10").SelectSo, you can run this code whenever we want to insert serial numbers from 1 to 10 in cells A1 to A10.
How to Save Macro Workbook?
The Excel workbook containing Macro code should save as Macro-Enabled Workbook. Then, click on Save As in excel and select the file extension as "Macro-Enabled Workbook."

Things to Remember
- It is just the introduction part of VBA. Keep following our blog to see more posts as we advance.
- Recording Macro is the best initialization to start the journey of Macros.
- Record more and more activities and see what the code is.
