Table Of Contents
What Is Flash Fill In Excel?
Flash Fill in Excel is a feature where we can automatically fill a series of data, such as date, year, or fill a pattern to the selected empty cells in a flash, i.e., in a fraction of a second.
In Excel Flash Fill, first, Excel senses the pattern in the data from the previous fills of Excel. Then, when we type some characters in the adjacent cells next to it, it automatically flashes the suggested data.
For example, in cell A1 we have the cell value 1478569230, and we have modified the cell value as 1478-5692-14, which acts as a pattern.

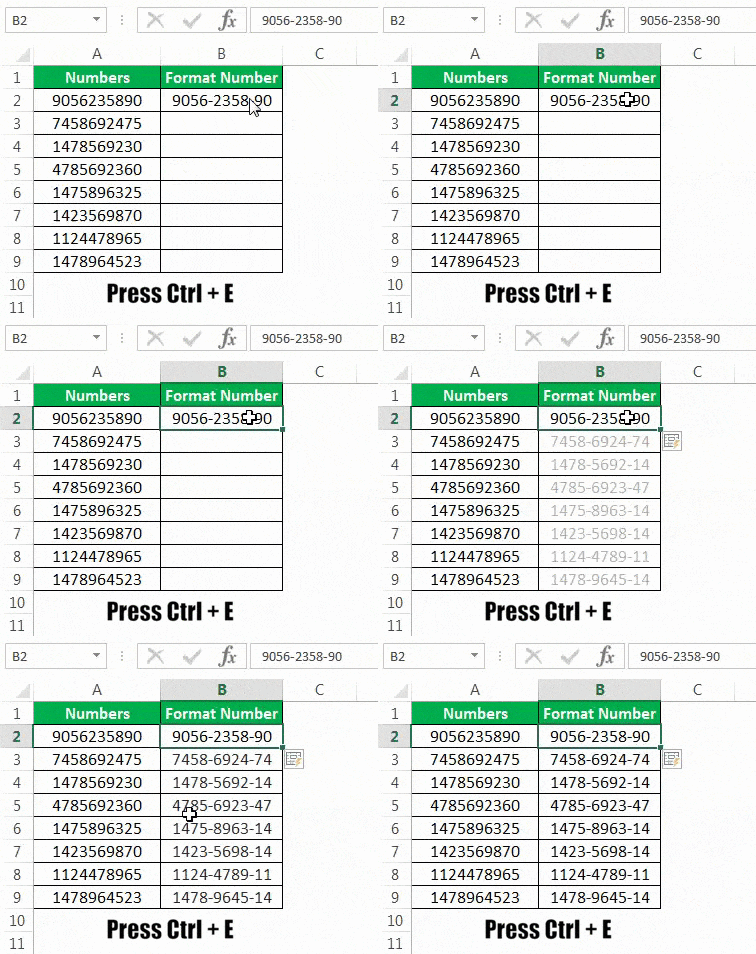
Next, type the Flash Fill shortcut key “Ctrl+E”.

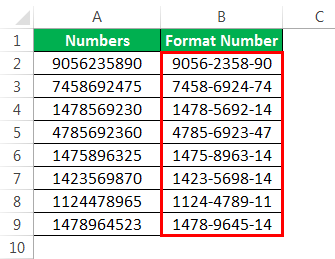
The output is shown above, i.e., the rest of the cells are filled w.r.t the pattern automatically.
Key Takeaways
- The Flash Fill in Excel automatically fills a set pattern in the cells, such as retrieving specific details from a cell value, part of the names, dates, years, etc.
- We have multiple methods to Flash Fill, such as clicking the option from the Data tab, using the shortcut key, using the Fill Handle’s Automatic Flash Fill feature, etc.
- Using this feature, we can retrieve a part of the selected cell values, or set a pattern to combine data from the existing data to form new data.
- If we are unable to view the Flash Fill feature, make sure to enable the feature from the Excel Options window’s Advanced tab.
How To Use Flash Fill In Excel?
We can use Flash Fill in Excel using the 2 methods, namely:
- Using the Excel Ribbon.
- Using the shortcut key.
Method #1 - Using the Excel Ribbon -
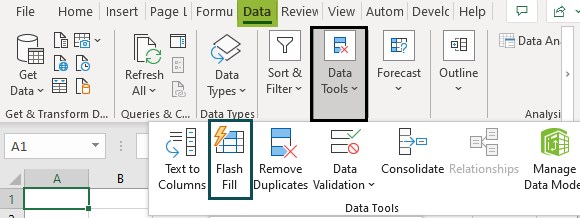
First, choose the cell value with the pattern to be filled - select the “Data” tab - go to the “Data Tools” group - click the “Flash Fill” option, as shown below.
Method #2 - Using the shortcut key -
The shortcut key to Excel Flash Fill is “Ctrl+E”.
Examples
We will consider examples to Flash Fill in Excel.
Example #1 – Extract FY From the Invoice Number
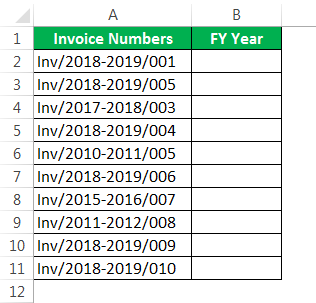
We have data on invoice numbers, and we want to extract the FY year from the list given below. Applying many complex formulas will be quite challenging for an intermediate user. However, the “Flash Fill” tool is a useful option.
The steps to retrieve the first year using Excel Flash Fill are,
- First, we must set the pattern, so type the first FY year in cell B2.

- Now, select the “Data” tab - go to the “Data Tools” group - click the “Flash Fill” option, as shown below.

- After typing the first FY into the cell, Excel understands the fill pattern. We can do the “Flash Fill” in two ways.
The first way, drag the first entry until the end. Now, click the AUTOFILL option in excel and select “Flash Fill”.

Consequently, it will insert all the FY years from the invoice numbers columns, as shown below.
The second way, after typing the first FY year into the cell, we must press the “CTRL + E” key. It will extract FY from the invoice numbers columns.
Example #2 – Extract First Name & Last Name
The “Flash Fill” tool will help us extract specific details as required.
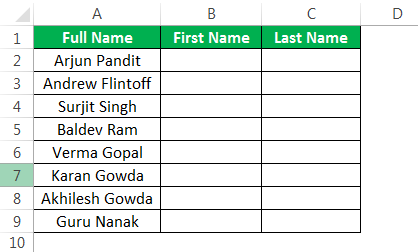
We want to get the first and last names from the above list.
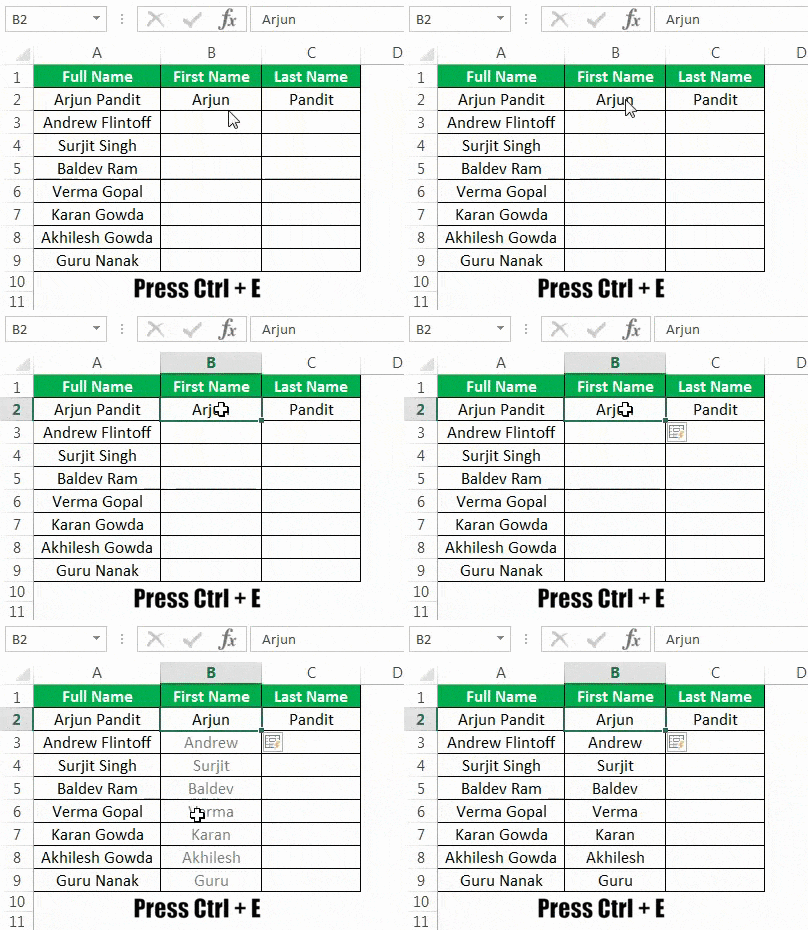
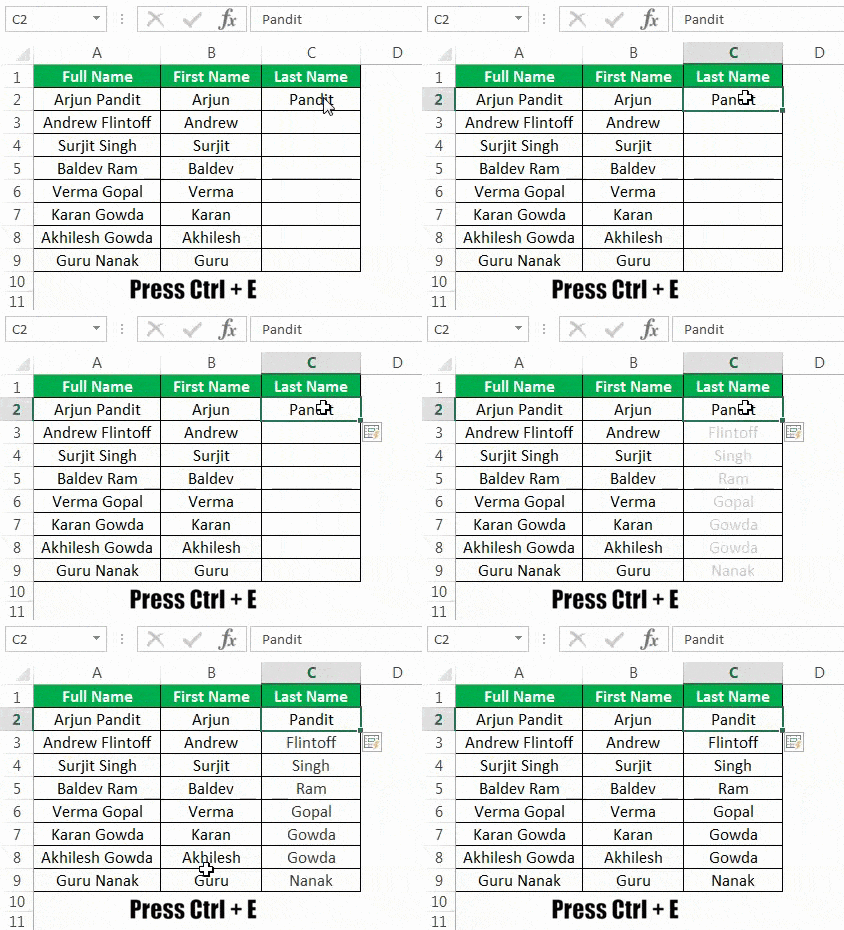
So, we must first type the first name in the B2 cell and the last name in the C2 cell to create a pattern.
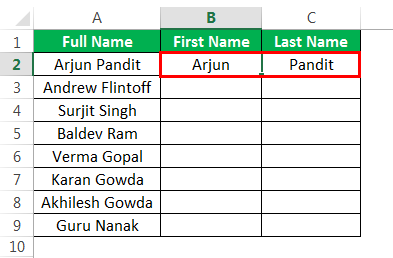
We will now go to the B2 cell, and press “CTRL + E”.
Then, we will go to the C2 cell, and press “CTRL + E”.
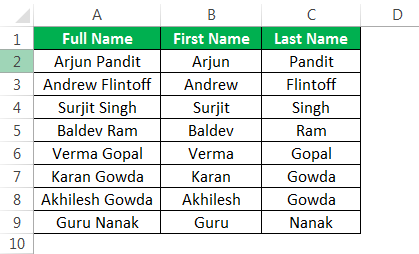
The final output is shown below.
Example #3 – Format Numbers Using Flash Fill
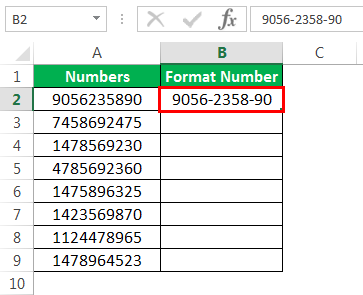
The Flash Fill feature extracts a portion of the cell and helps us format the cell value. Now, let us take a look at the below example. We have phone numbers, and we want to format them like this: 9056-2358-90.
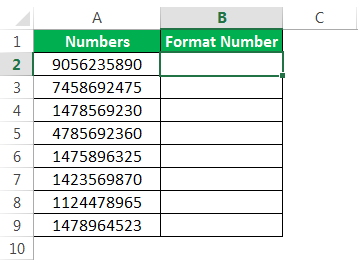
First, we will type the format in the first cell to set a pattern.
Now, type “CTRL + E”.
The output is shown below.
Example #4 – Combine Two Values Using Flash Fill
The Flash Fill tool takes the first and last names and combines them. So, now we have a first name and last name in two different columns. We want the full name in the next column.
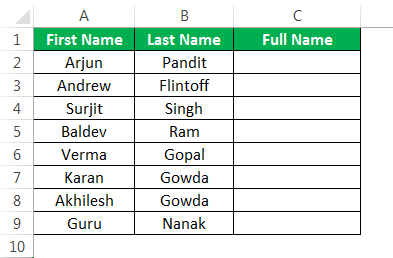
To do that, we must type the required pattern name in cell C2.
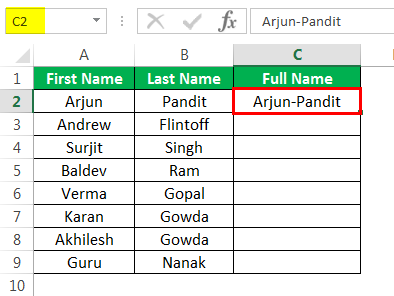
Now, we must press the shortcut key to “Flash Fill”.
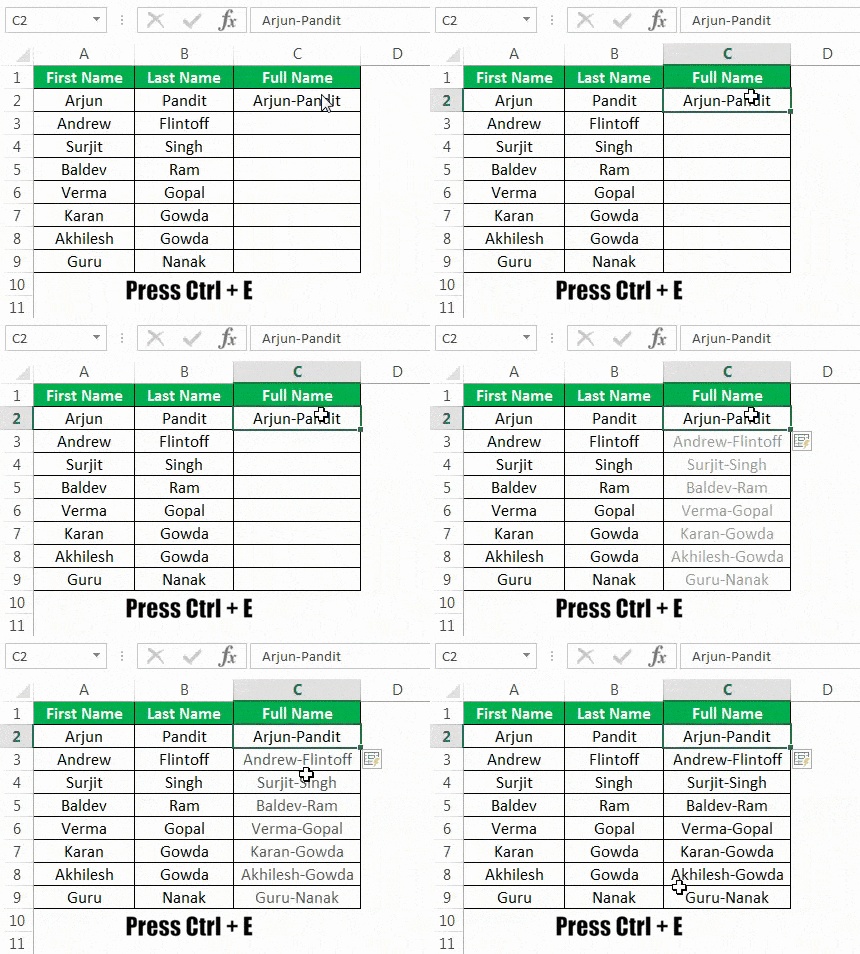
The output is shown below.
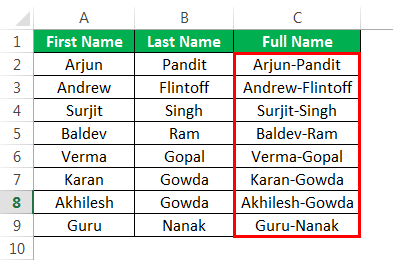
Excel Flash Fill Shortcut
The shortcut for Flash Fill is,

We must set the pattern in the first output cell, then press “Ctrl+E” for the pattern to Automatically Fill to the rest of the output cells.
Excel Flash Fill Limitations
The Flash Fill feature has its limitations too. It is very important to note them.
- The Flash Fill data tool is not dynamic. Remember, it is not a formula to change the resulting cell if any modifications to the reference cell values are made.
- The Flash Fill tool can wrongly insert the data. Take a look at the below example.
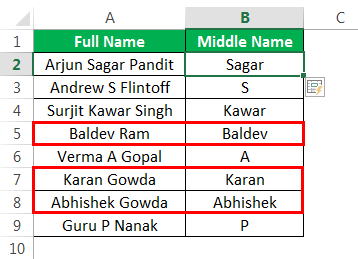
In the above image, we wanted to extract the middle name. So, we typed the middle name in the first cell and pressed the “CTRL + E”. But for a few names, there are no middle names, so it has extracted the first name itself.
Important Things To Note
- The Flash Fill tool works based on the pattern of the data. If there is no pattern, Excel may show the below error message.

- Ensure to select the “Flash Fill” option while using the Fill Handle options.

