What Is Rows And Columns In Excel?
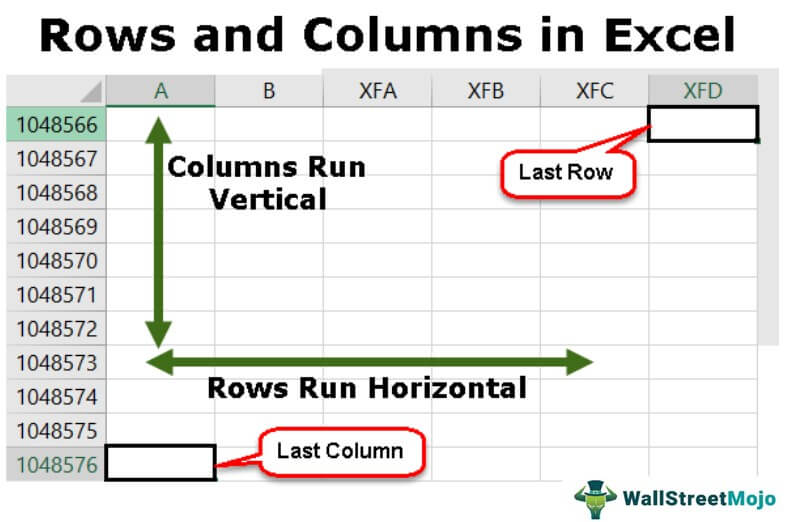
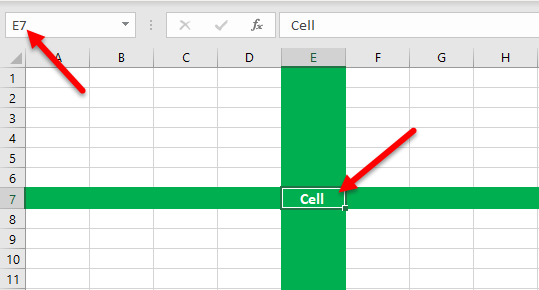
Rows and columns in Excel are the combinations of the horizontal and the vertical area of the Excel worksheet. At any point in time, if we want to refer to a particular area’s location, we need to refer to a cell. A Cell is the intersection of rows and columns.
Key Takeaways
- Rows and Columns in Excel are 2 of the main components of an Excel worksheet. The intersection of a Row and a Column is known as a Cell.
- Rows are the horizontal area that are numerically arranged, and the columns are the vertical area arranged alphabetically.
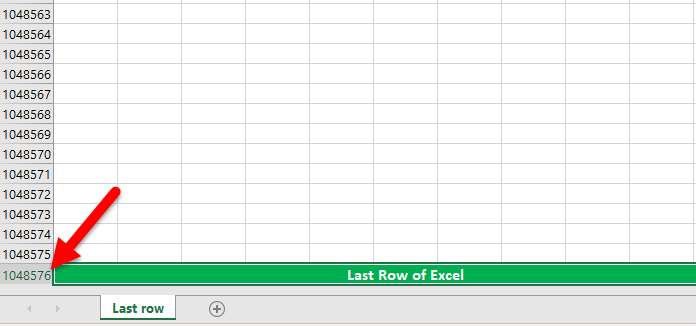
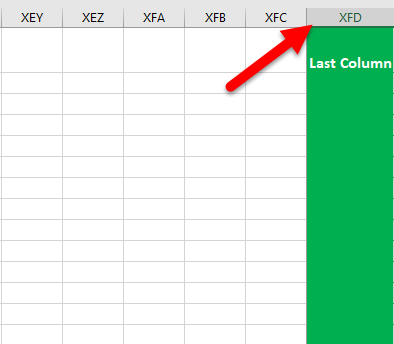
- There are a total of 1,048,576 rows that are numbered as 1,2,3,4…….10,48,576, and a total of 16,384 columns that are named as “A, B, C…AA, AB, AC….AAA, AAB, AAC…XFD”.
- The components of the Excel worksheets are Rows, Columns, Cells, Cell Address or Name Bar, Formula Bar, etc.
Examples of Rows and Columns in Excel
Example #1 – Rows of Excel
There are a total of 1,048,576 rows that are currently available in Microsoft Excel. The rows are aligned horizontally and are numbered as 1,2,3,4…….1,048,576. Therefore, if we have to move from one row to another, we must move downward or upward.
Example #2 – Column of Excel
There are a total of 16,384 columns that are available in Excel currently. The columns are vertically placed and are named “A, B, C…AA, AB, AC….AAA, AAB, AAC…XFD”.
The columns are aligned from left to right. It means that if we need to go to another column, we must move from left to right.
Example #3 – Cell of Excel
The intersection of rows and columns is called a cell. The cell location combines the column number and the row number. Hence, a cell is called “A1, A2, and so on”.
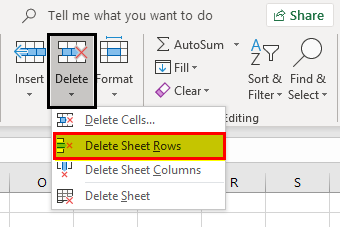
Example #4 – Deleting a Row
We can delete a row using the keyboard shortcut Ctrl+ “-”.
Example #5 – Deleting a Column
We can delete a column using the keyboard shortcut Ctrl+”-“.

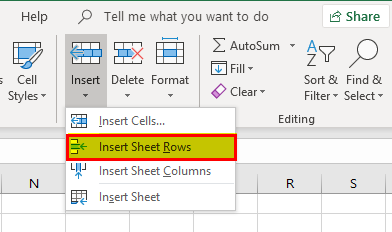
Example #6 – Inserting a Row
We can insert a row by using the option of Ctrl+ “+”.
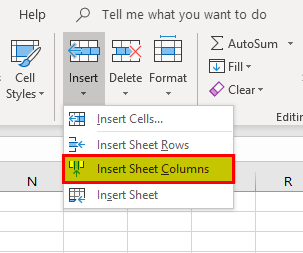
Example #7 – Inserting a Column
We can insert a column by using the option of Ctrl+ “+”.
Example #8 – Hiding a Row
A row can be set to hide by using the menu option. First, go to the “Home” tab, select “Format,” and click on “Hide Rows.”

Example #9 – Hiding a Column
We can also hide a column by using the menu option. Go to the “Home” tab, select “Format,” and click on “Hide Columns” from the “Hide & Unhide” option.

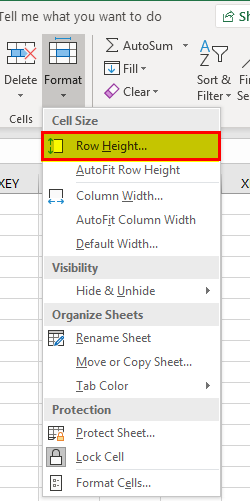
Example #10 – Increasing the Width of the Row
Sometimes the width must be increased to add more data into the row.
Example #11 – Increasing the Width of the Column
The width of the column needs to increase if the text’s length is more than that column’s width.
Example #12 – Moving a Row
We can also move a row to another location.
Example #13 – Moving a Column
We can also move a column to another location.
Example #14 – Copying a Row
The row’s data can be copied and pasted into another row.

Example #15 – Copying a Column
The data of the column can also be copied into any other column.

Example #16 – Autofit Height of the Row
This feature will adjust the row height as per the text length.
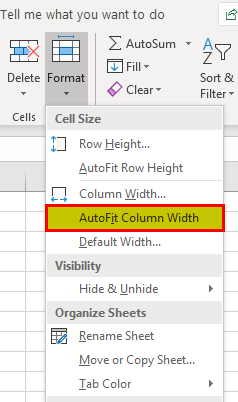
Example #17 – Autofit Width of the Column
We can also adjust the column’s width per the text’s length.
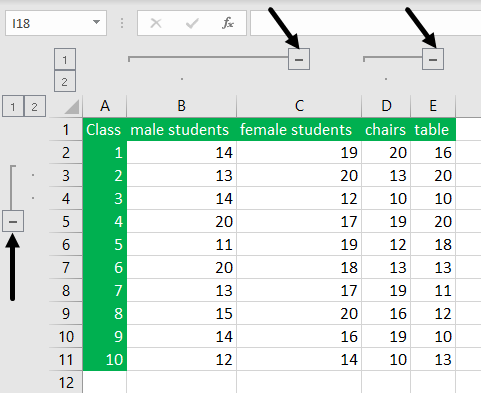
Example #18 – Grouping Rows
We can also group the rows and make the data easier to understand.
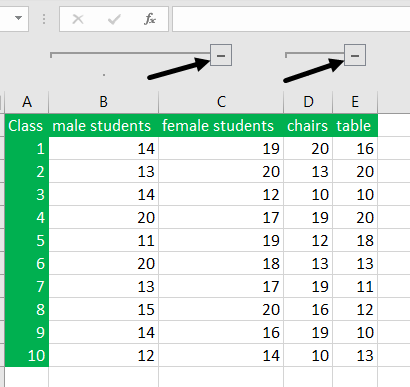
Example #19 – Grouping Columns
We can group the columns and make them one cluster column.
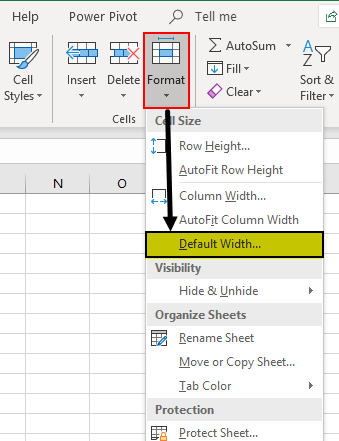
Example #20 – Setting Default Width of Rows and Columns in Excel
We can use this option if we want the height and width of the Excel column and rows to be again restored to one specific defined measure.
How to use Rows and Columns in Excel?
We can use the Rows and Columns In Excel for the following reasons, namely:
#1 – To delete a row and column
We must select that row or column to delete, right-click on it, and choose the “Delete” option.
#2 – Inserting a row and columns
To insert row and columns, we must select the location, and select the “Insert” option.
#3 – Hiding a row or column
We can hide the row and column using the menu option of hiding.
#4 – Increasing the width
To increase the width of the row and column, select that row or column and drag the width.
#5 – Copying
To copy a row/column, select any row, right-click on it, choose “copy”, and then paste at the required location.
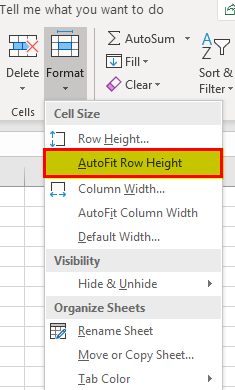
#6 – Autofit
If we want to AutoFit Excel row height, we can choose this option from the “Format” toolbar in excel and click “AutoFit”.
#7 – Grouping
If we need to group the rows or columns, we need to select the rows and choose the option of “Group” from the “Data” tab.
Important Things To Note
- The count of available rows and columns in excel cannot be increased but can be reduced as needed.
- We cannot change the sequence in which the rows are ranked. Therefore, the count will always start from 1 and increase by one.
- We cannot insert a column to the left of column “A”.
- If a column is inserted to the right of a column, then all the formatting is also copied from the left cell.
Frequently Asked Questions (FAQs)
What are Rows and Columns in Excel?
The Rows and Columns in Excel are the components that make up the area of an Excel worksheet. Rows are numerically arranged, but the columns are arranged alphabetically.
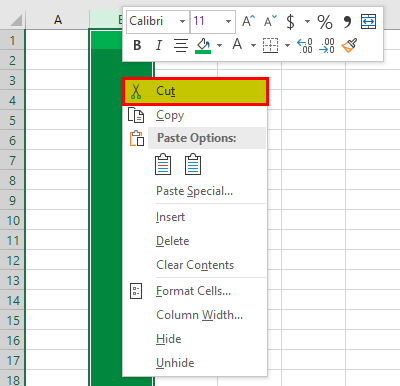
How can we insert Rows and Columns in Excel?
In simple terms, we must right-click on any row or column, then right-click on it. We will get the options shown in the image below.
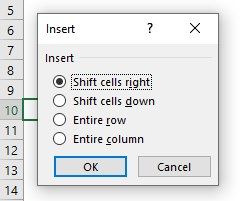
Then, select the required option as “Entire Row” or “Entire Column” accordingly.
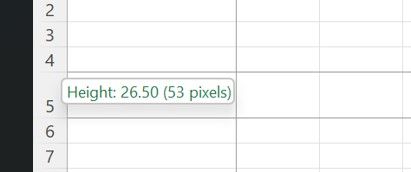
How to increase or decrease the row and column size?
We can increase or decrease the row and column size as,
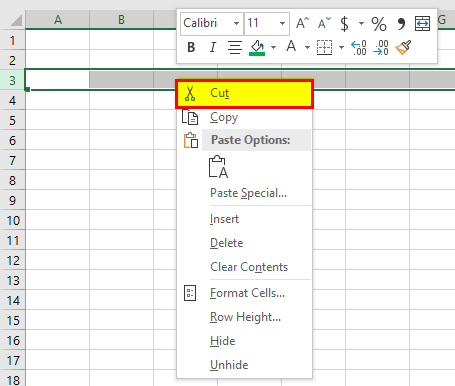
- Row-Height – By selecting the desired row or when we hover around the row number, the cursor changes to a plus sign with an up and down arrow.
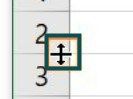
Drag the arrow to increase or decrease the height, as shown below.
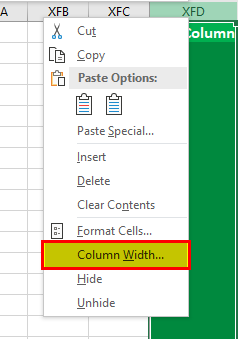
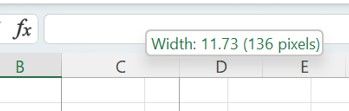
- Column-Width – By selecting the desired column or when we hover around the column name, the cursor changes to a plus sign with left and right arrows.
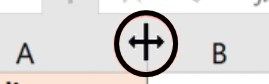
Drag the arrow to increase or decrease the width, as shown below.
Recommended Articles
This article is a guide to Rows and Columns in Excel. Here we learn to delete, insert, hide, resize, copy the Rows & Columns, examples & downloadable template. You may learn more about Excel from the following articles: –