End Function in VBA
An End is a statement in VBA that has multiple forms in VBA applications. One can put a simple End statement anywhere in the code. It will automatically stop the execution of the code. One can use the End statement in many procedures like to end the sub procedure or to end any Loop function like “End If.”
For everything, there is an end. In VBA, it is no different. You must have seen the word “End” in all the codes in your VBA. We can End in “End Sub,” “End Function,” and “End If.” These are common as we know each “End” suggests the end of the procedure. These VBA End statements do not require any special introduction because we are familiar with them in our VBA coding.
Apart from the above “End,” we have one property, “End,” in VBA. This article will take you through that property and how to use it in our coding.

End Property in VBA
The “End” is the property we use in VBA to move in the suggested direction. The typical example of direction is moving from the active cell to the last used cell or the last entry cell horizontally and vertically in the worksheet.
For example, let us recall this with a worksheet. Look at the below image.
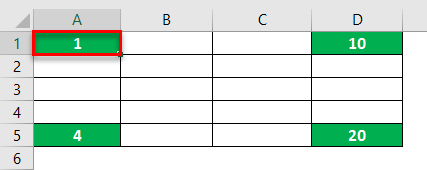
Right now, we are in the A1 cell.
If we want to move to the last used cell horizontally, we use the excel shortcut key Ctrl + Right Arrow, which will take us to the last used cell horizontally.
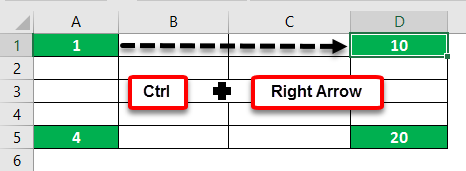
Similarly, if we want to move to the last used cell downwards or vertically, we press the shortcut key Ctrl + Down Arrow.

So, to move from left to right, we press Ctrl + Left Arrow. To move from bottom to top, we press Ctrl + Up Arrow.
A similar thing can be done in VBA but not by using the Ctrl key. Rather, we need to use the word “End.”
Examples of Excel VBA End Function
Example #1 – Use VBA End Property To Move in Worksheet
Let us look at how to use Excel VBA End to move in the sheet. First, we need to decide which cell we need to move. For example, suppose we need to move from cell A1, so refer to the cell using the VBA Range object.
Code:
Sub End_Example1()

  Range ("A1")

End Sub
Put dot (.) to see the IntelliSense list. Then, select “End” VBA property from the list.
Code:
Sub End_Example1()

  Range("A1").End

End Sub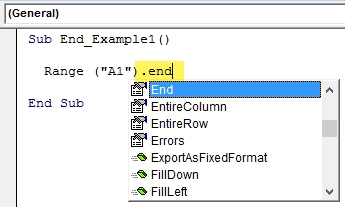
Once the end property is selected, open parenthesis.
Code:
Sub End_Example1()

  Range("A1").End(

End Sub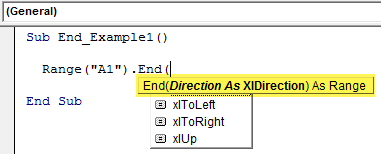
As soon as you open parenthesis, we can see all the available options with the “End” property. Select “xlToRight” to move horizontally from cell A1 to the last used cell.
Code:
Sub End_Example1()

  Range("A1").End (xlToRight)

End Sub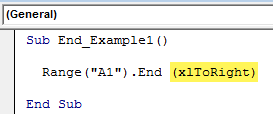
After moving to the last cell, we must select what we need to do. Put dot (.) to see the IntelliSense list.
Code:
Sub End_Example1()

  Range("A1").End(xlToRight).

End Sub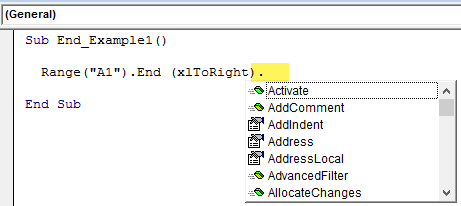
Choose the “Select” method from the IntelliSense list.
Code:
Sub End_Example1()

  Range("A1").End(xlToRight).Select

End Sub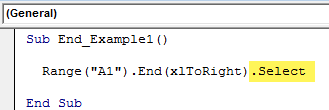
It will make use of cell A1 to last used cells horizontally.
Similarly, use the other three options to move right, left, down, and up.
To move right from cell A1.
Code:
Sub End_Example1()

  Range("A1").End(xlToRight).Select

End Sub
To move down from cell A1.
Code:
Sub End_Example1()

  Range("A1").End(xlDown).Select

End Sub
To move up from cell A5.
Code:
Sub End_Example1()

  Range("A5").End(xlUp).Select

End Sub
To move left from cell D1.
Code:
Sub End_Example1()

  Range("D1").End(xlToLeft).Select

End Sub
All the above codes are examples of using the “End” property to move in the worksheet.
We will now see how to select the ranges using the “End” property.
Example #2 – Selection Using End Property
We need to end the property to select the range of cells in the worksheet. For this example, consider the below data.

Select A1 to Last Used Cell
To select the cells from A1 to the last used cell horizontally, first, mention cell A1 in the Range object.
Code:
Sub End_Example2()

  Range("A1",

End Sub
For the second argument, open one more Range object and mention the cell as A1 only.
Code:
Sub End_Example2()

  Range("A1",Range("A1")

End Sub
Close only one bracket and put a dot to select the Excel VBA End property.
Code:
Sub End_Example2()

  Range("A1",Range("A1").End(

End Sub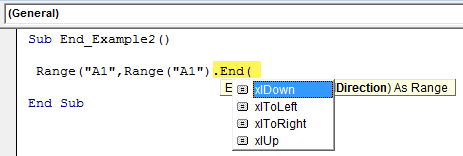
Now, select xlToRight and close two brackets.
Code:
Sub End_Example2()

  Range("A1",Range("A1").End(xlToRight))

End Sub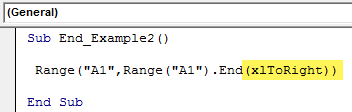
Now, choose the “Select” method.
Code:
Sub End_Example2()

  Range("A1", Range("A1").End(xlToRight)).Select

End Sub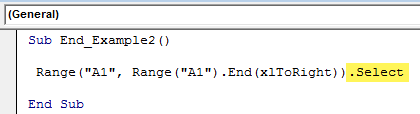
We have completed it now.
Run this code to see the impact.
As you can see, it has selected the range A1 to D1.
Similarly, to select downwards, use the below code.
Code:
Sub End_Example2()

  Range("A1", Range("A1").End(xlDown)).Select
     'To select from left to right
End Sub
Code:
Sub End_Example2()

  Range("A1", Range("A1").End(xlDown)).Select
     'To select from top to down
End Sub
Code:
Sub End_Example2()

  Range("D1", Range("D1").End(xlToLeft)).Select
     'To select from right to left
End Sub
Code:
Sub End_Example2()

  Range("A5", Range("A5").End(xlUp)).Select
     'To select from bottom to up
End Sub
Example #3 – Select Right to Left, Right to Bottom, & Top
We have seen how to select horizontally and vertically. Next, we need to use two “End” properties to select vertically and horizontally. For example, to select the data from A1 to D5, we need to use the below code.
Code:
Sub End_Example3()

 Range("A1", Range("A1").End(xlDown).End(xlToRight)).Select
  'To from cell A1 to last use cell downwards & rightwards
End Sub
It will select the complete range like the one below.

Like this, we can use the VBA “End” function property to select a range of cells.
Recommended Articles
This article has been a guide to the Excel VBA End function. Here, we learn how to use End property in VBA and End property selection, examples, and a downloadable template. Below are some useful Excel articles related to VBA: –