What Is Excel Family Tree Template?
Family tree is a chart representing the family members’ relation. It is also called as pedigree chart.
Excel is not only used to manage personal finance budget but we can also use Excel to create family tree template. To draw a family tree, we need to identify where to start. So, in this article, we will learn how to create family tree template in excel starting with the grandparents’ level.
Key Takeaways
- Family tree excel template helps users create their family tree in excel with ease.
- Family tree chart is also called as pedigree chart and it usually starts with grandparents.
- In excel, we can create family tree template by clicking on Shapes option under the Illustrations category from Insert tab.
- Alternatively, we can also create customized family tree template using copy-paste method.
- To replicate shapes while using copy-paste method to create family tree, we should press Ctrl and left click on the mouse.
How To Create A Family Tree Excel Template?
Method #1
The following are the steps for the first method:
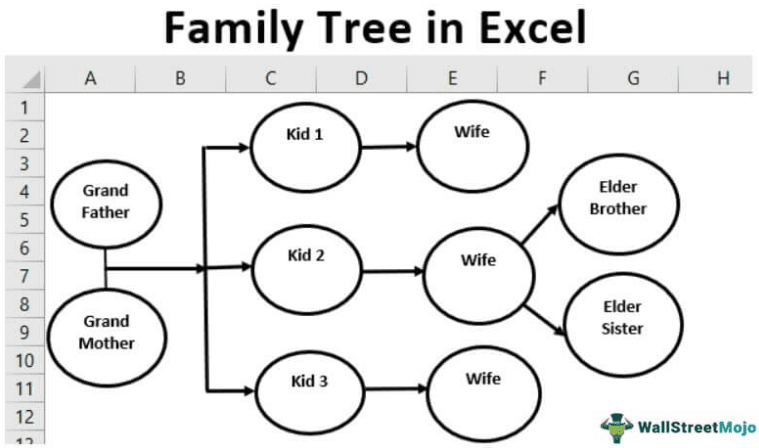
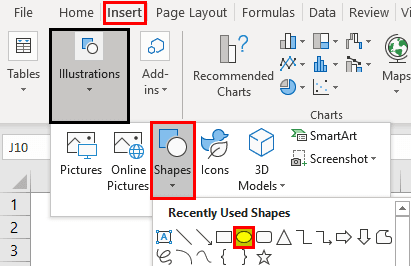
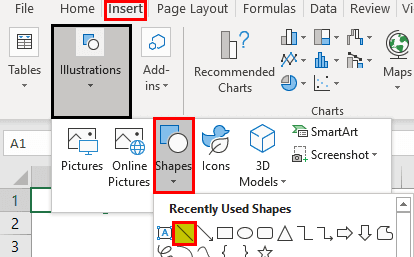
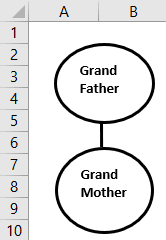
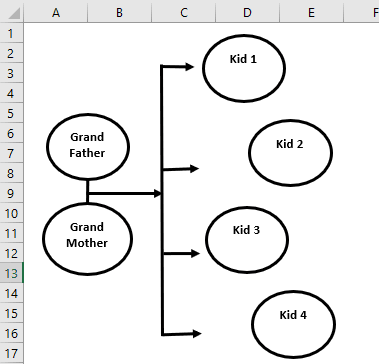
1. To draw the first family member, we must go to the “Insert” tab. Then, from “Illustrations,” go-to “Shapes” and draw two oval-shaped shapes.
2. Then, we must select the shape and draw, as shown below.
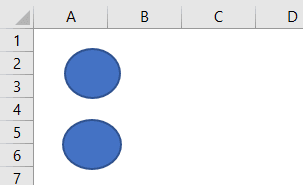
3. Once the oval shape is drawn, insert the text in the oval box as “Grand Father” and “Grand Mother,” respectively.

4. Then, select the connector line.
5. Now, we must add a connector line between these two shapes.
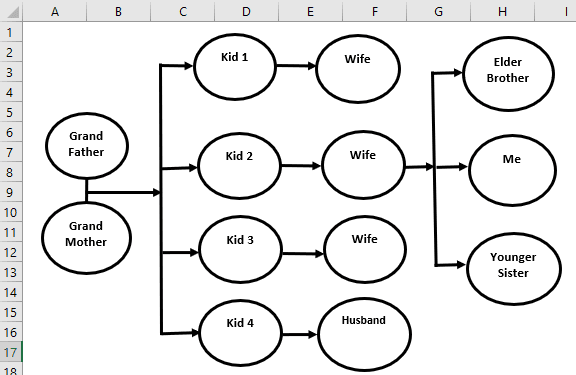
6. As per the family and how many children they have, we must draw ovals for each child of the grandfather and grandmother.
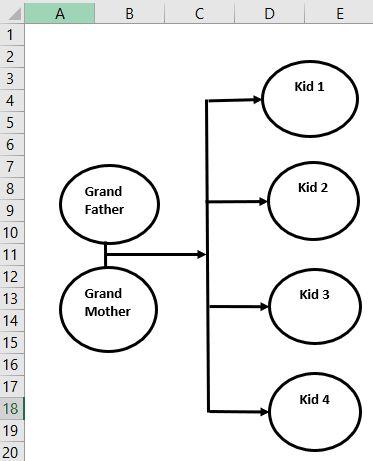
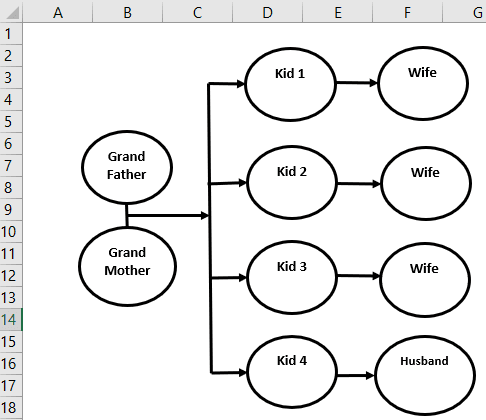
7. Each child has a wife, so draw four more oval shapes with connectors.
8. Out of four kids, the grandmother and grandfather have three boys and one girl as their kids. So from here on, we will concentrate solely on the family.
Suppose you are the child of “Kid 2,” then draw branches in front of “Kid 2.” Based on the number of kids your parents have. For example, assume your parents have 3 kids, then draw three oval shapes in front of “Kid 2,” i.e., your parents.
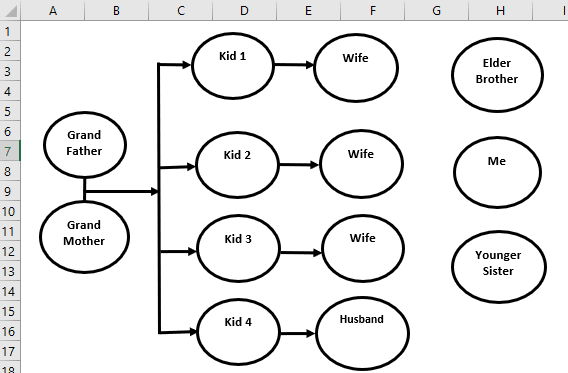
9. We need to draw a connector line for your “Elder Brother,” “You,” and “Younger Sister” from here on.
Method #2 – Create a Family Tree using the Copy-Paste Method
When we are drawing the family tree, the first step is to decide on the hierarchy of the family.
We cannot keep on drawing the shapes from the Insert tab. Once the shape is drawn, we can replicate the same shape for all the other shapes. So we must go back to the “Insert” tab whenever we are required to draw the shapes.
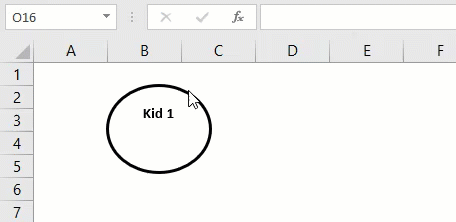
One way of replicating the same shape is traditional copying and pasting.
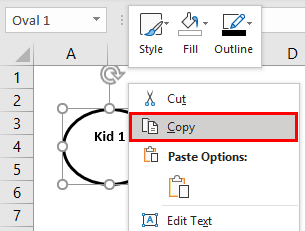
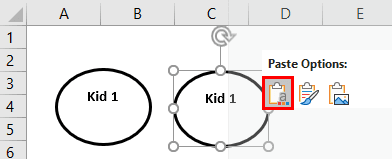
But we have another technique that is best suited for us: Select the shape, hold the “Ctrl” key and drag the shape with a left click of the mouse. As a result, we can get the shape replica.
A similar technique can also be employed to draw connector lines.
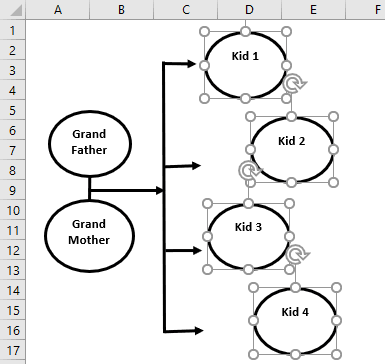
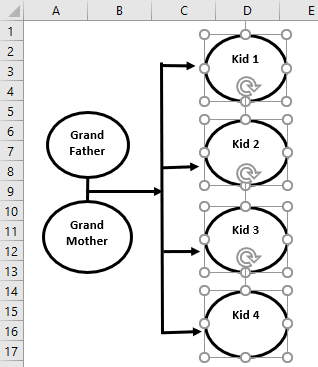
The next thing we need to learn is the alignment of shapes. For example, after drawing four shapes for four kids of “Grand Father” and “Grand Mother,” in the above steps, we may illustrate them like this.
As we can see, those shapes are not in order. Arranging them with the mouse is almost impossible with perfection, so how do we align these shapes in order?
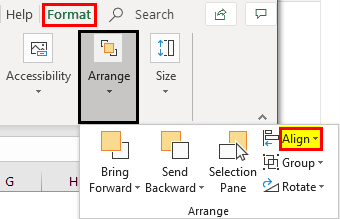
First, we must select all the shapes at once. Then, hold the “Shift” key and left-click on the shapes we want to set to choose all the shapes.
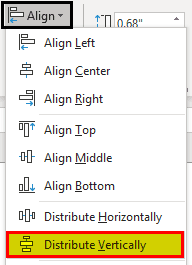
Once the shapes are selected, we must go to “FORMAT” > “Arrange” > “Align.”
Click on the ” Align ” drop-down list and select “Align Left.”
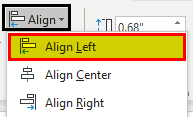
As soon as we click on “Align Left,” we can see all the shapes are aligned properly from the left view.
Now, the shapes are aligned properly from the left side. Now, we need to align them vertically. For this, by selecting the shapes under “Align,” we must choose “Distribute Vertically.”
Now, the shapes are placed perfectly.
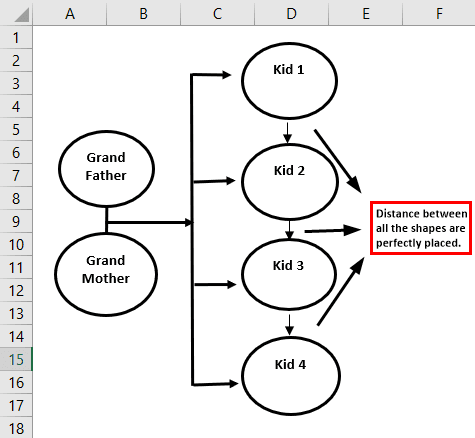
Like this, we can use shape and alignment options to set the placement of the shapes flawlessly.
Important Things To Note
- Apart from managing, analyzing data, we can use Excel to create family tree.
- The Family Tree chart (pedigree chart) can be created from grandparents level in Excel.
- We can easily align the shapes used in the family tree template in excel.
Frequently Asked Questions (FAQS)
What is family tree template in excel?
Excel has many in-built templates and Family tree excel template is most commonly used by users. The family tree chart, also known as pedigree chart represents the family members’ relation.
What are the 2 different family tree templates available in excel?
Apart from the two methods to create family tree template discusses in the article, Excel has 2 different family tree templates.
Using the 1st template, we can create three generation family tree chart whereas the other option enables us to add pictures of the family members also.
How can we create family tree template in excel?
We can create family tree templates in 2 methods:
1) Using Insert > Shapes
2) Using copy-paste method
Recommended Articles
This article is a guide to the Family Tree Excel Template. We discussed making a family tree in Excel using shapes with examples and downloadable Excel templates. You may learn more about Excel from the following articles: –